
Wreath Making Step-By-Step Tutorial
Wreaths have become one of the most popular festive decorations. They are a beautiful way to bring the scent and spirit of Christmas to your home and add instant seasonal sparkle to your front door.
Wreath-making workshops have become so popular and whilst it’s lovely to join in with the festivities, sometimes, you just want to make a gorgeous wreath from the comfort of your own home.
Whether you've foraged some foliage for your own DIY Christmas wreath, or you have purchased on of our DIY Wreath Kits, you can follow along with my step-by-step video tutorial below or read the step-by-step instructions. In the video I demonstrate the full wreath-making process including mossing a wire wreath ring, adding foliage and wiring decorations. So grab a cup of tea (or a glass of fizz!) and get ready for a festive craft afternoon together!
What You’ll Need
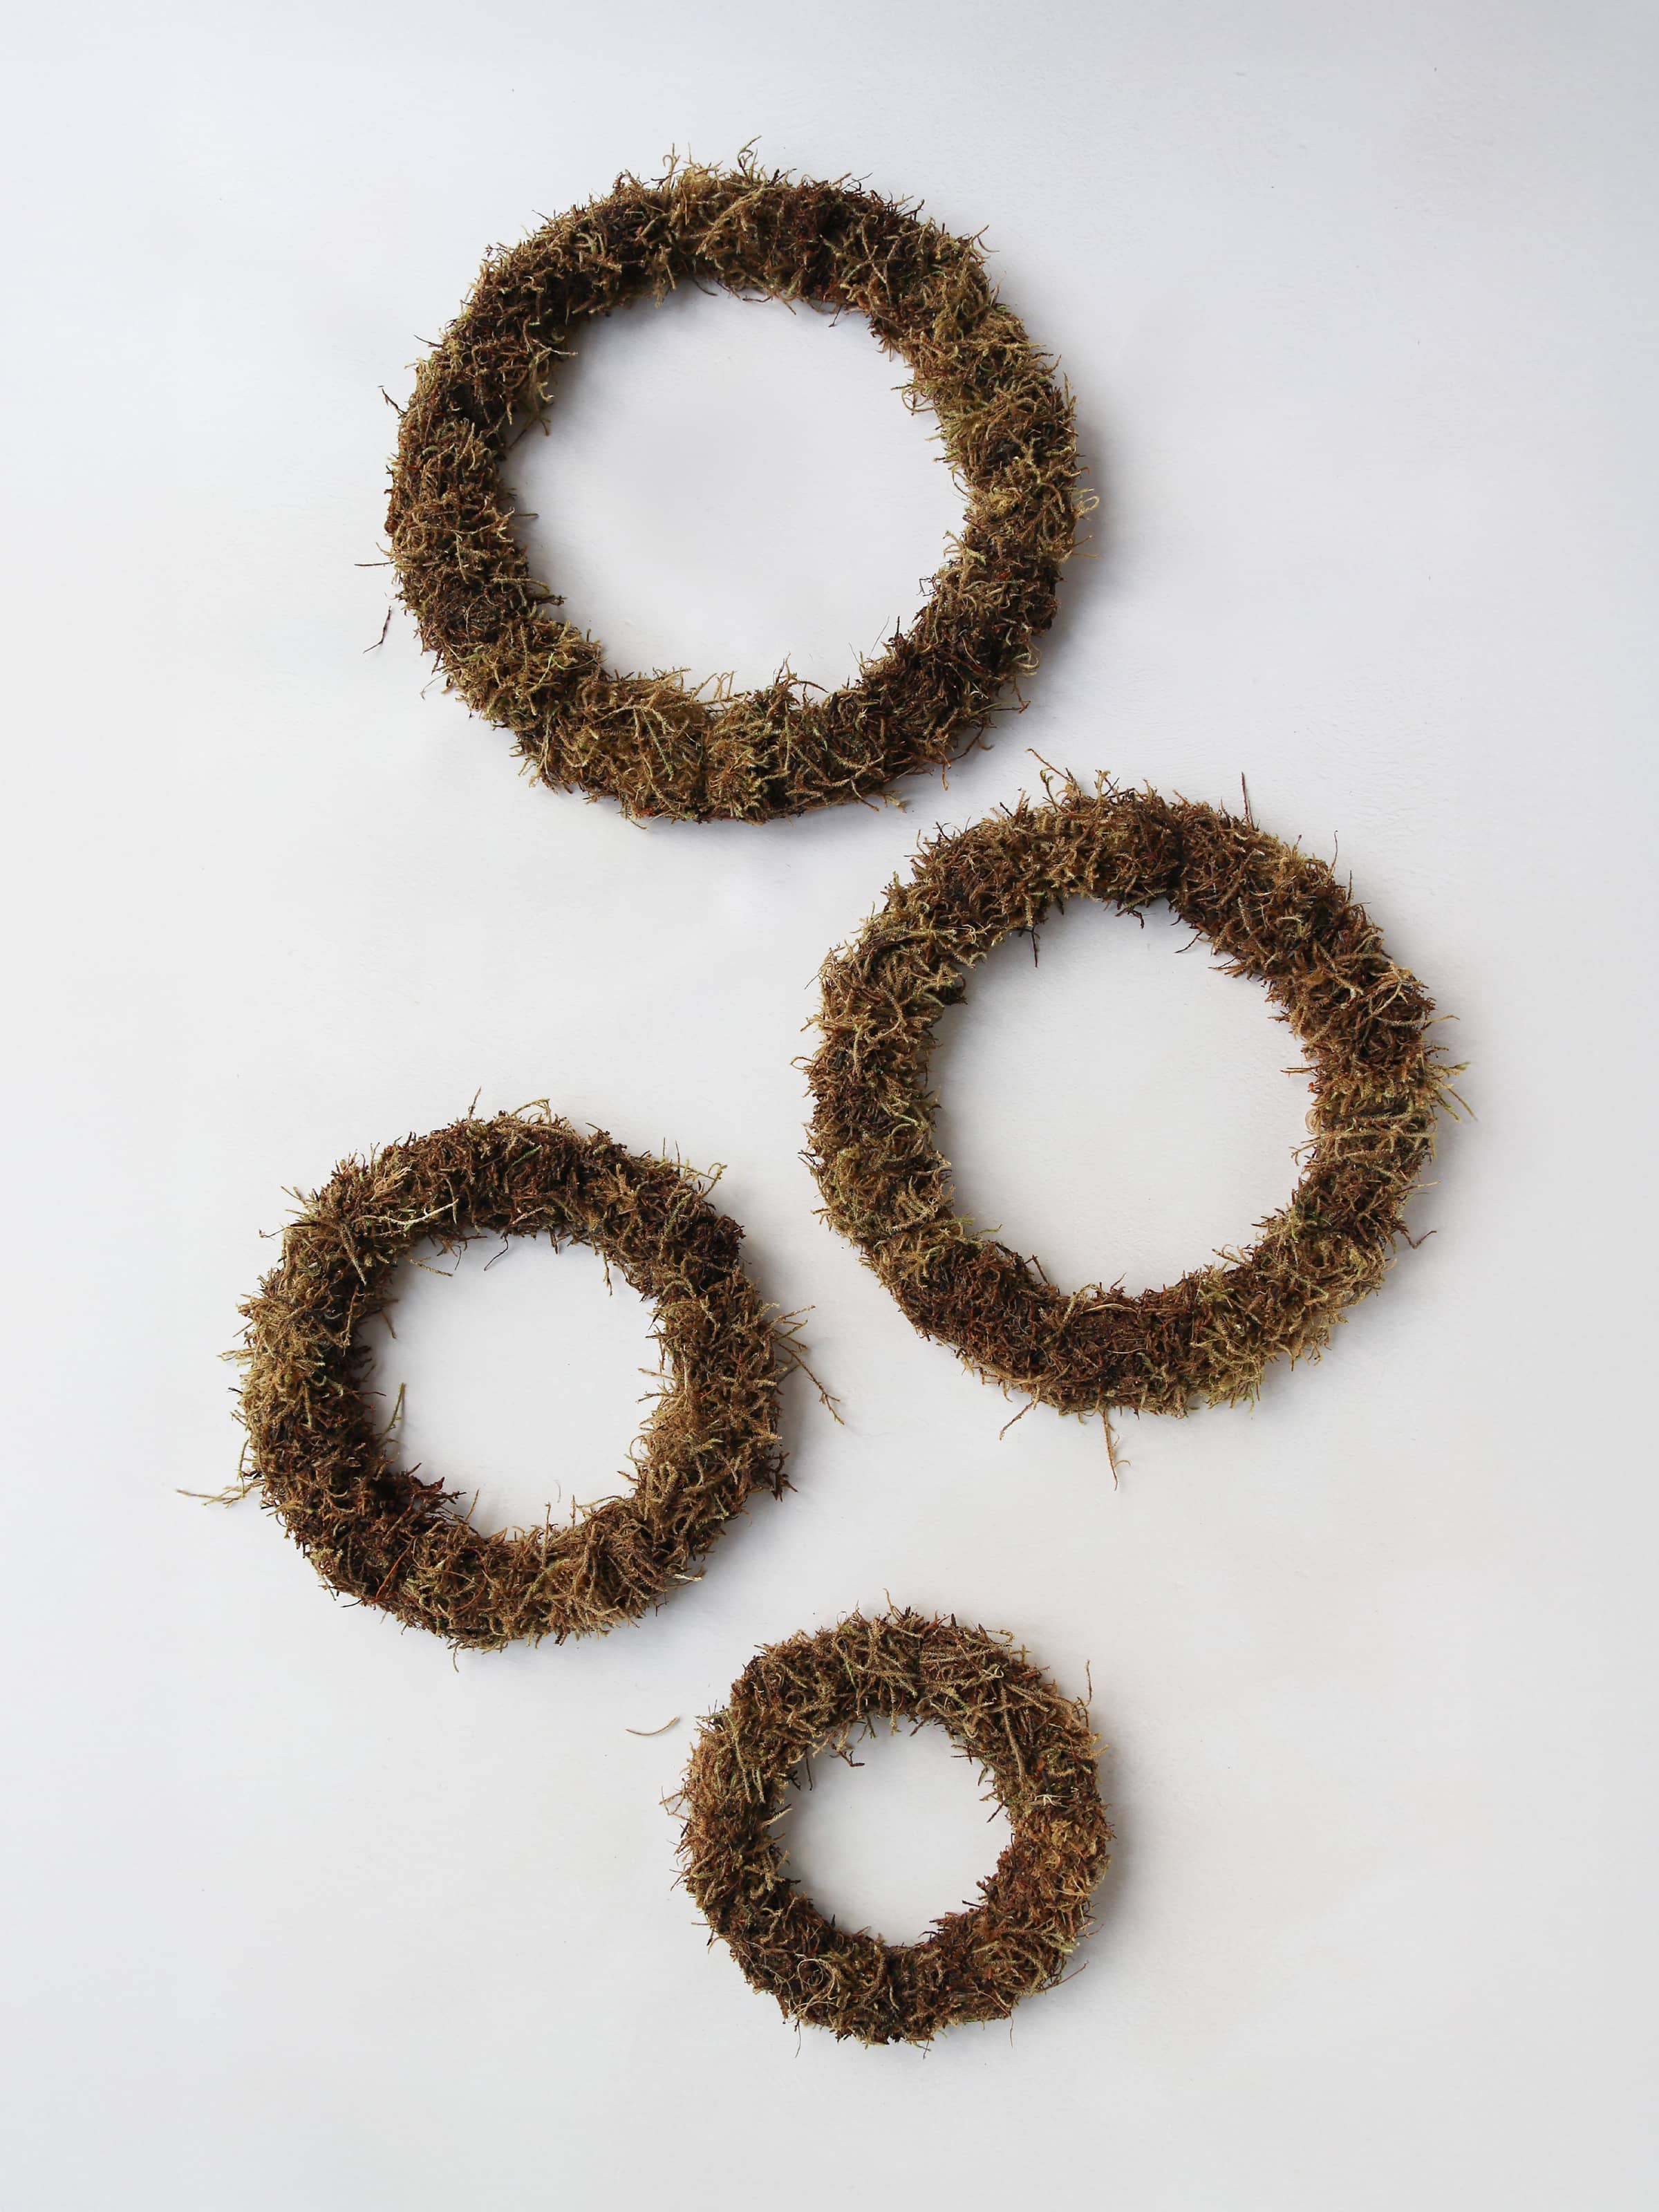
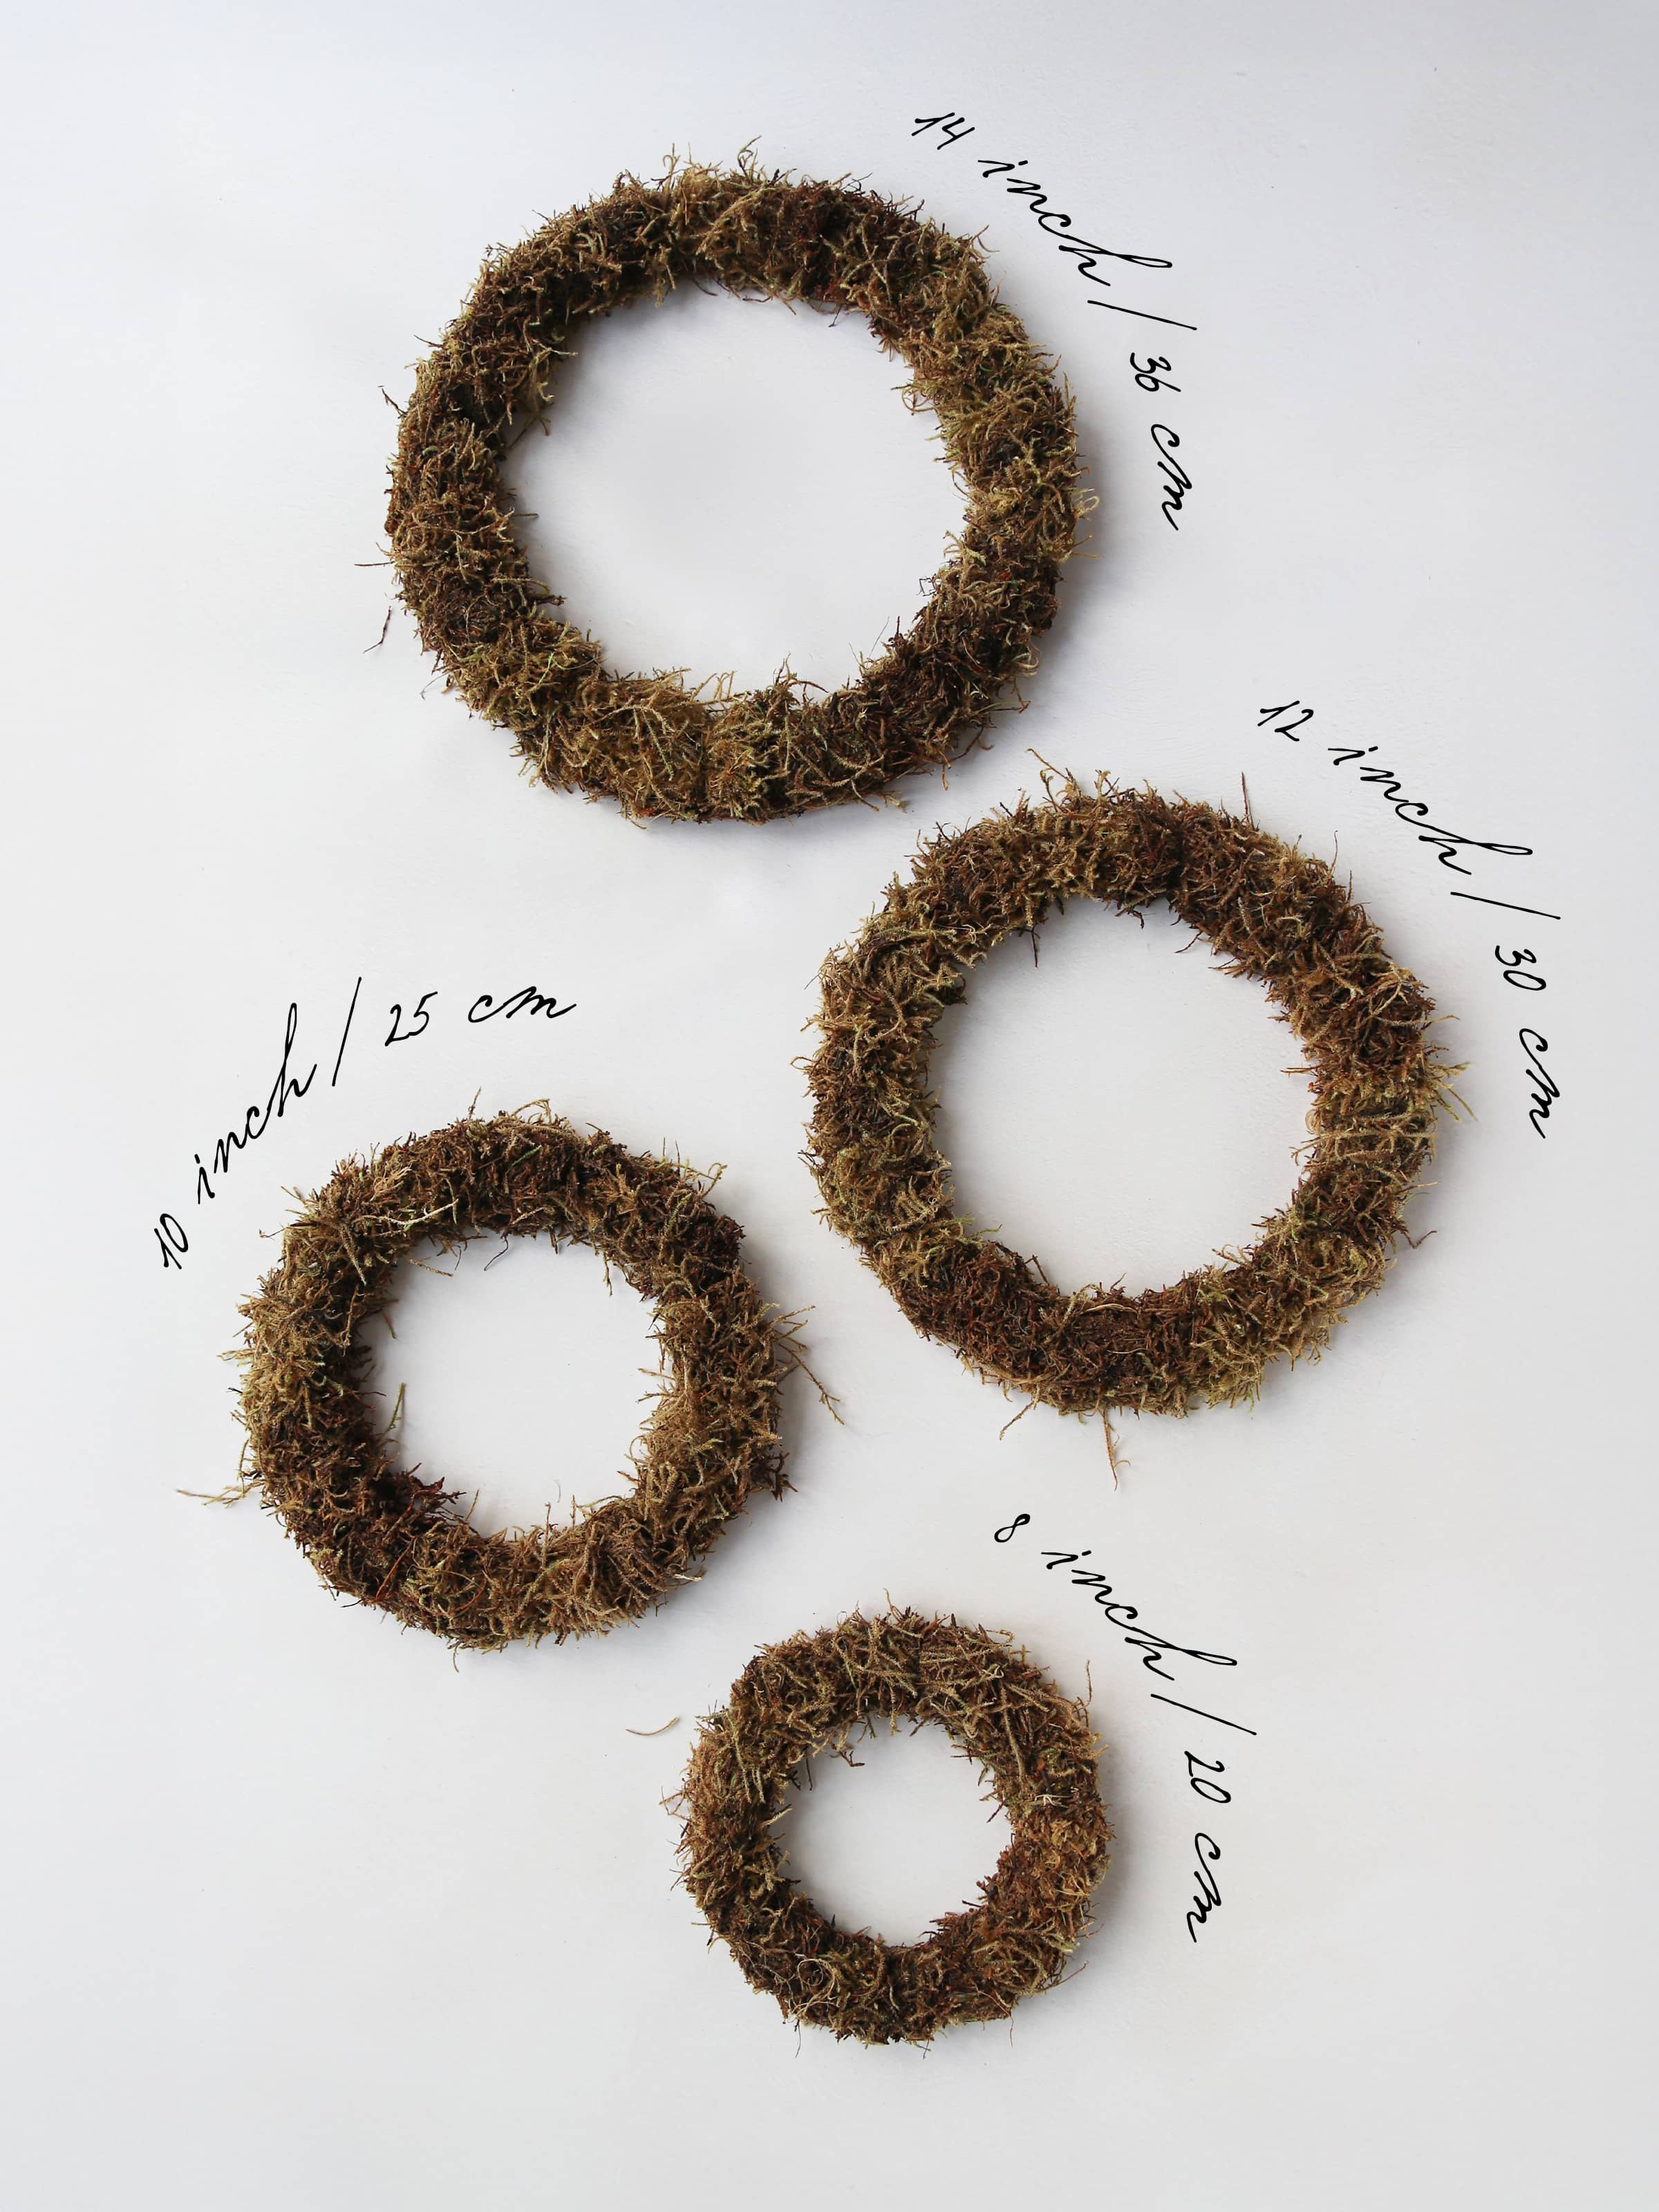
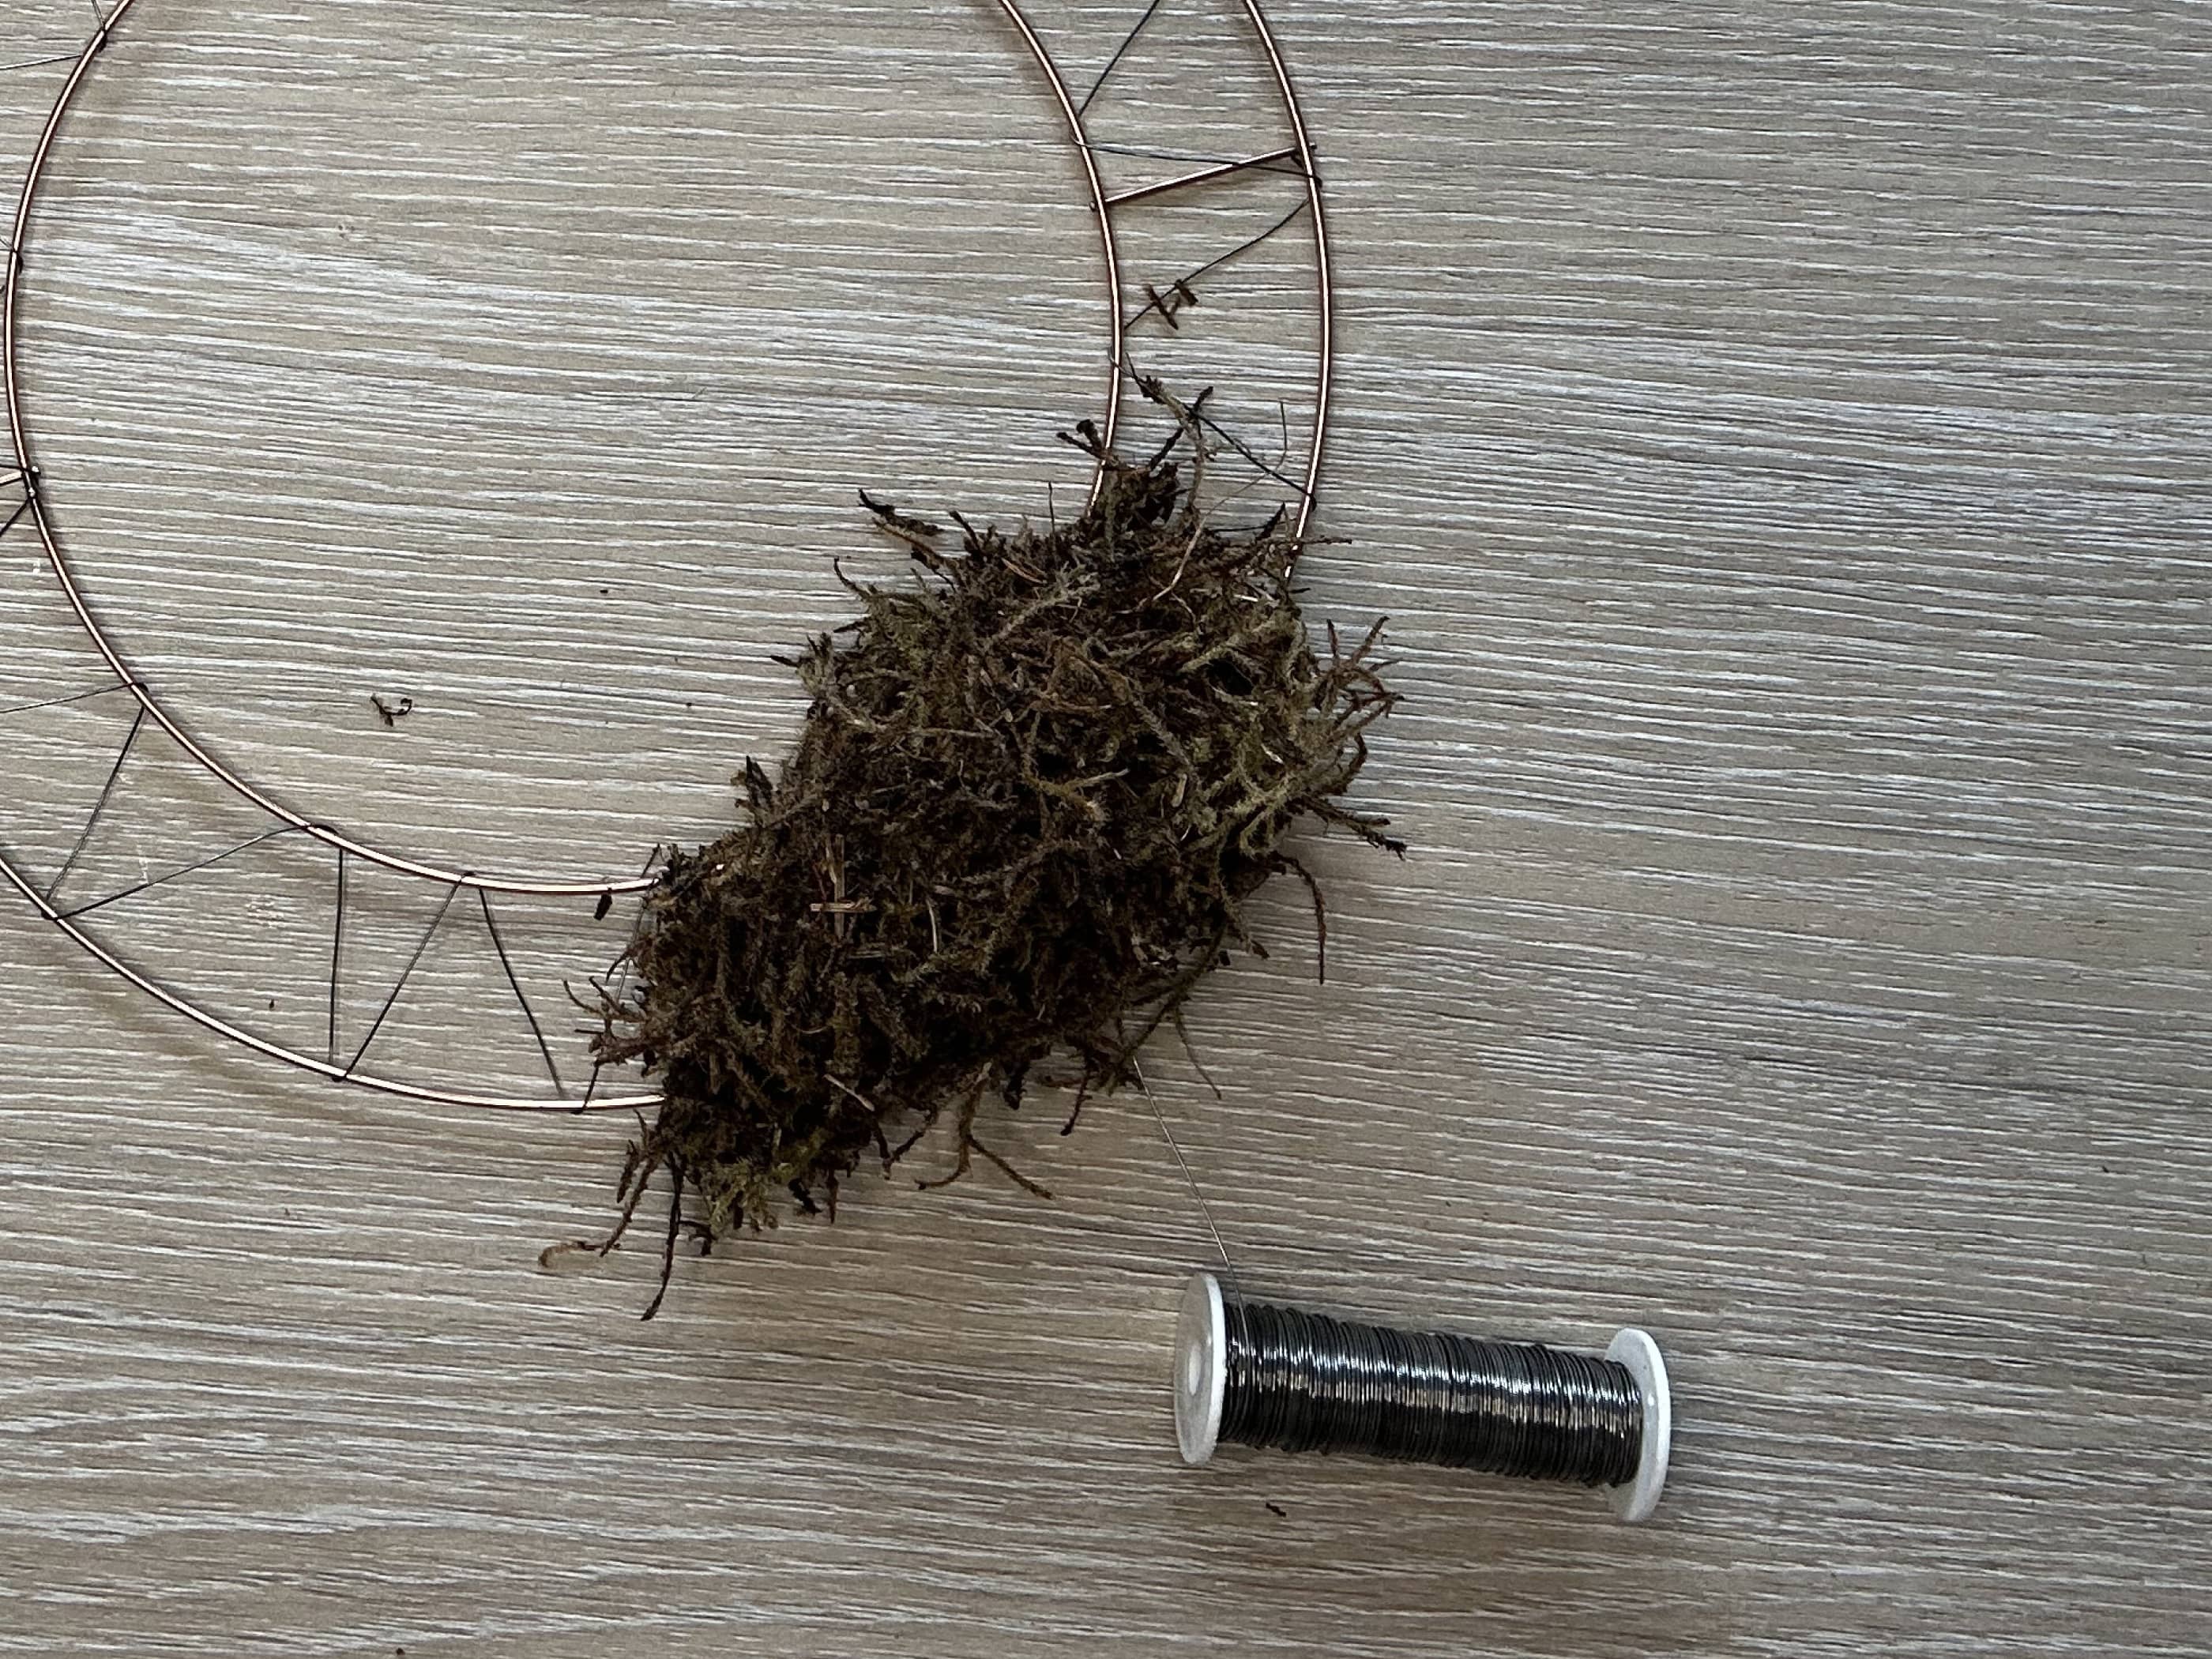
- 1 x copper wire wreath ring
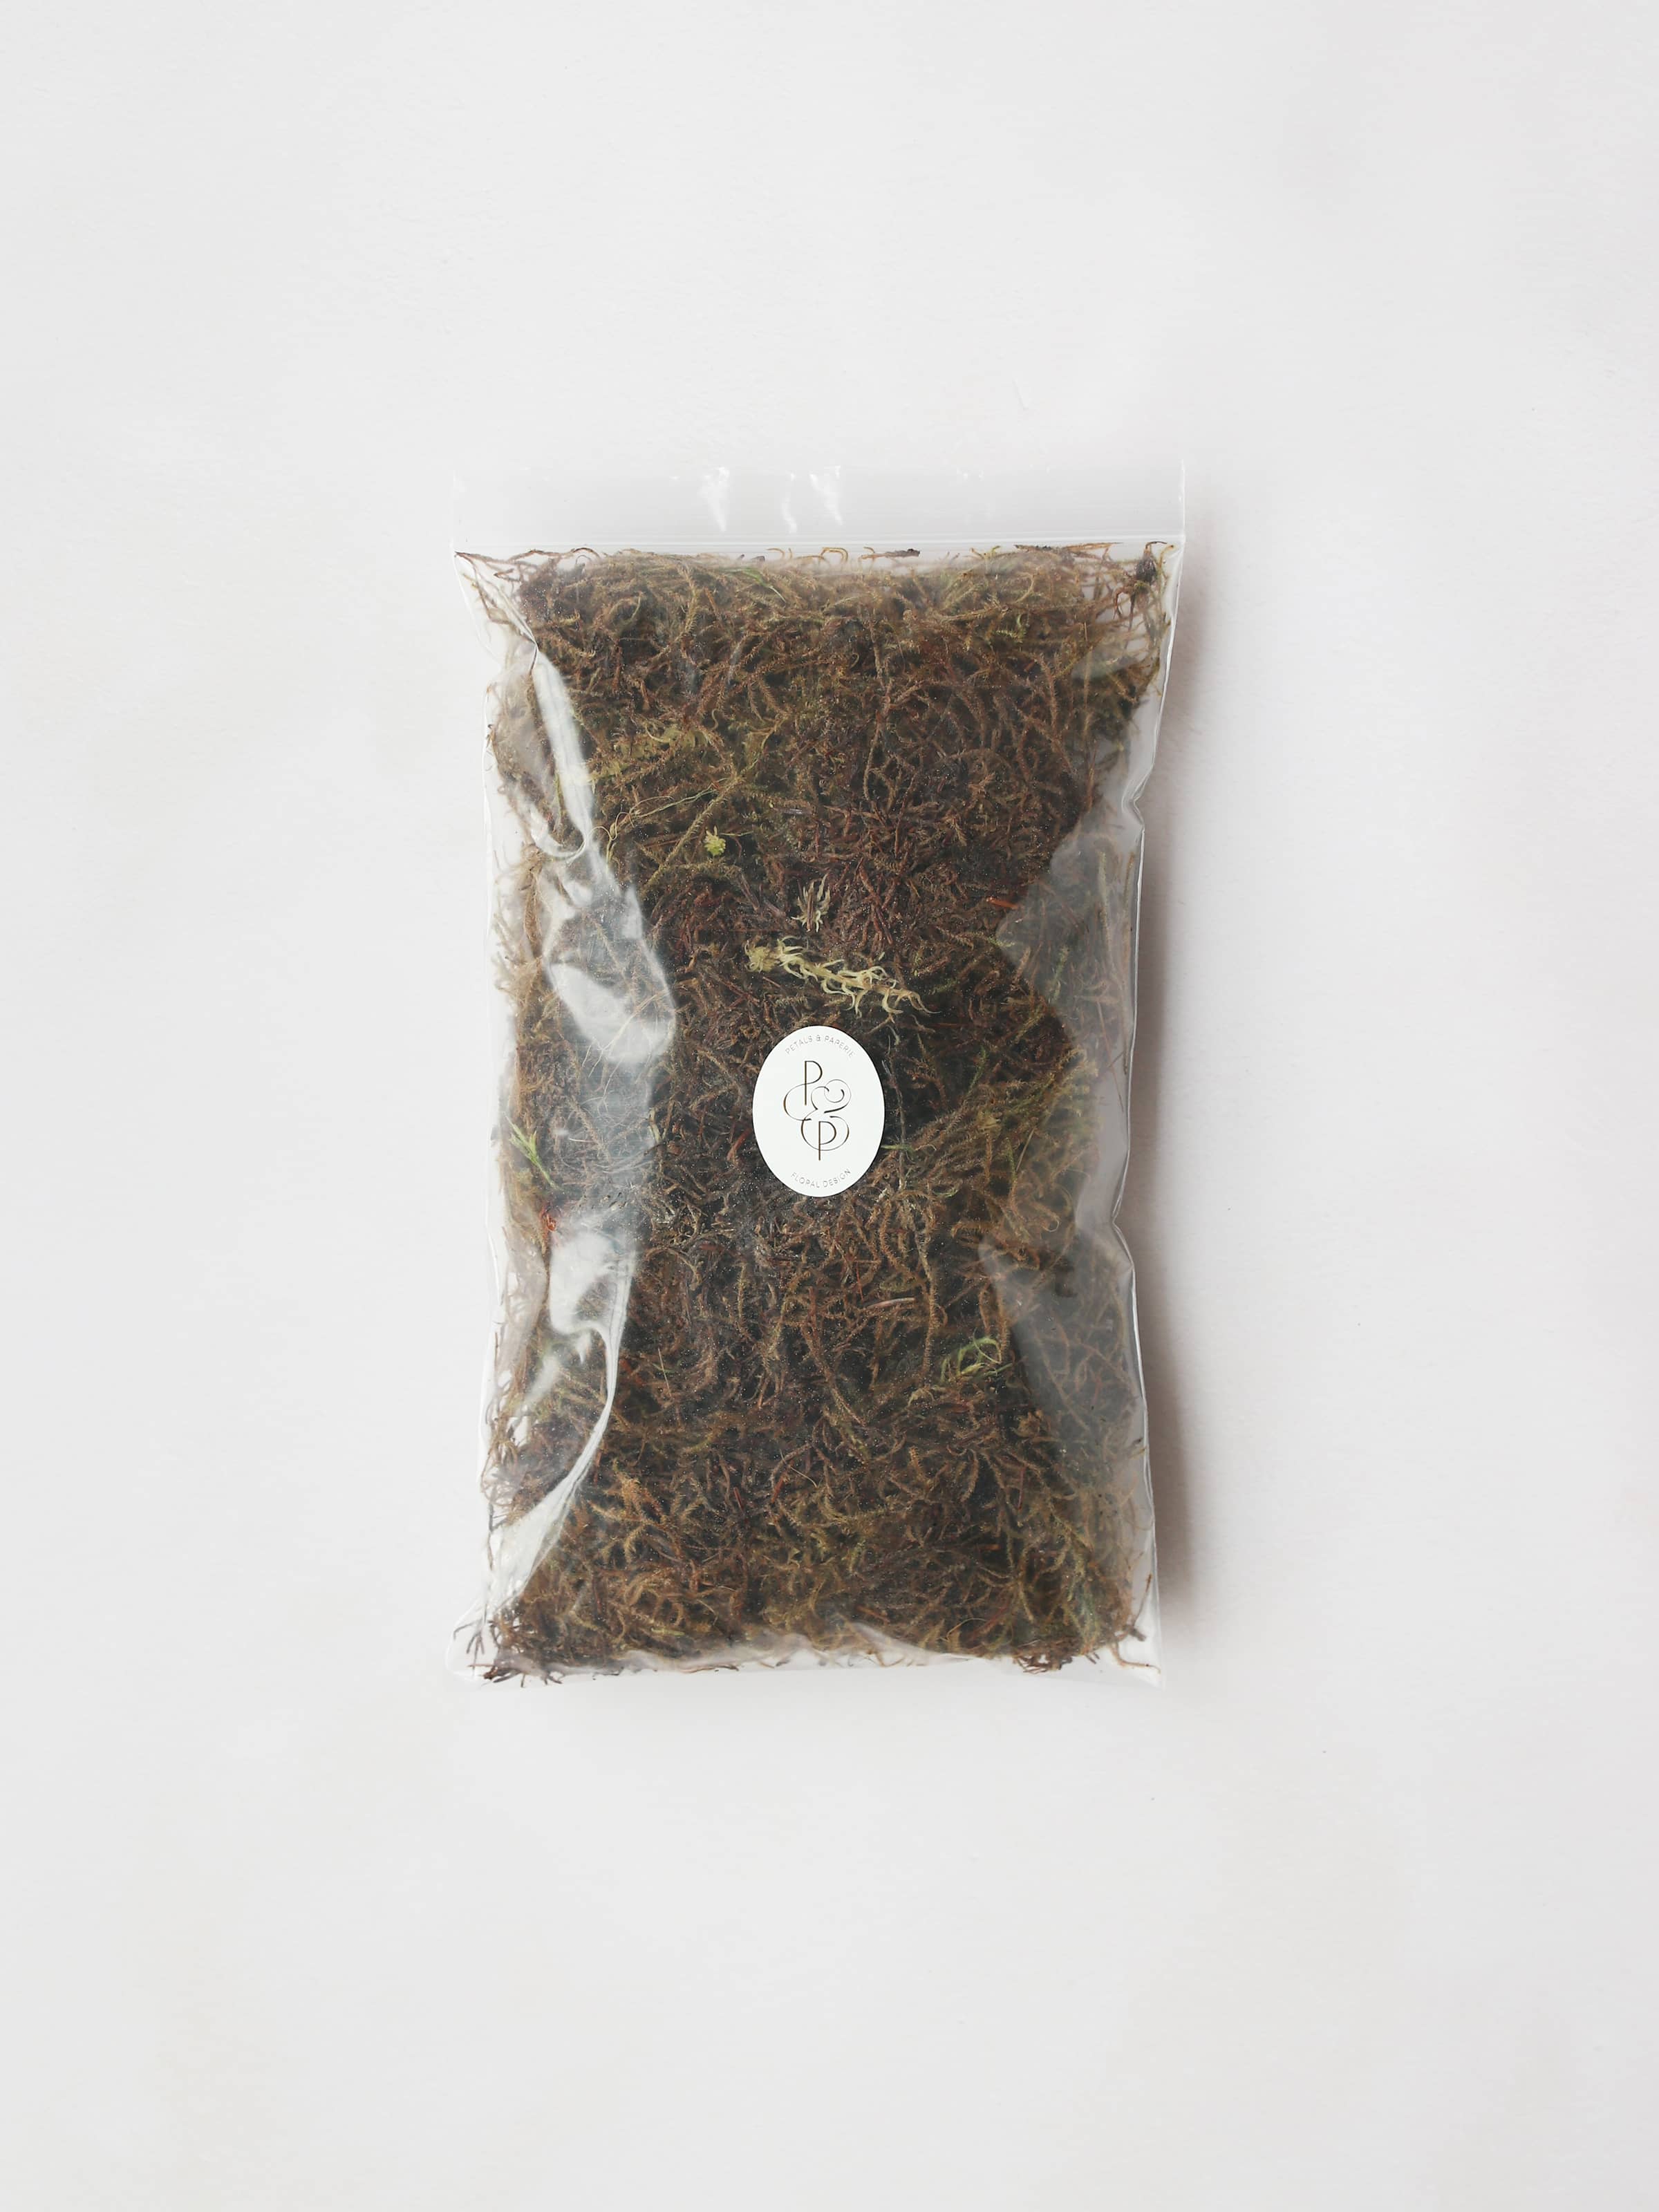
- 1 x bag fresh sphagnum moss
- 1 x spool of reel or ‘binding’ wire
- A selection of fresh, long-lasting winter foliage such as Spruce, Pine, Eucalyptus, Ivy etc)
- A pair of secateurs or scissors
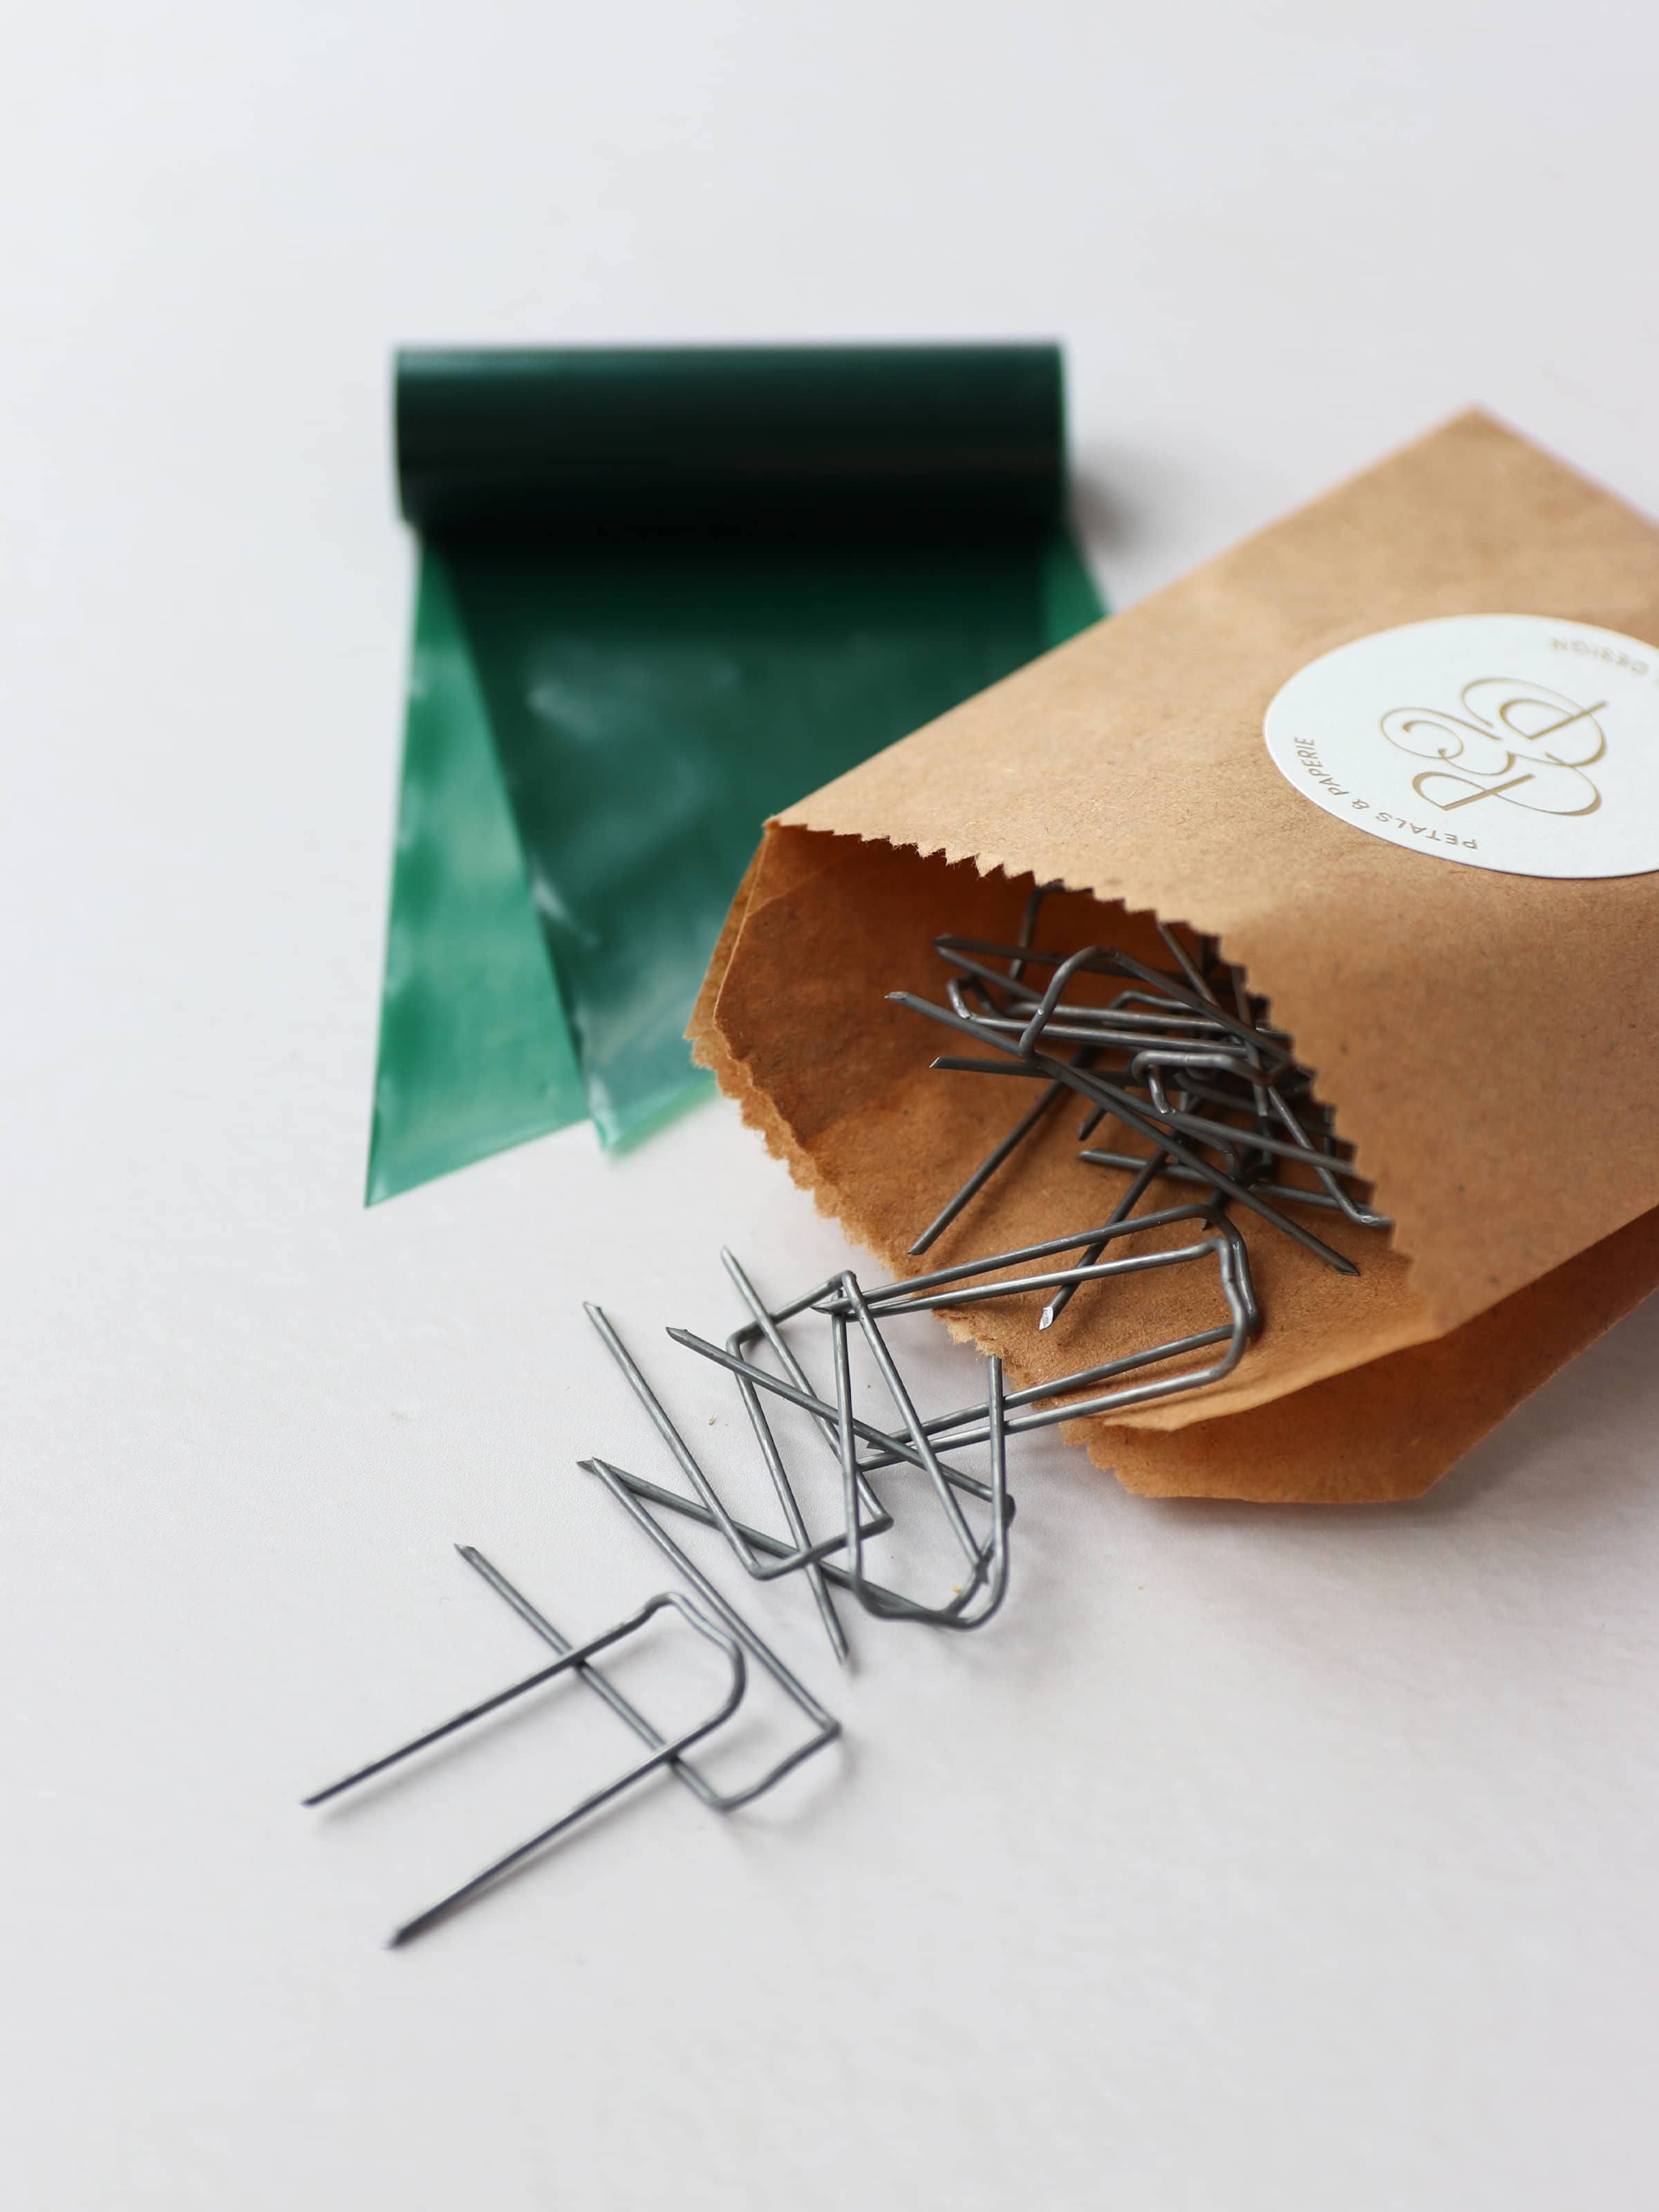
- Wreath backing wrap and mossing pins
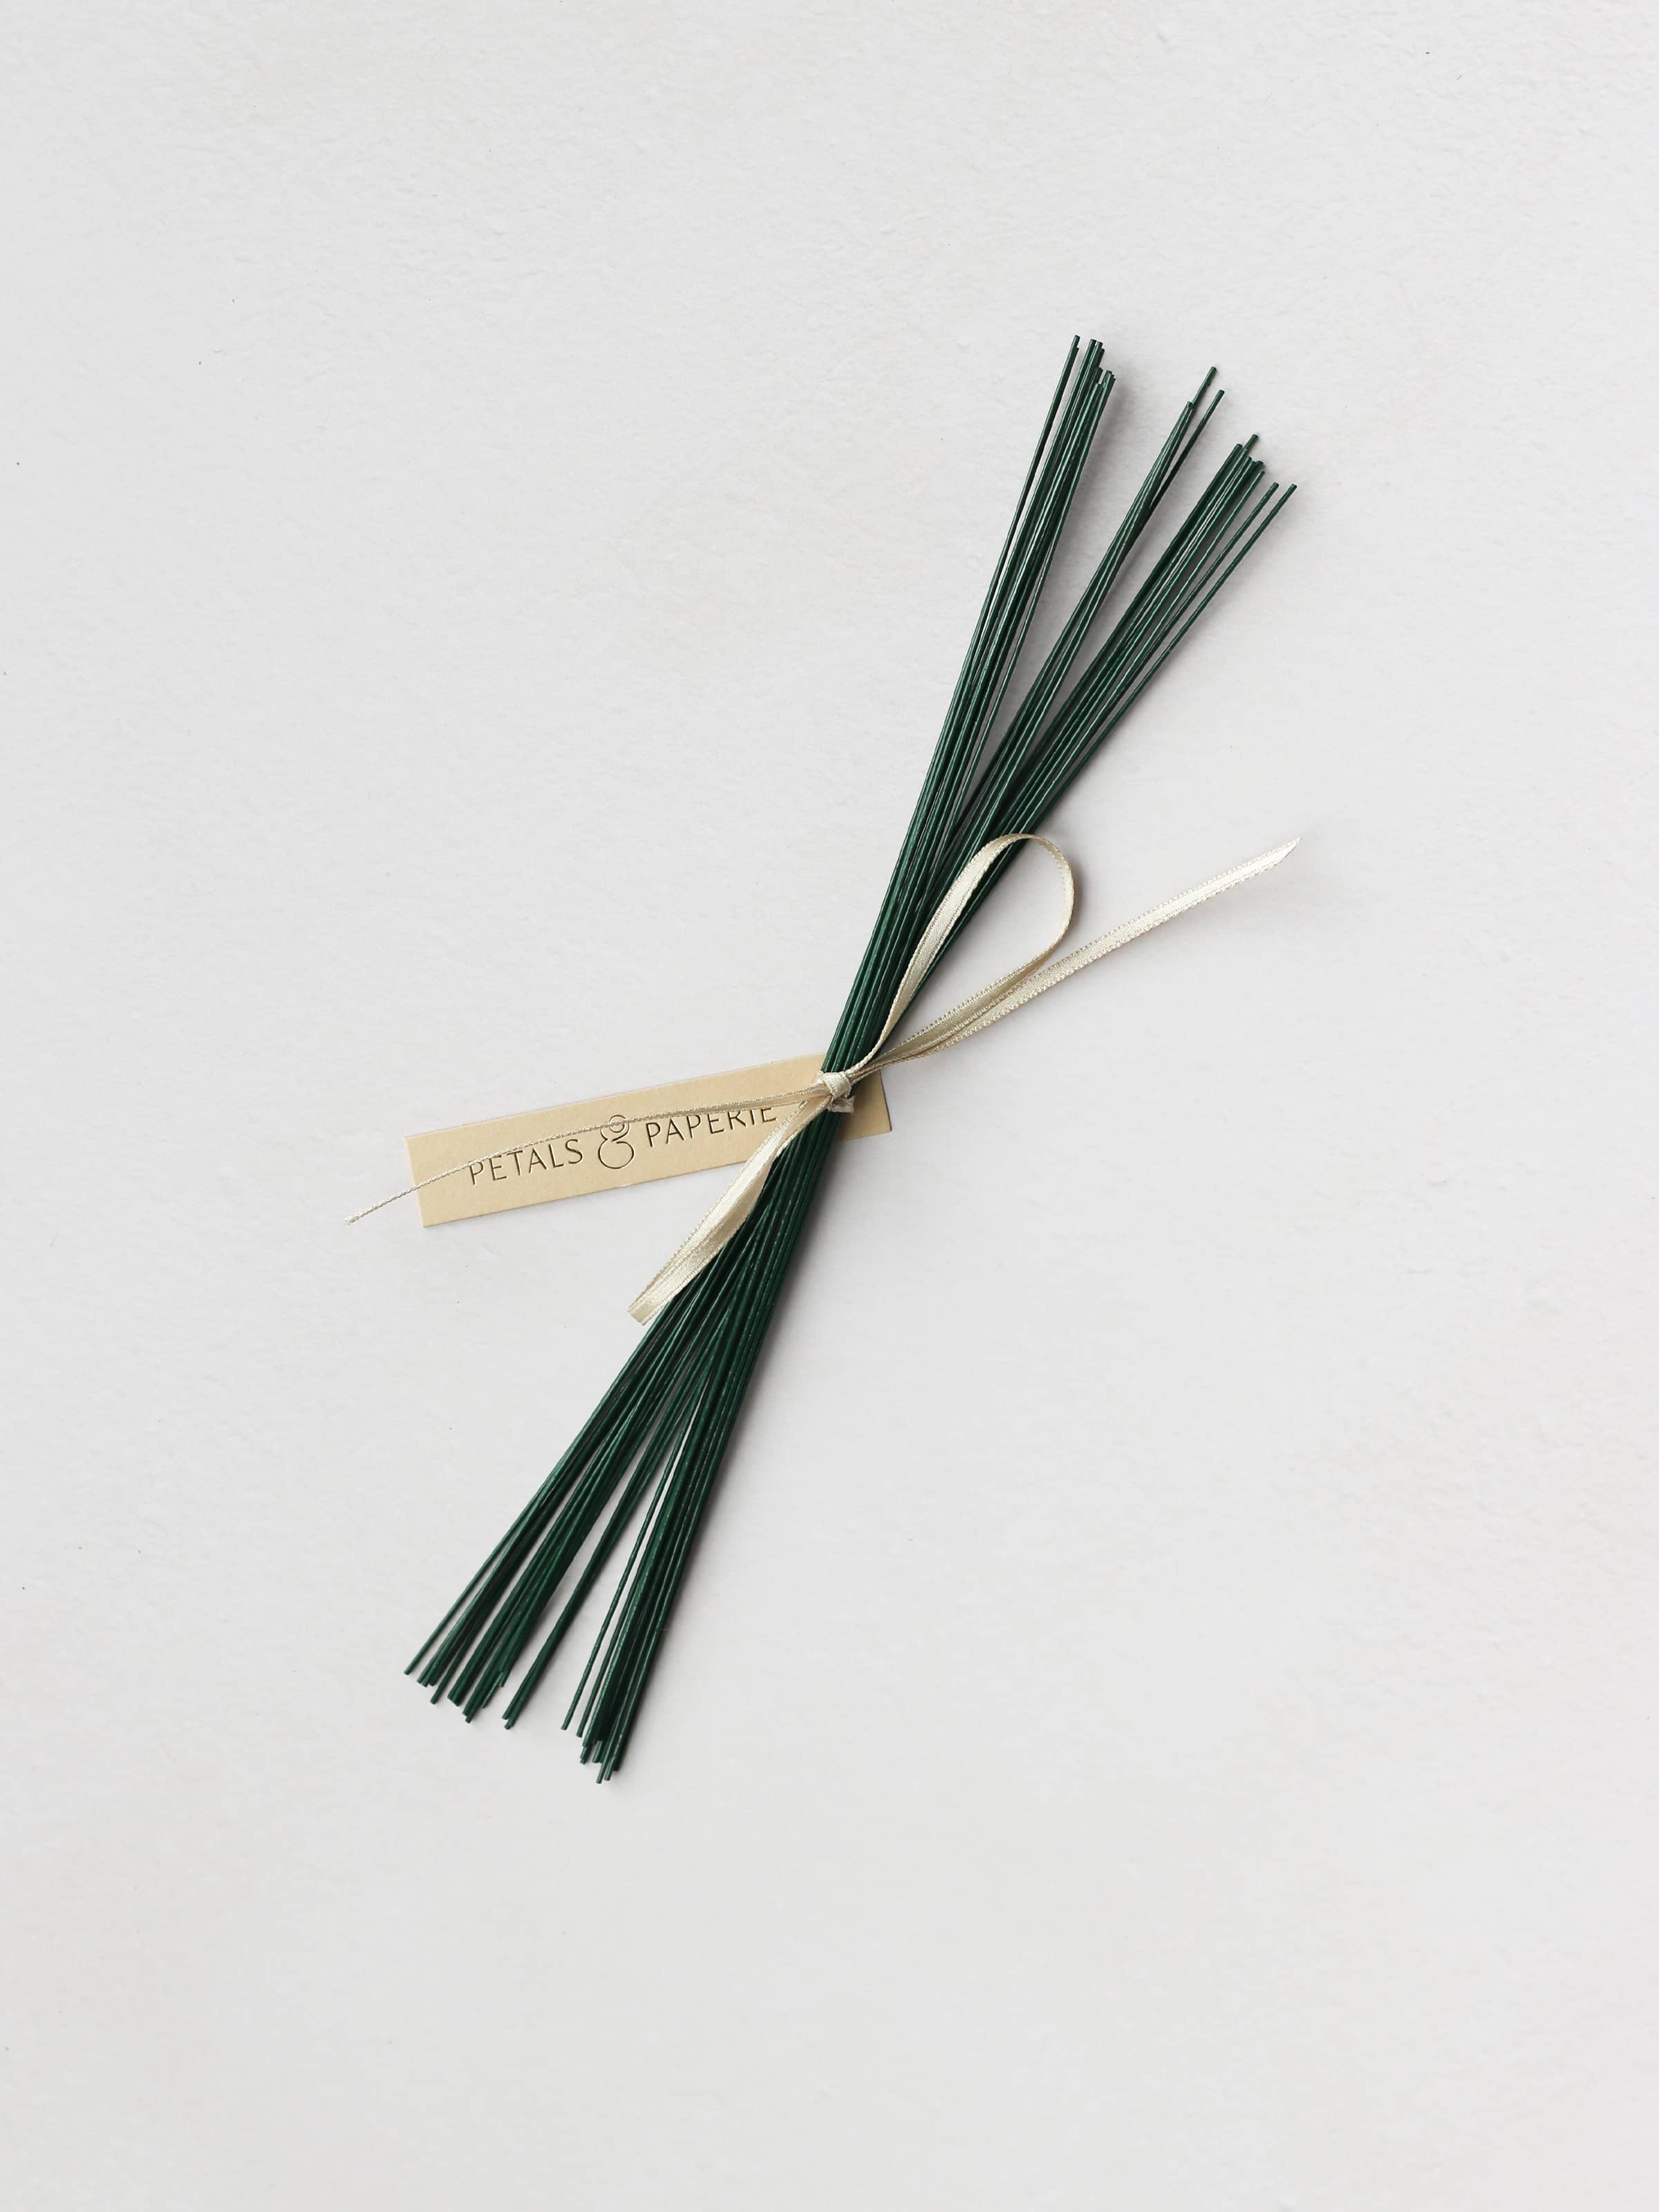
- Florist stub wires
- Velvet or satin ribbon
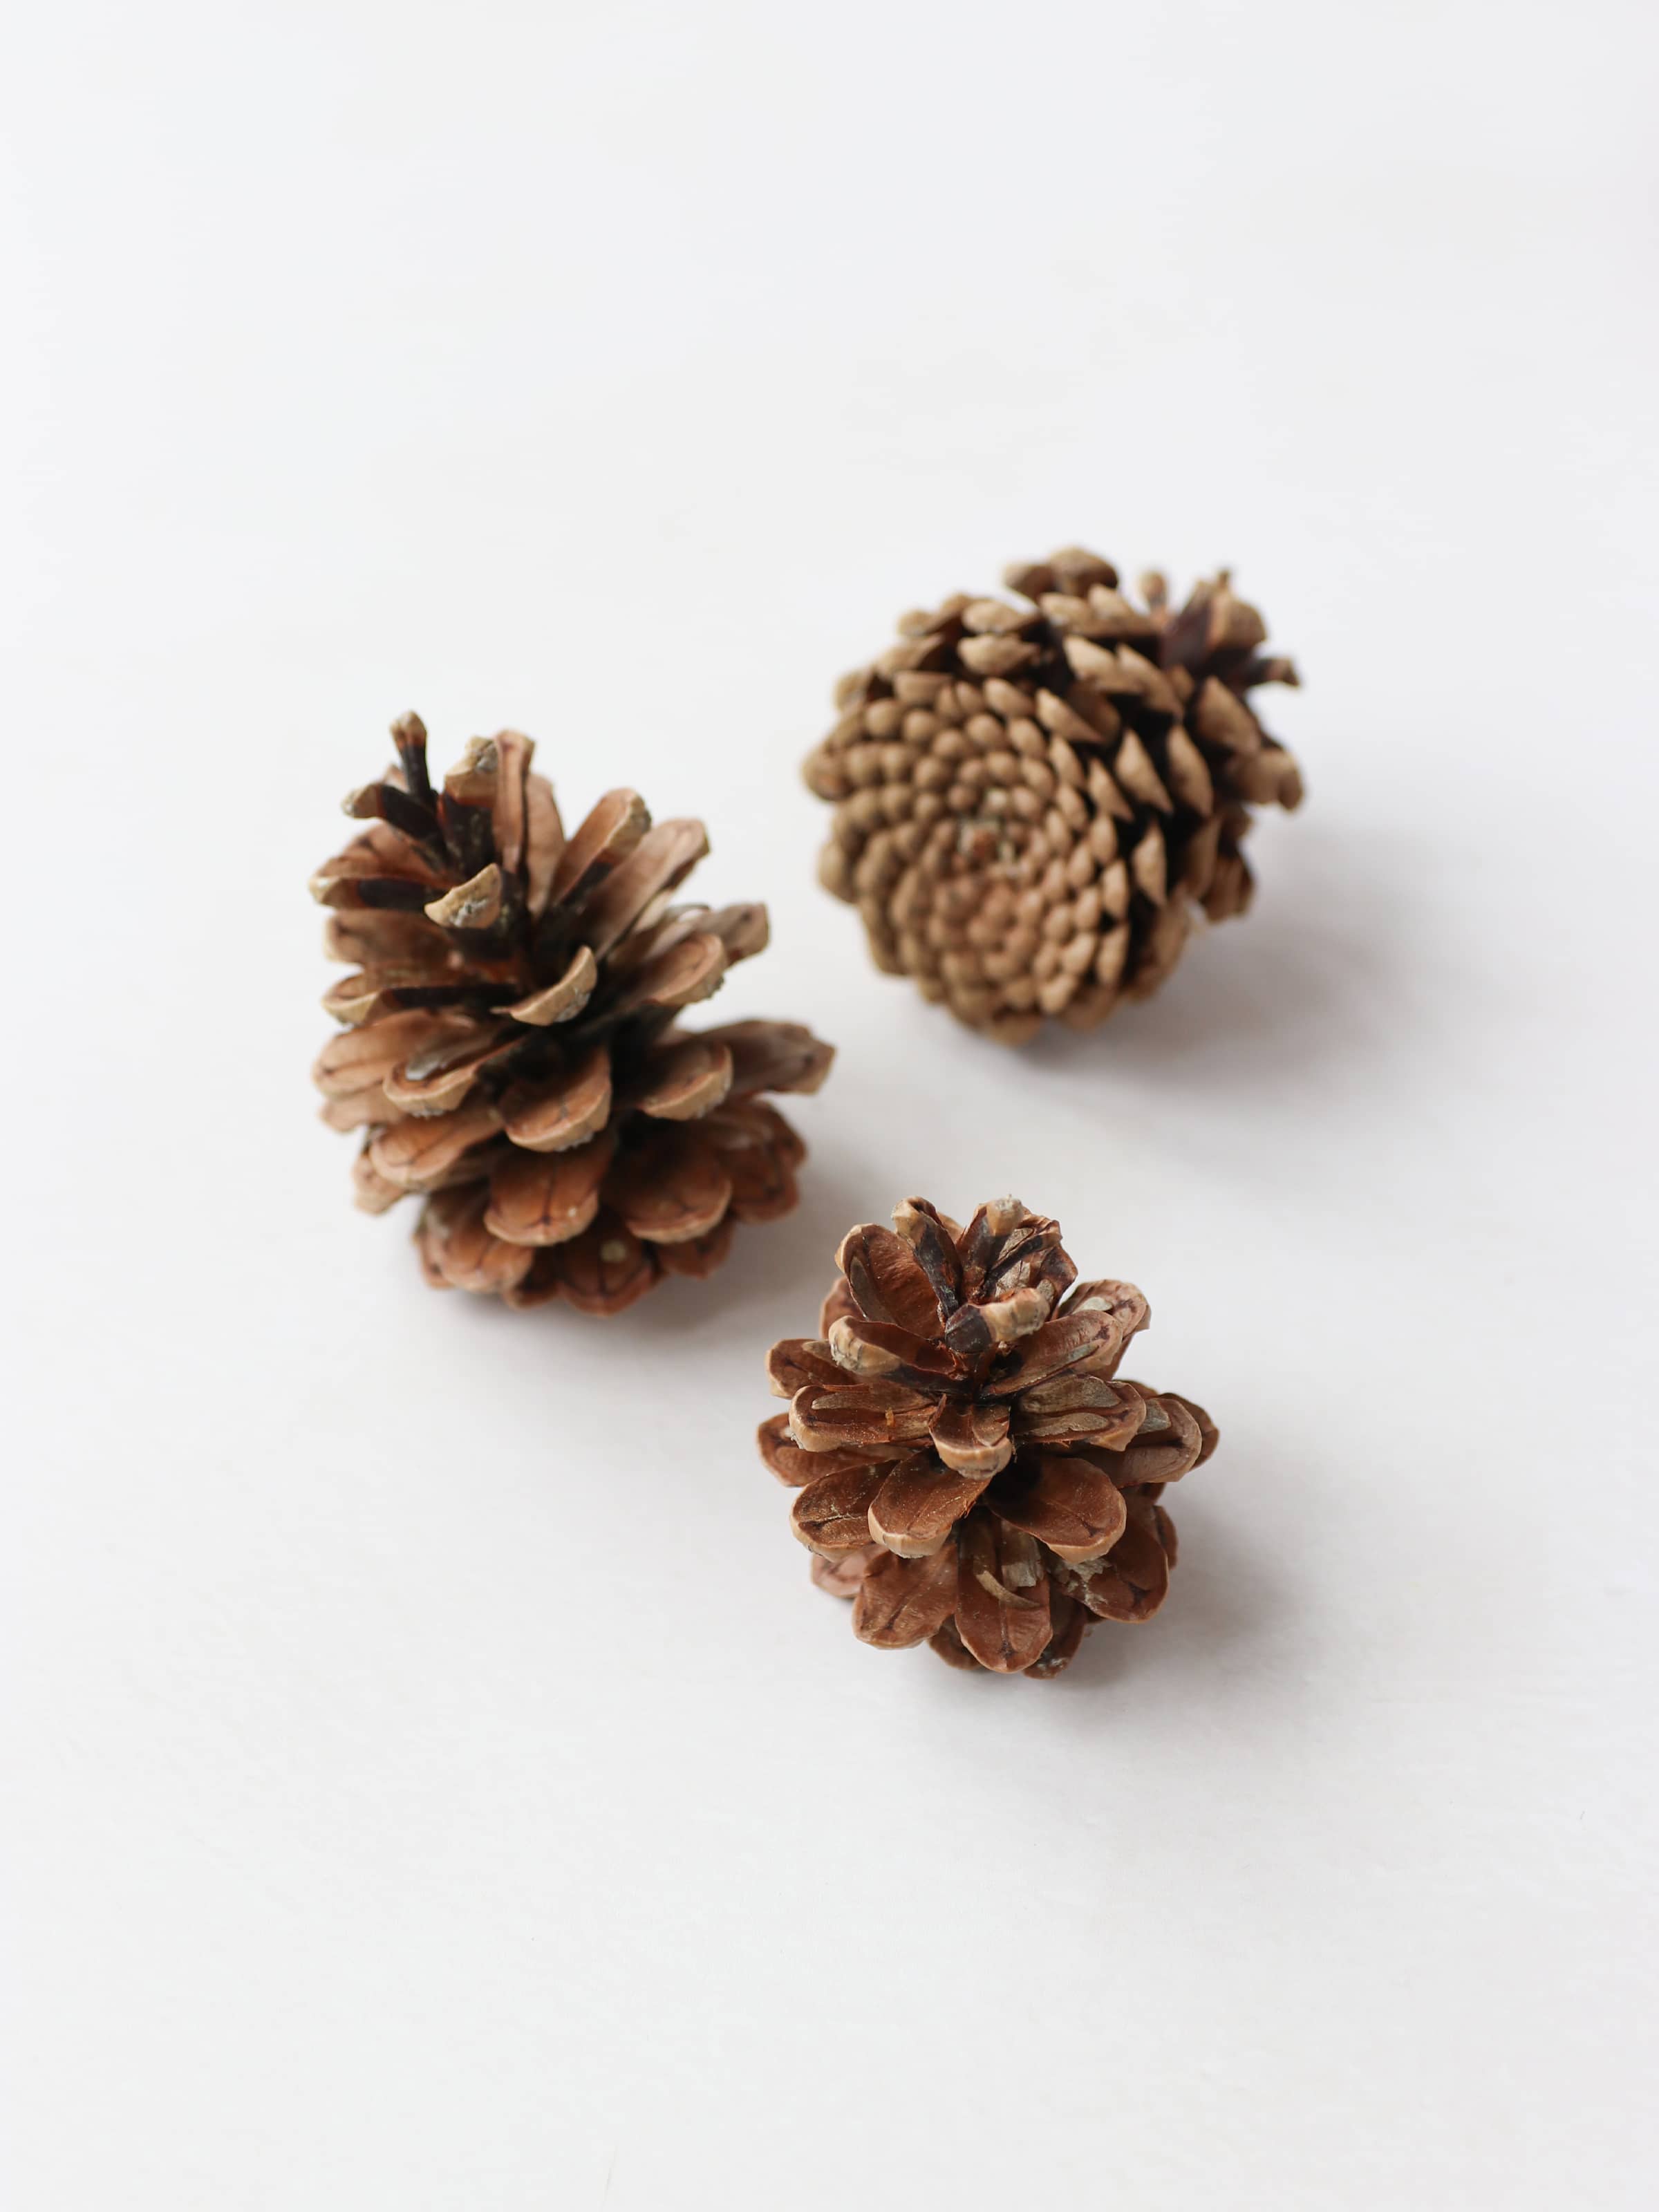
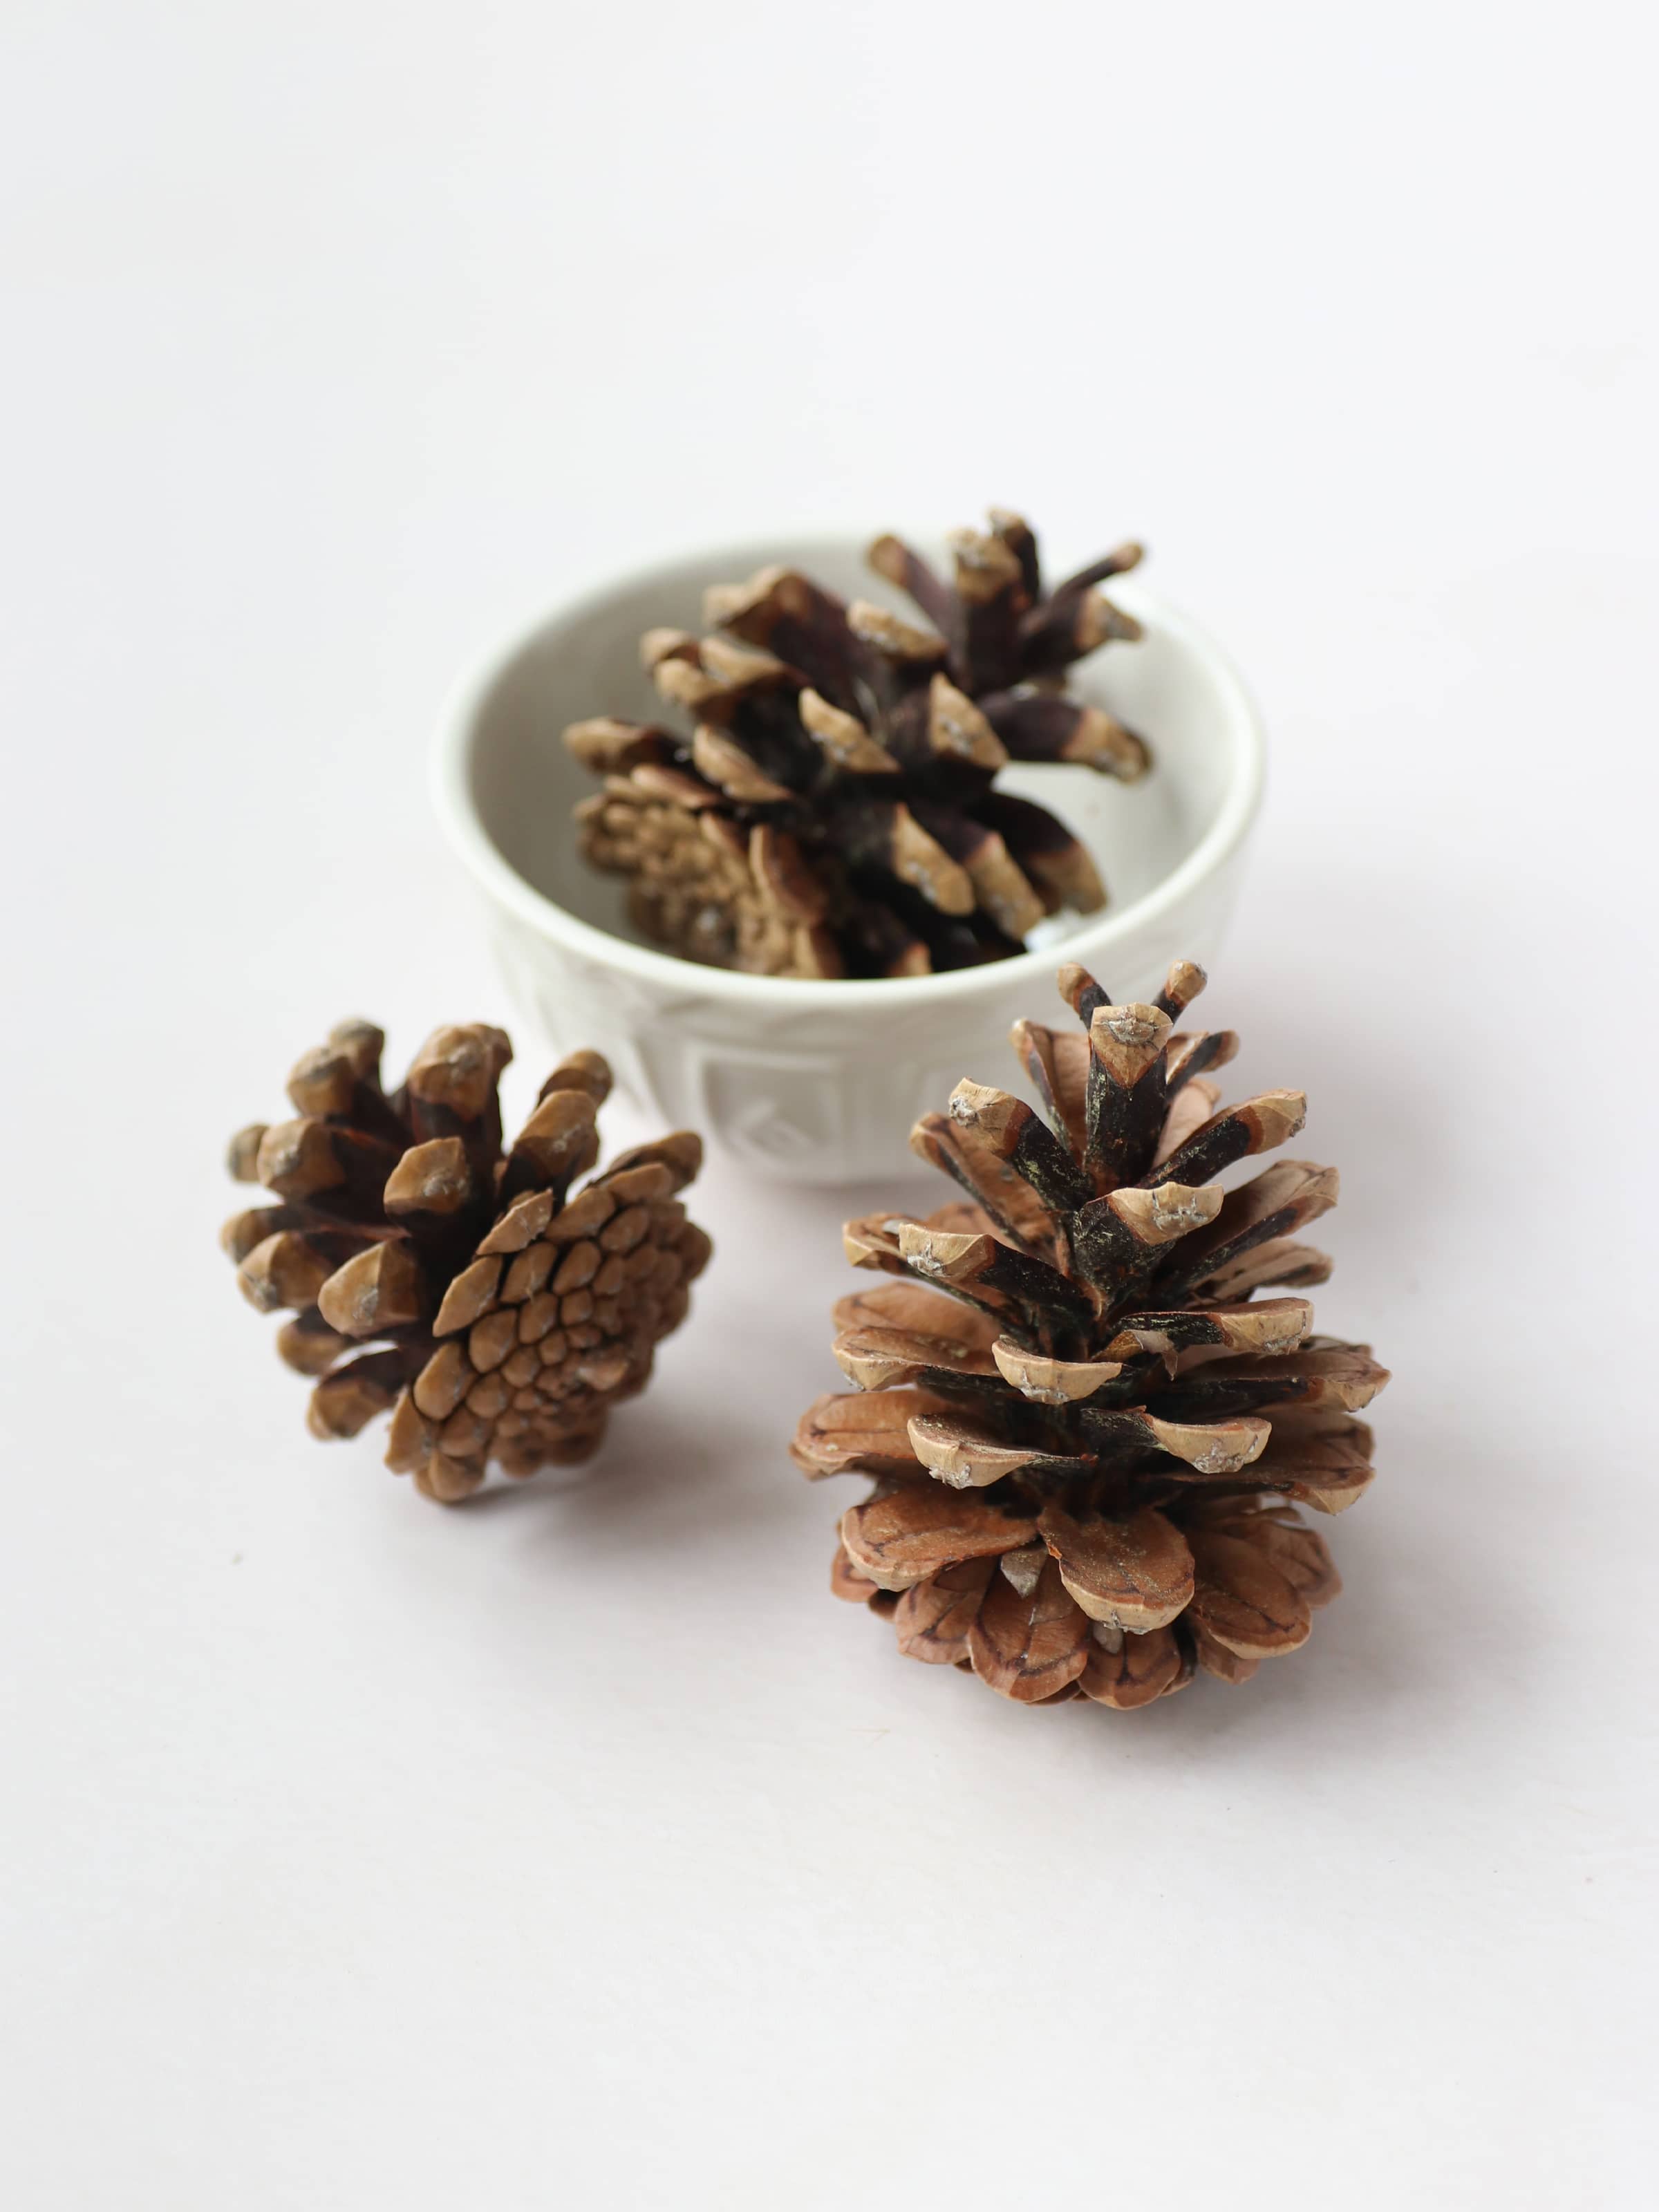
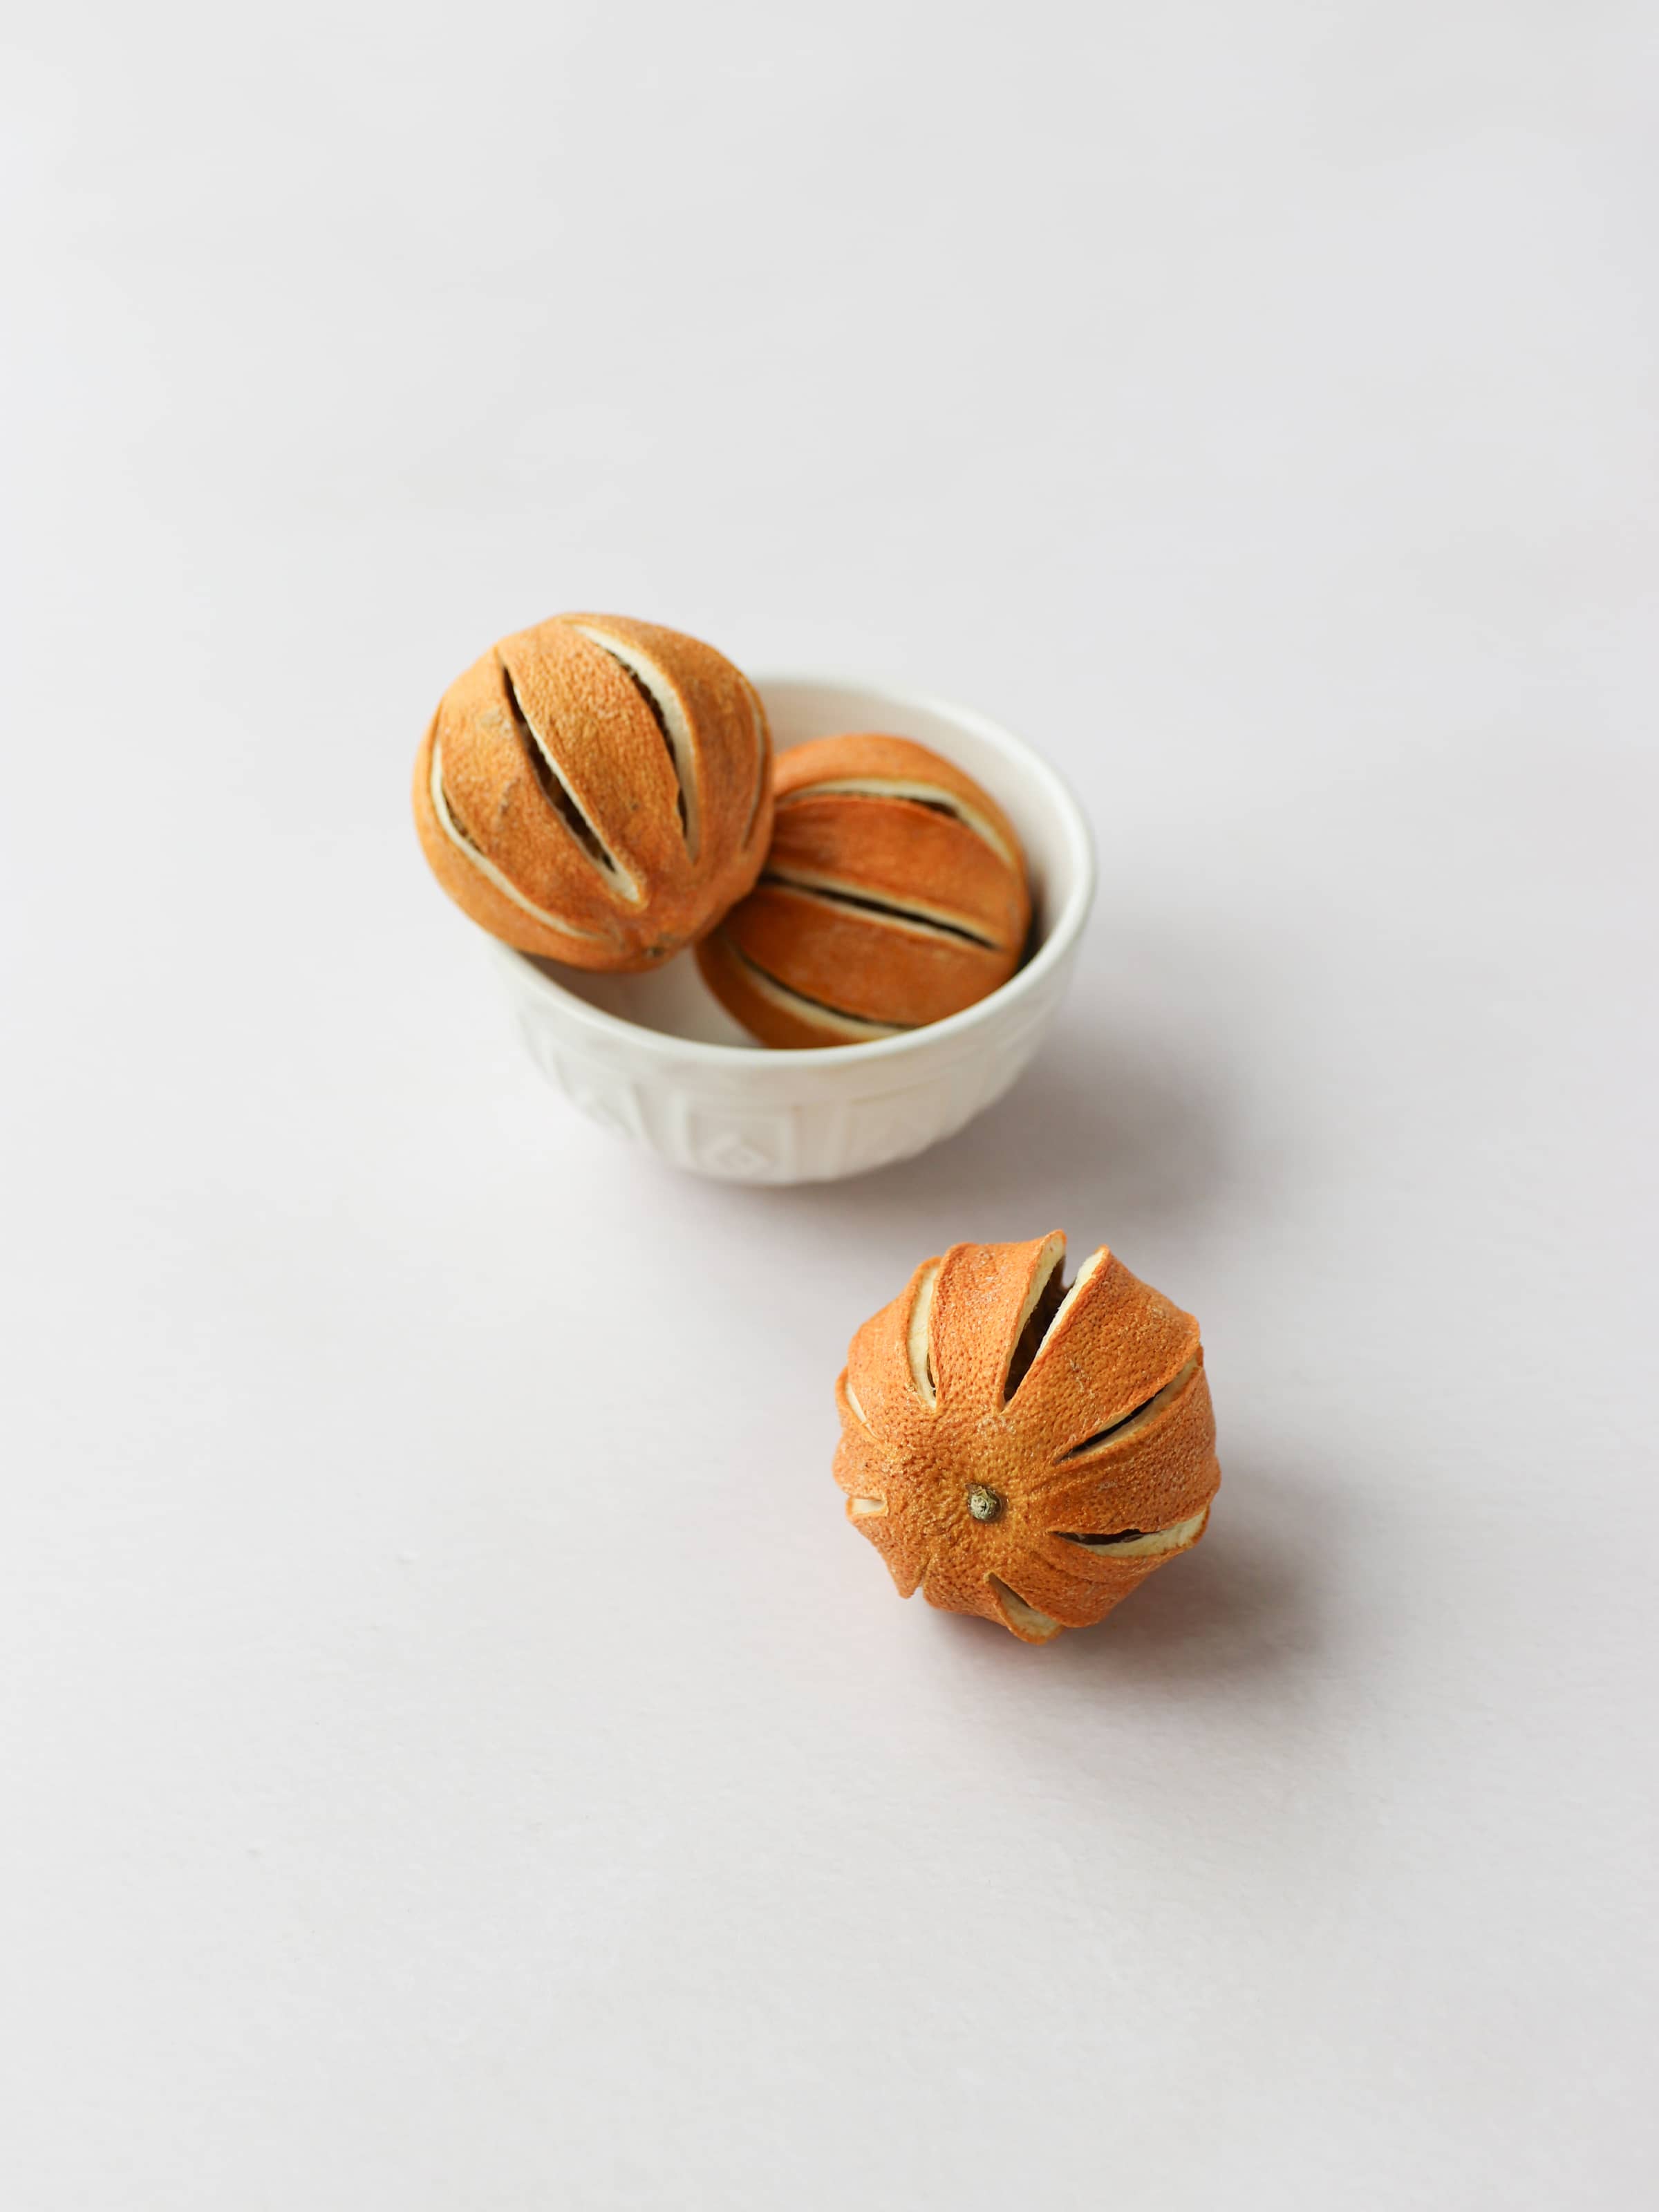
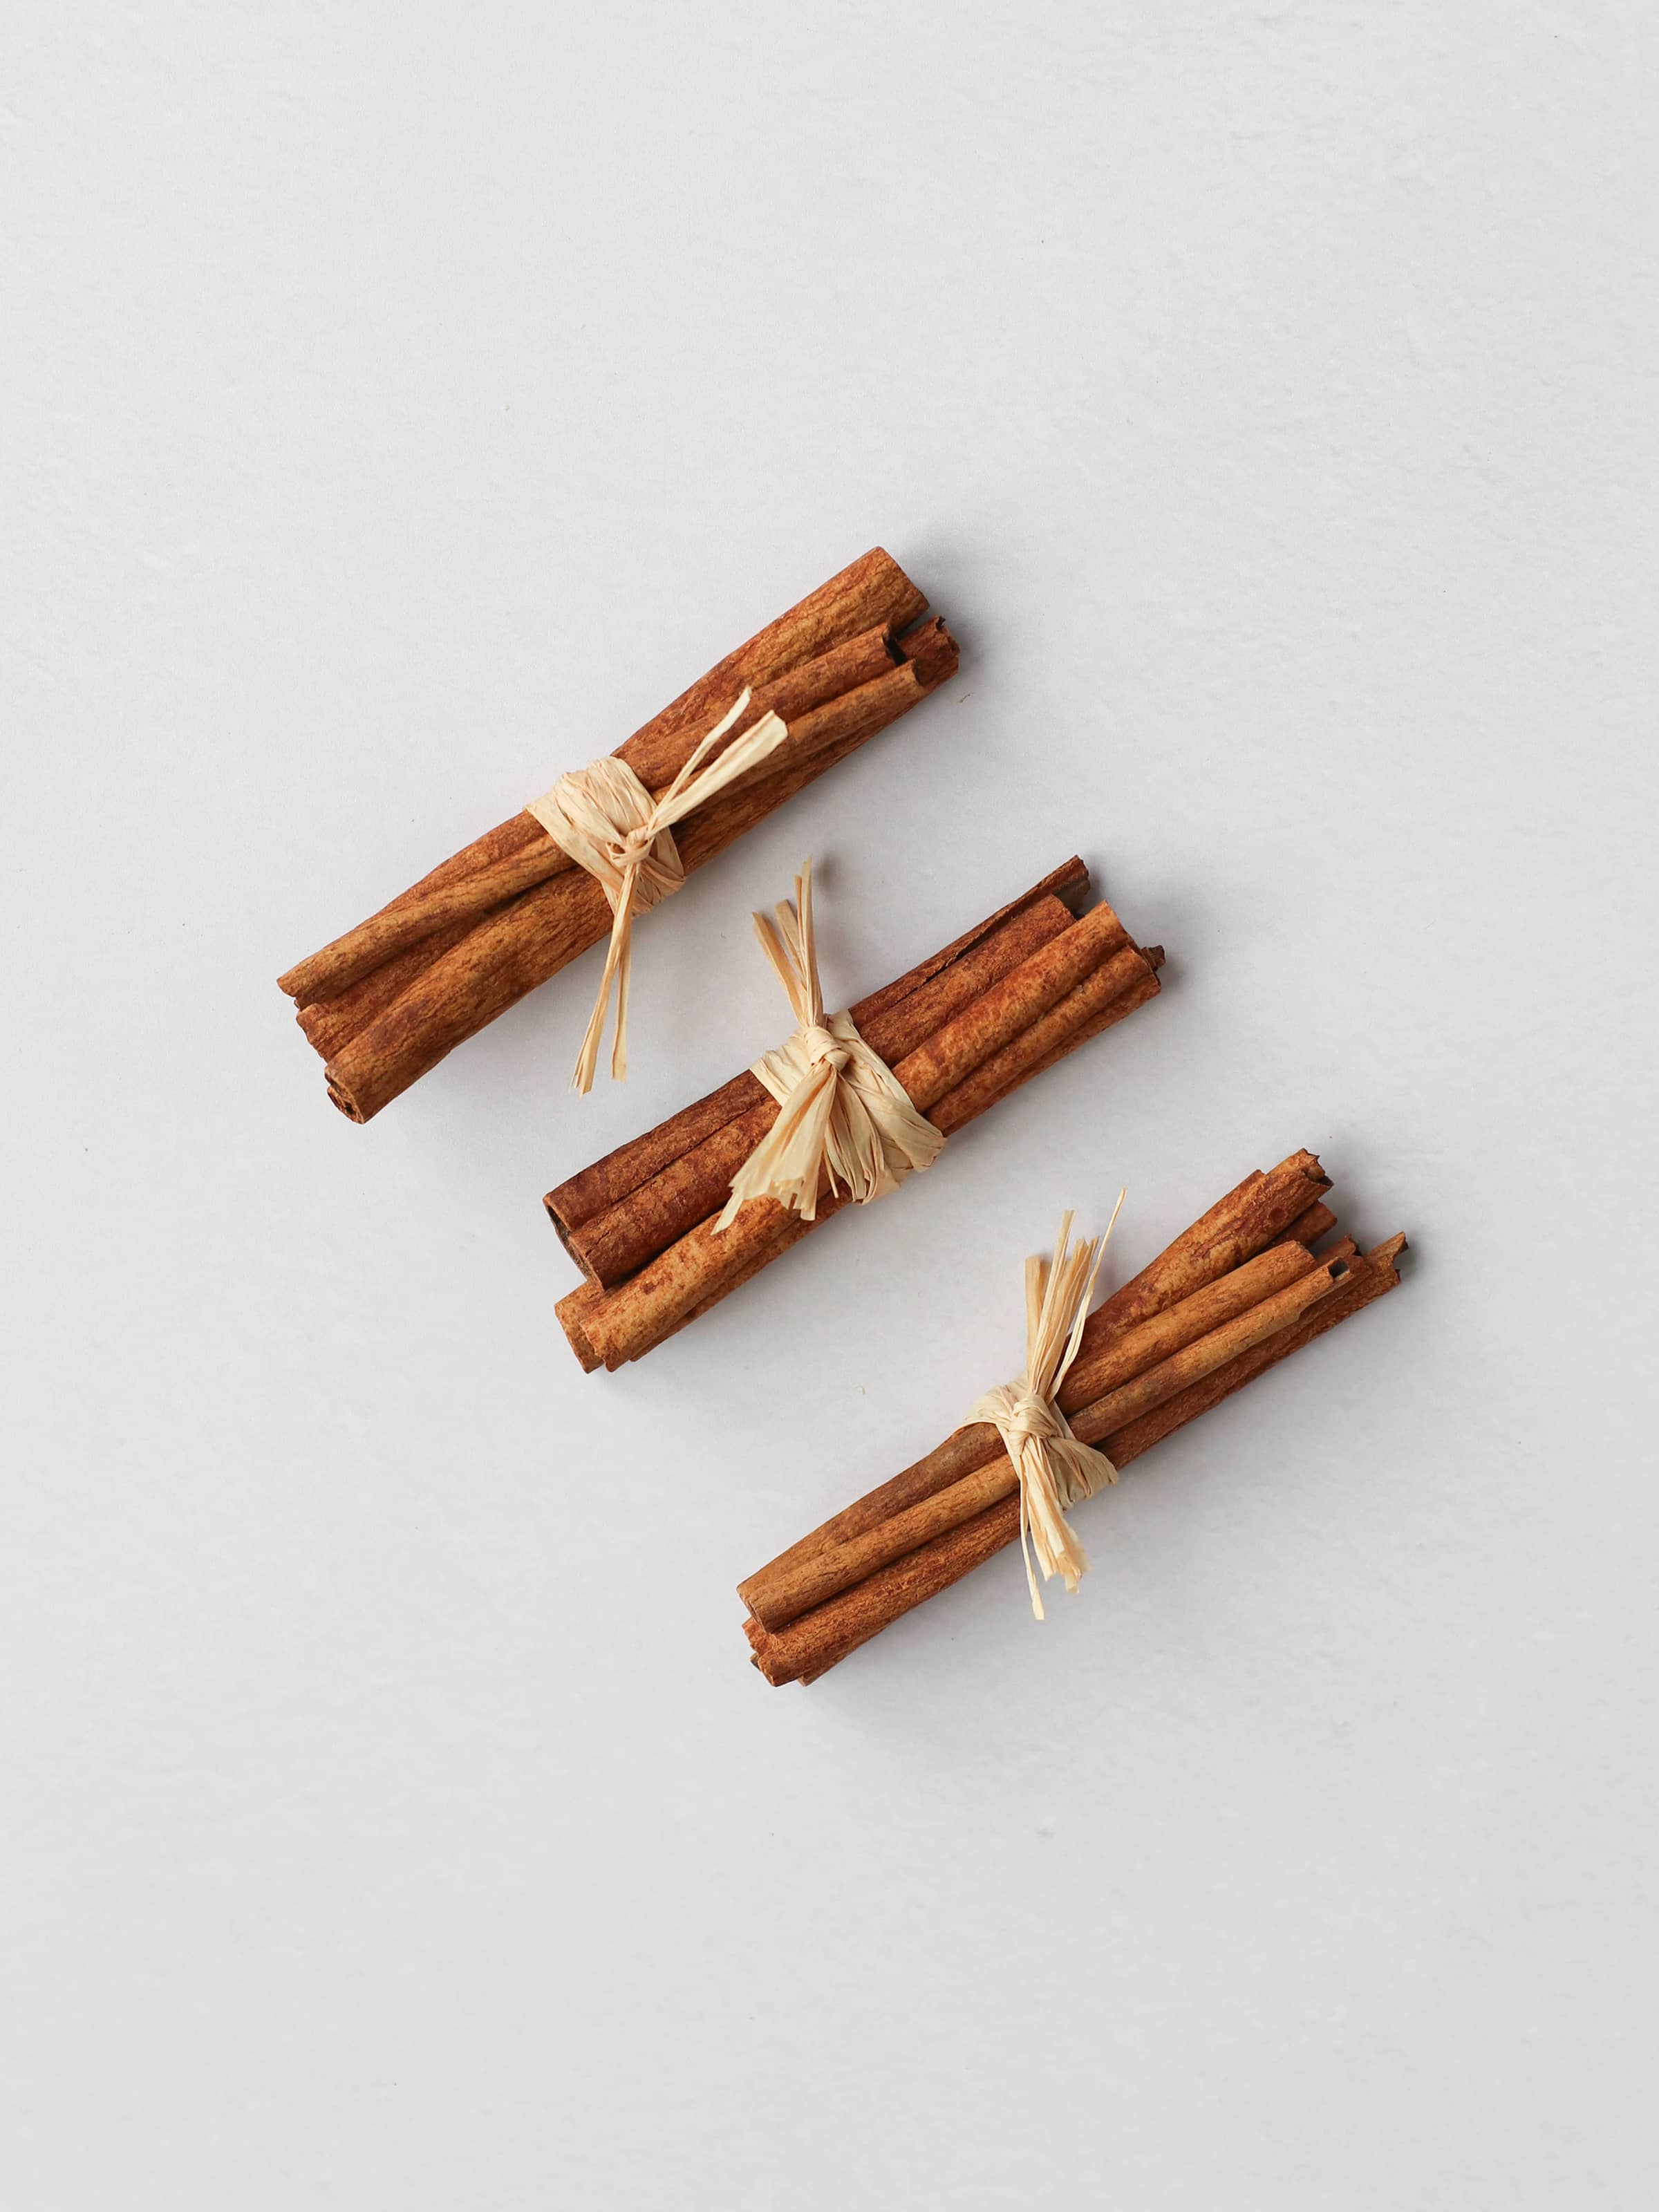
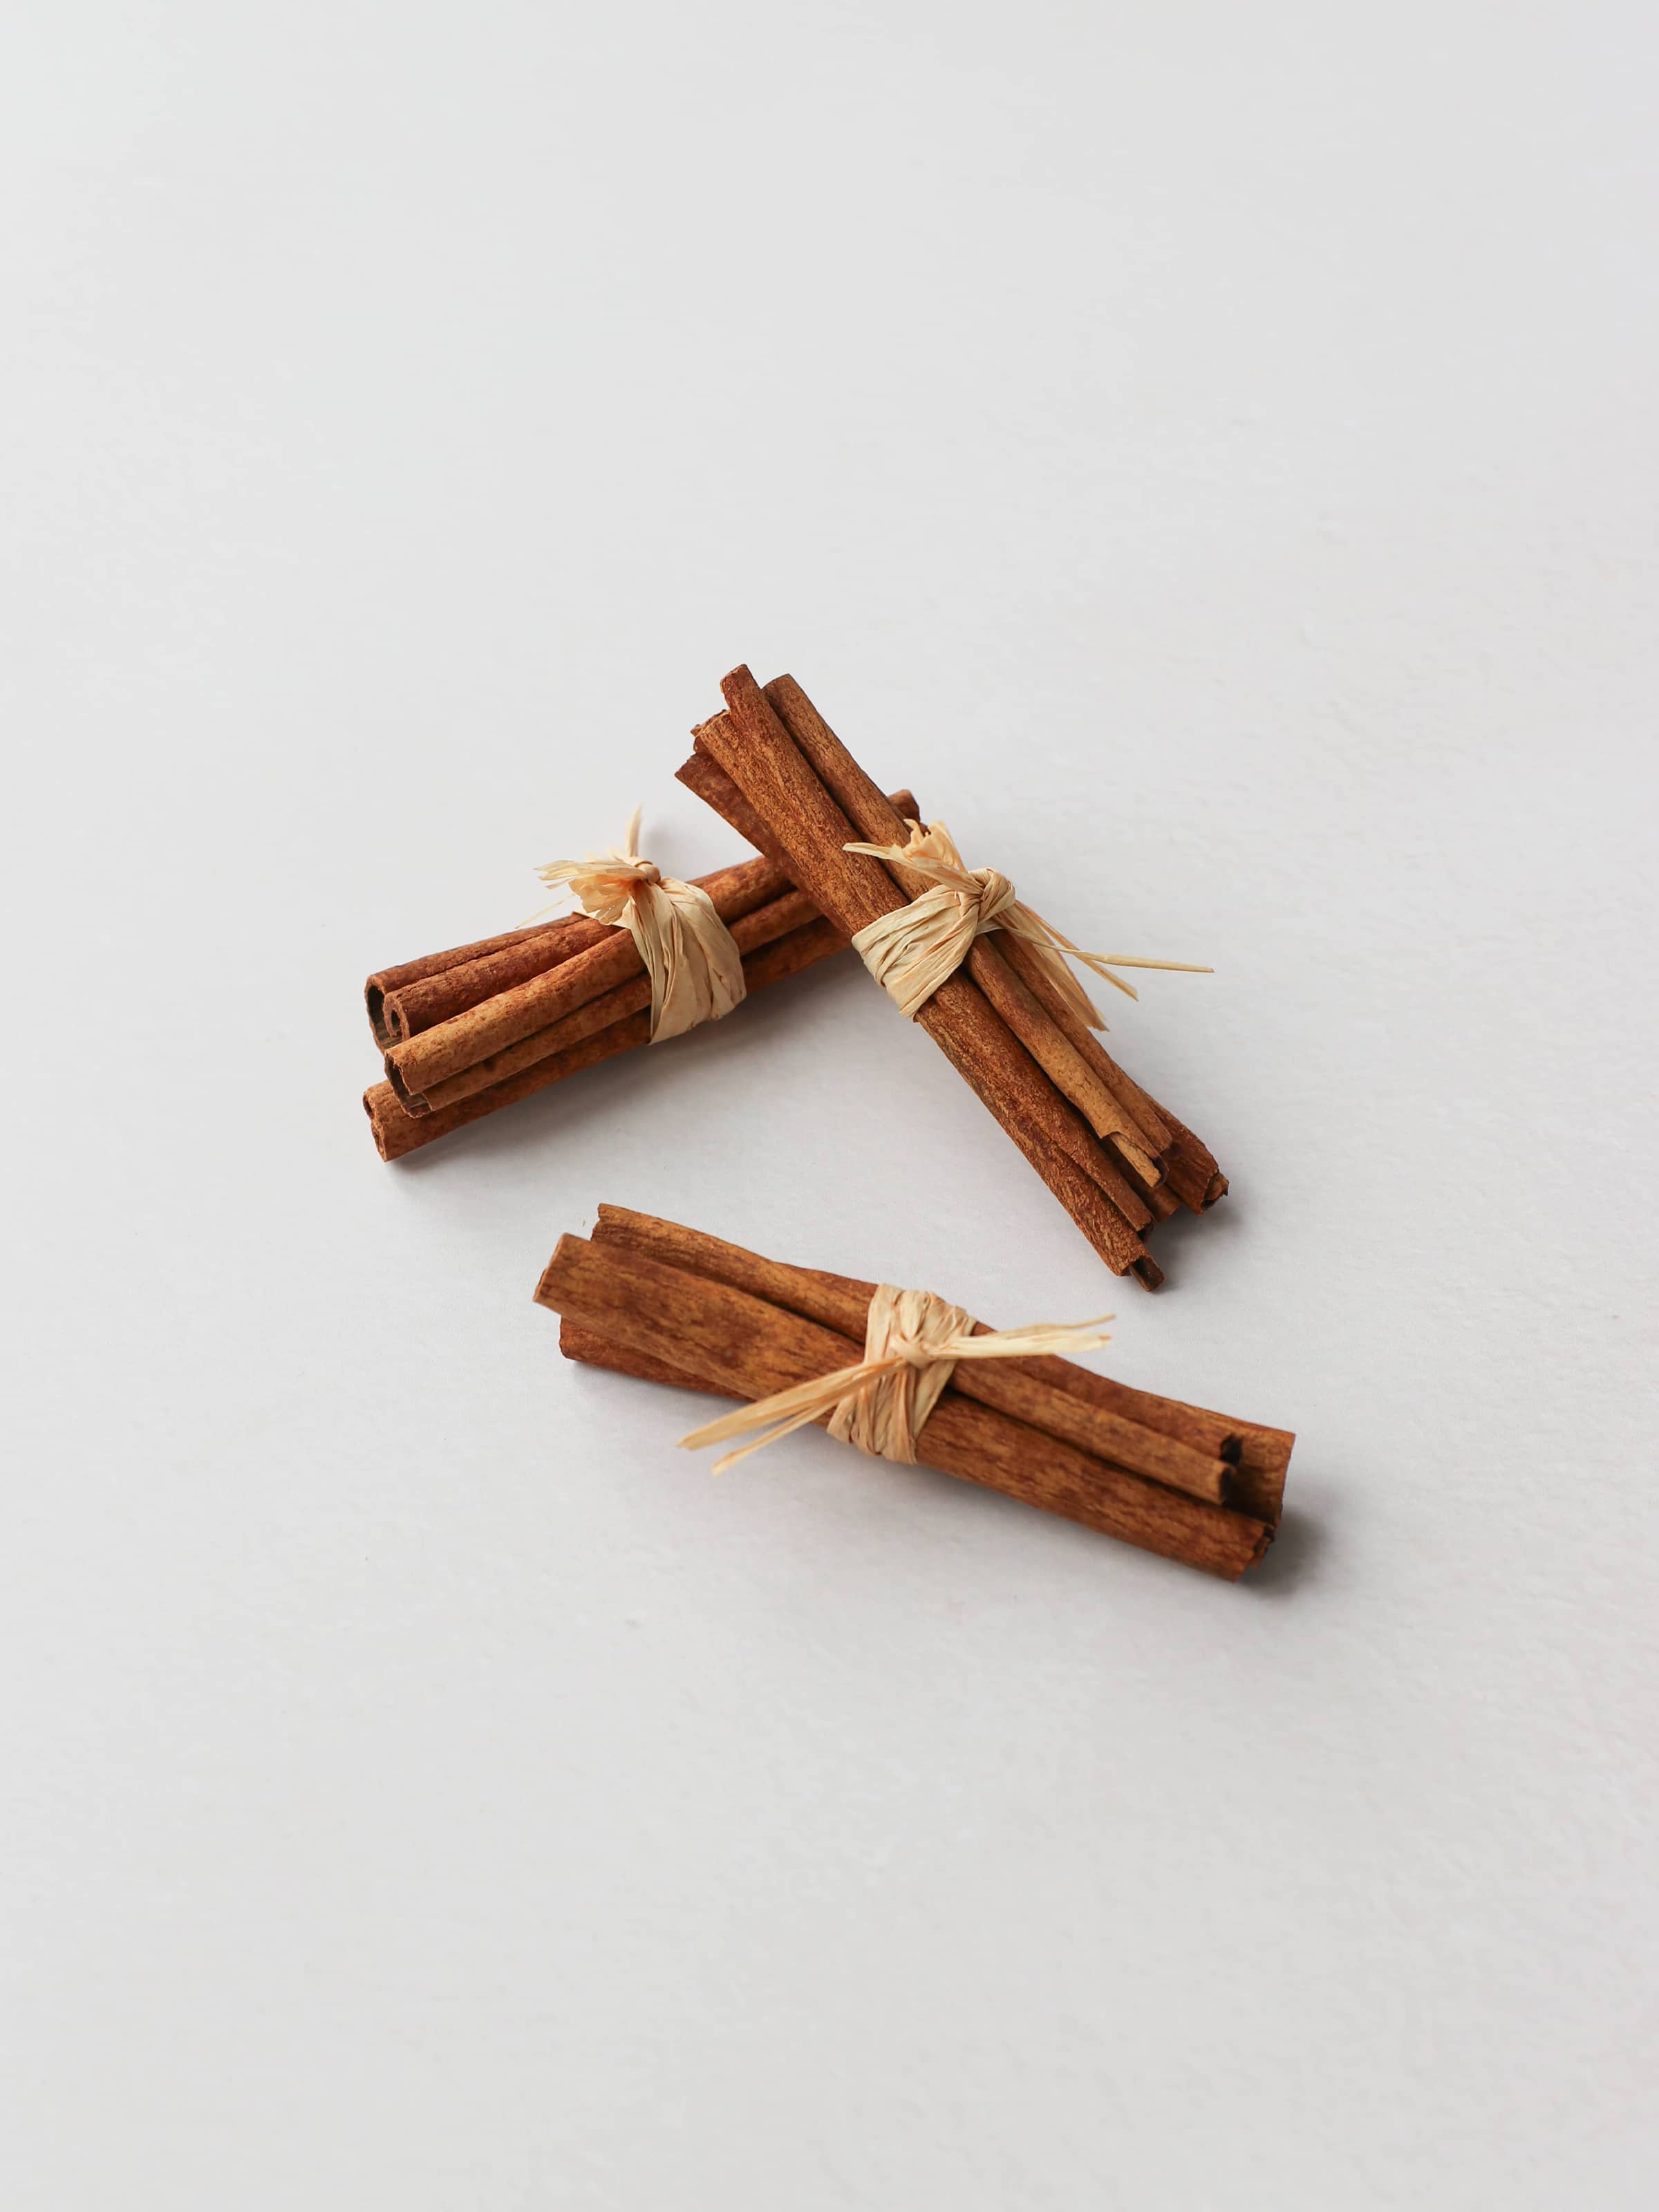
- Decorative extras (berries, pinecones, dried orange slices, etc.)
Optional
- Protective tablecloth
- Dust pan & brush
- Protective gloves
- Water spray bottle
You might need...


Stage 1: Preparing Your Moss Base
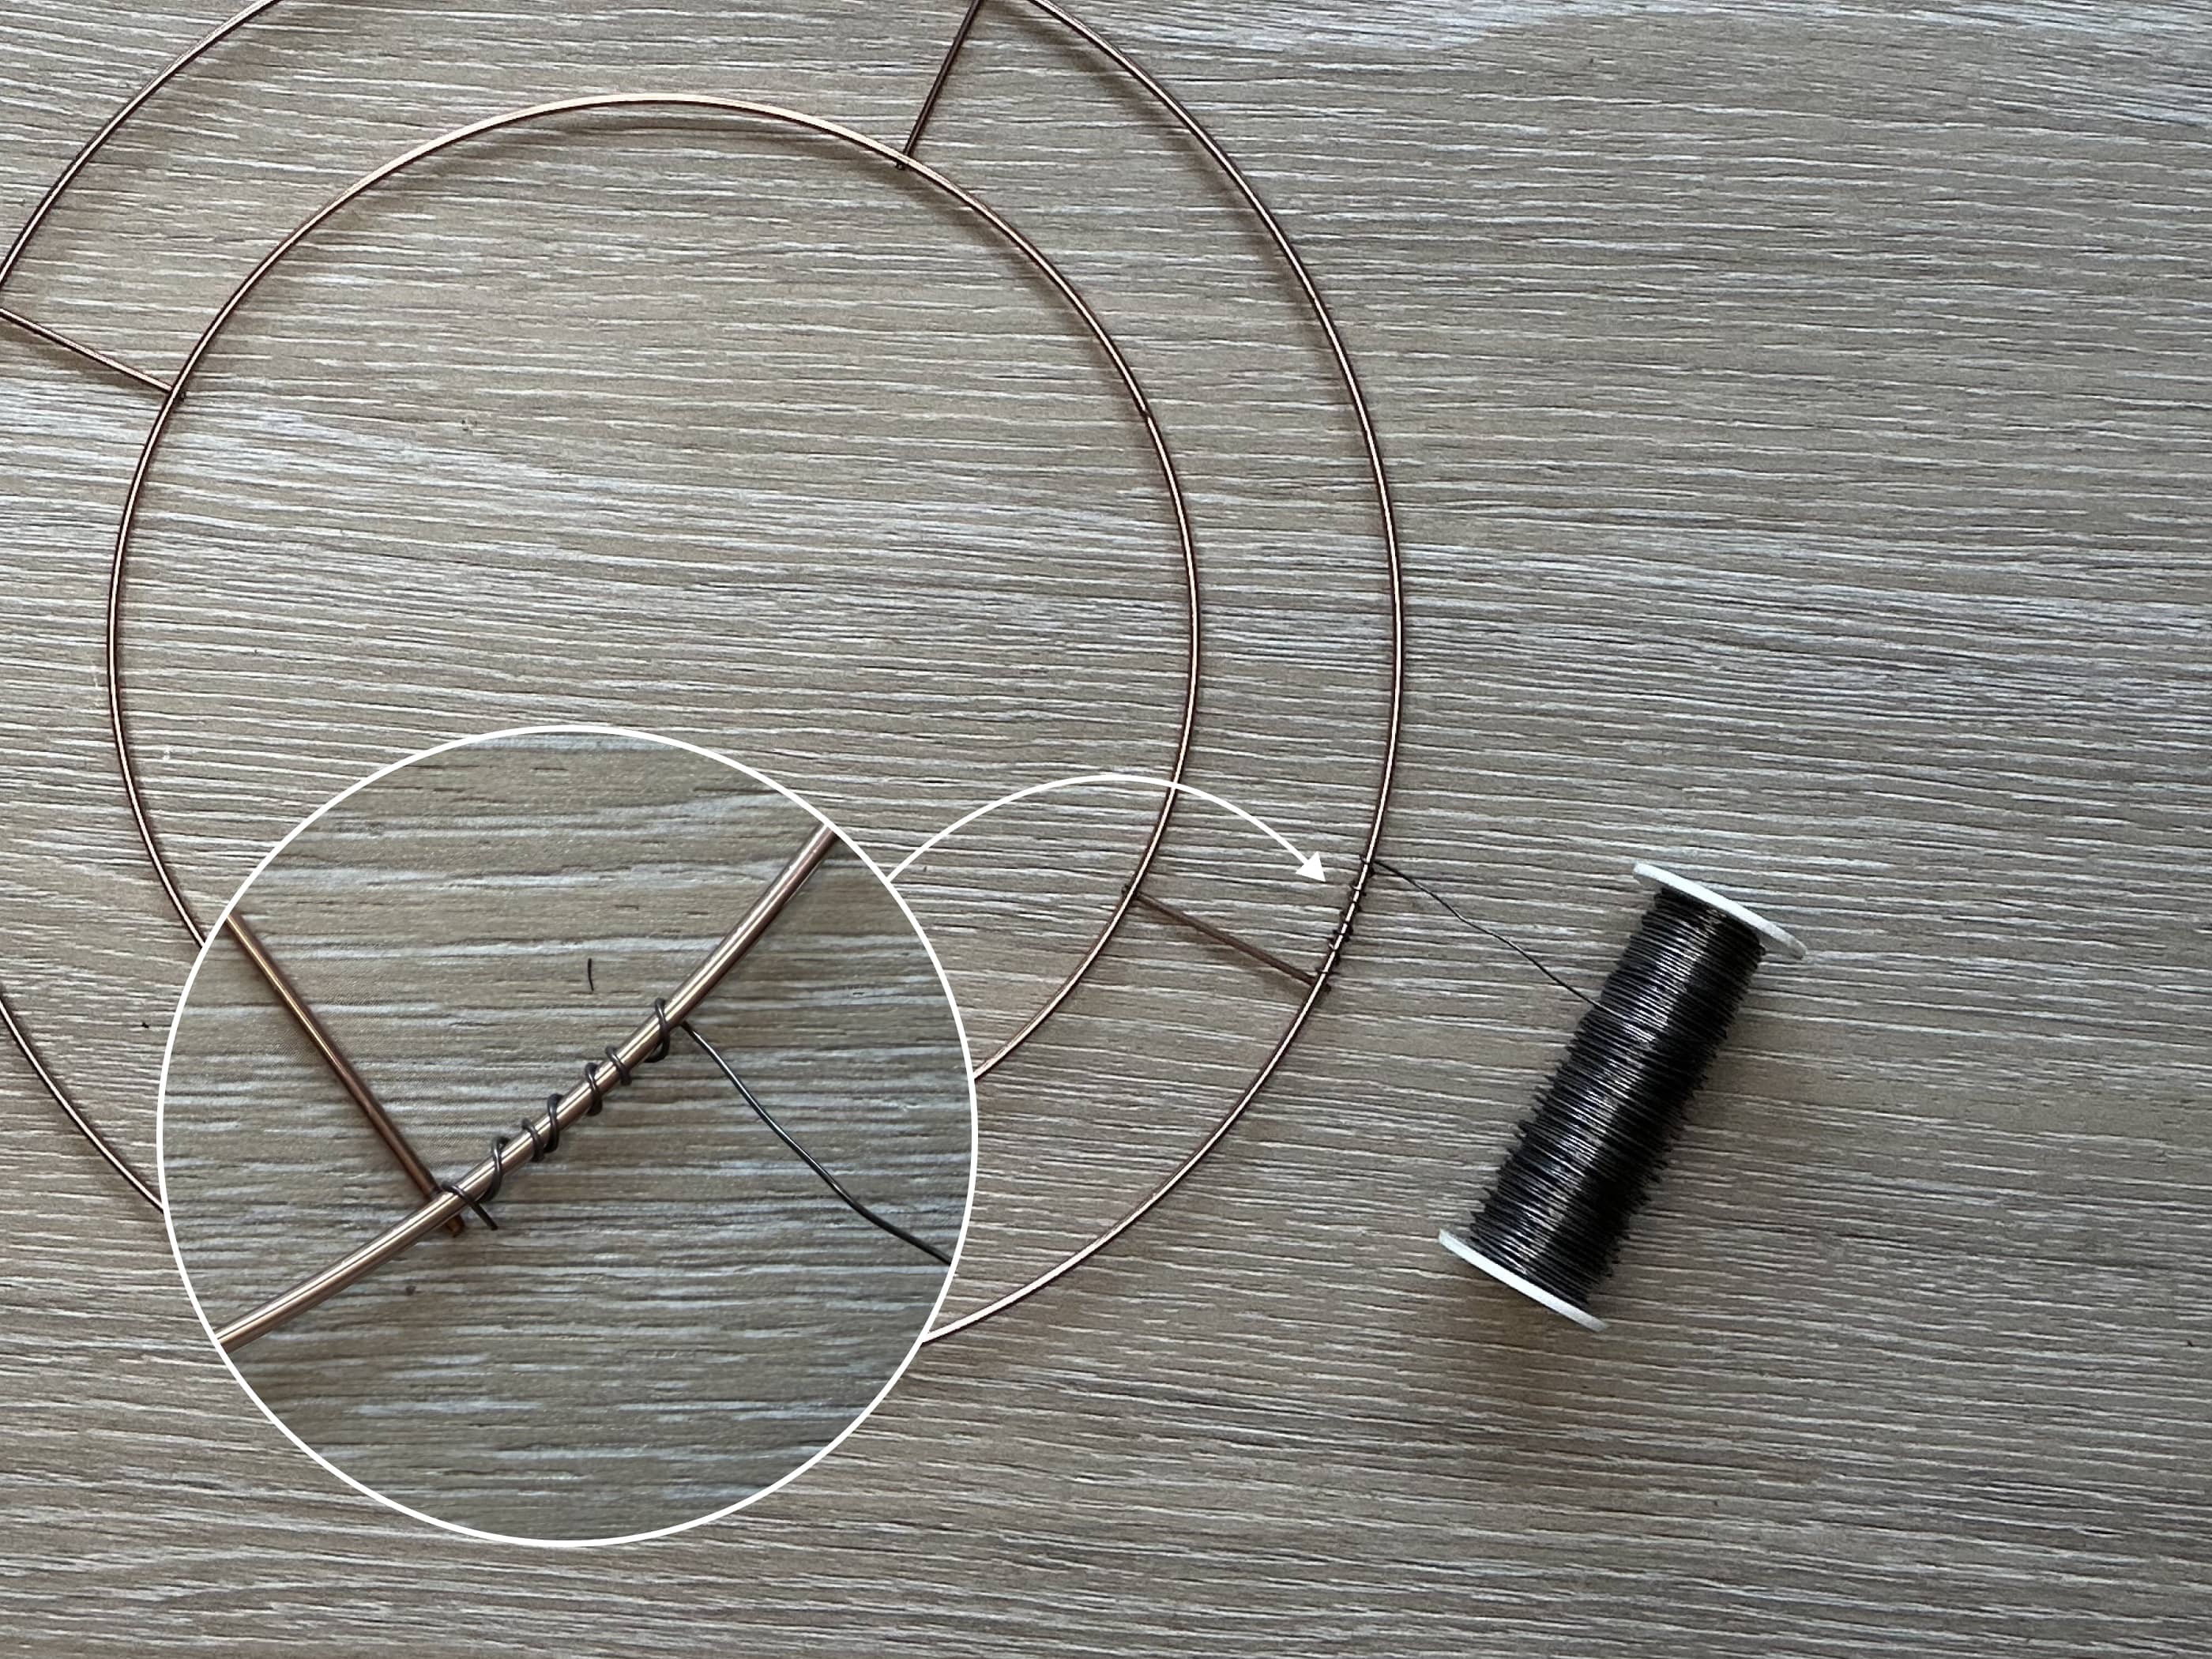
1. Firstly, we prepare the wreath ring by creating a more solid base for our wreath using the reel wire. Take the starting end of your reel wire and twist it around the outer edge of the wreath ring at any point. This is to secure the reel wire to the wreath base.
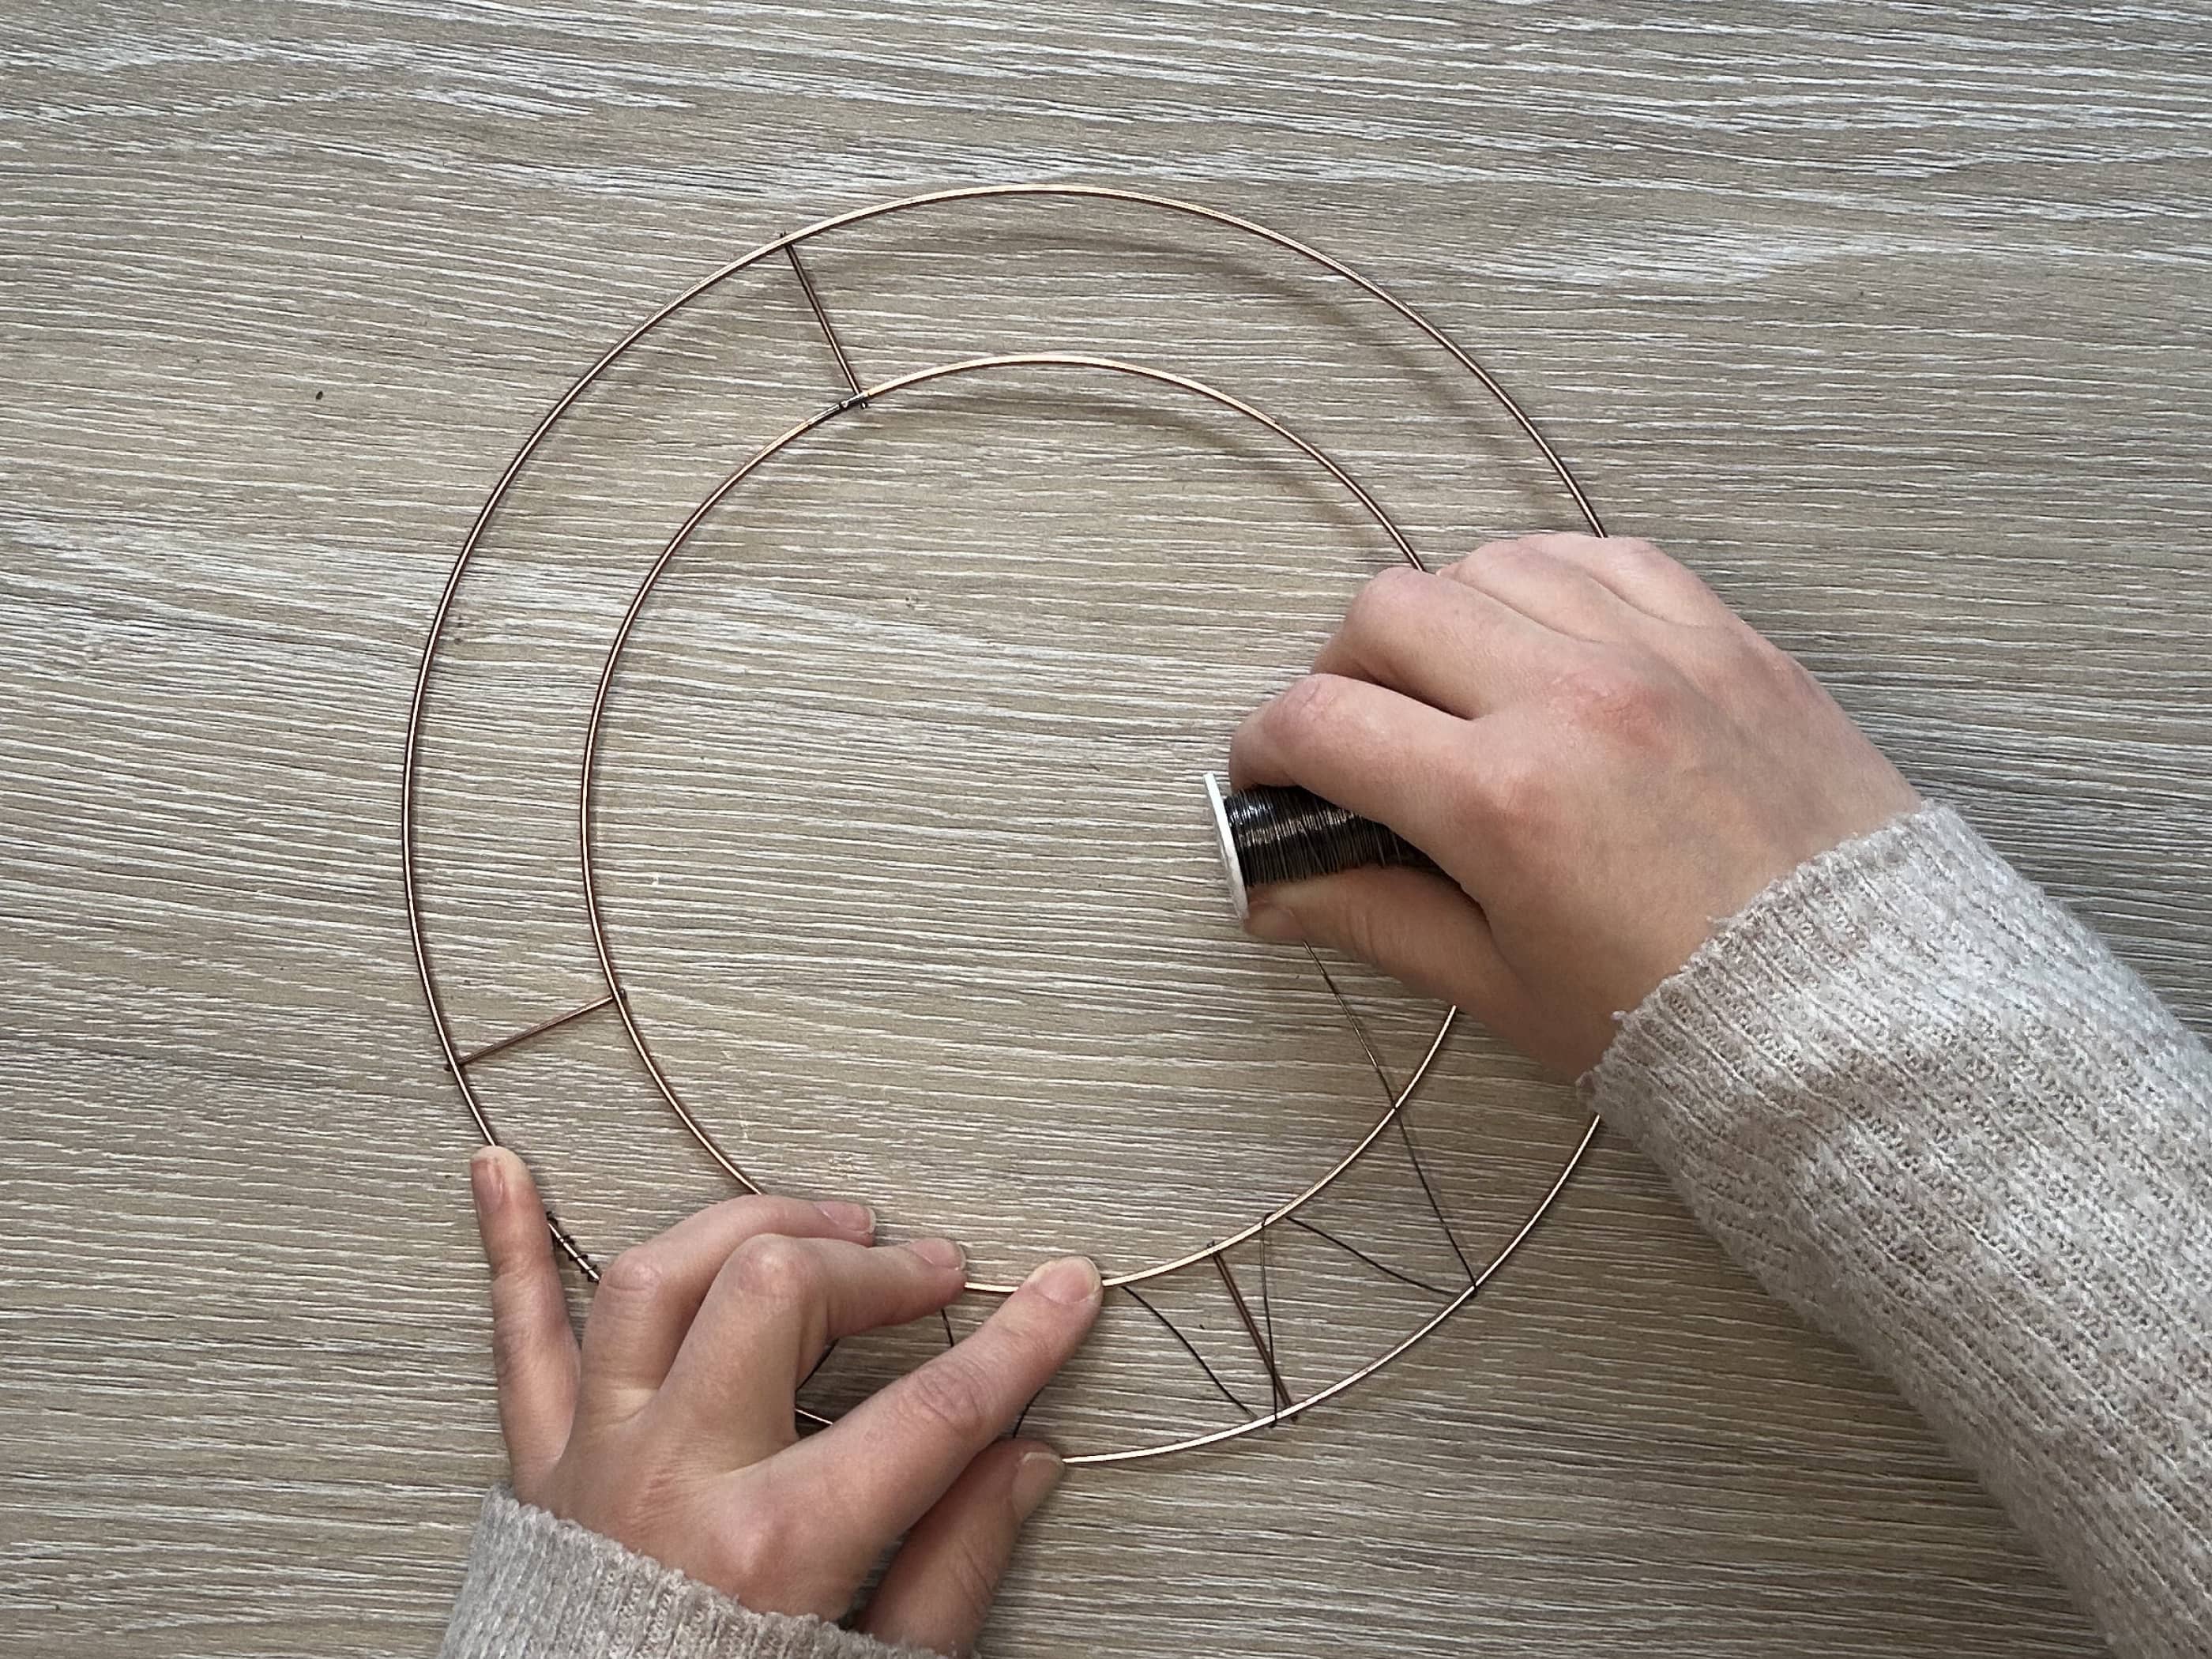
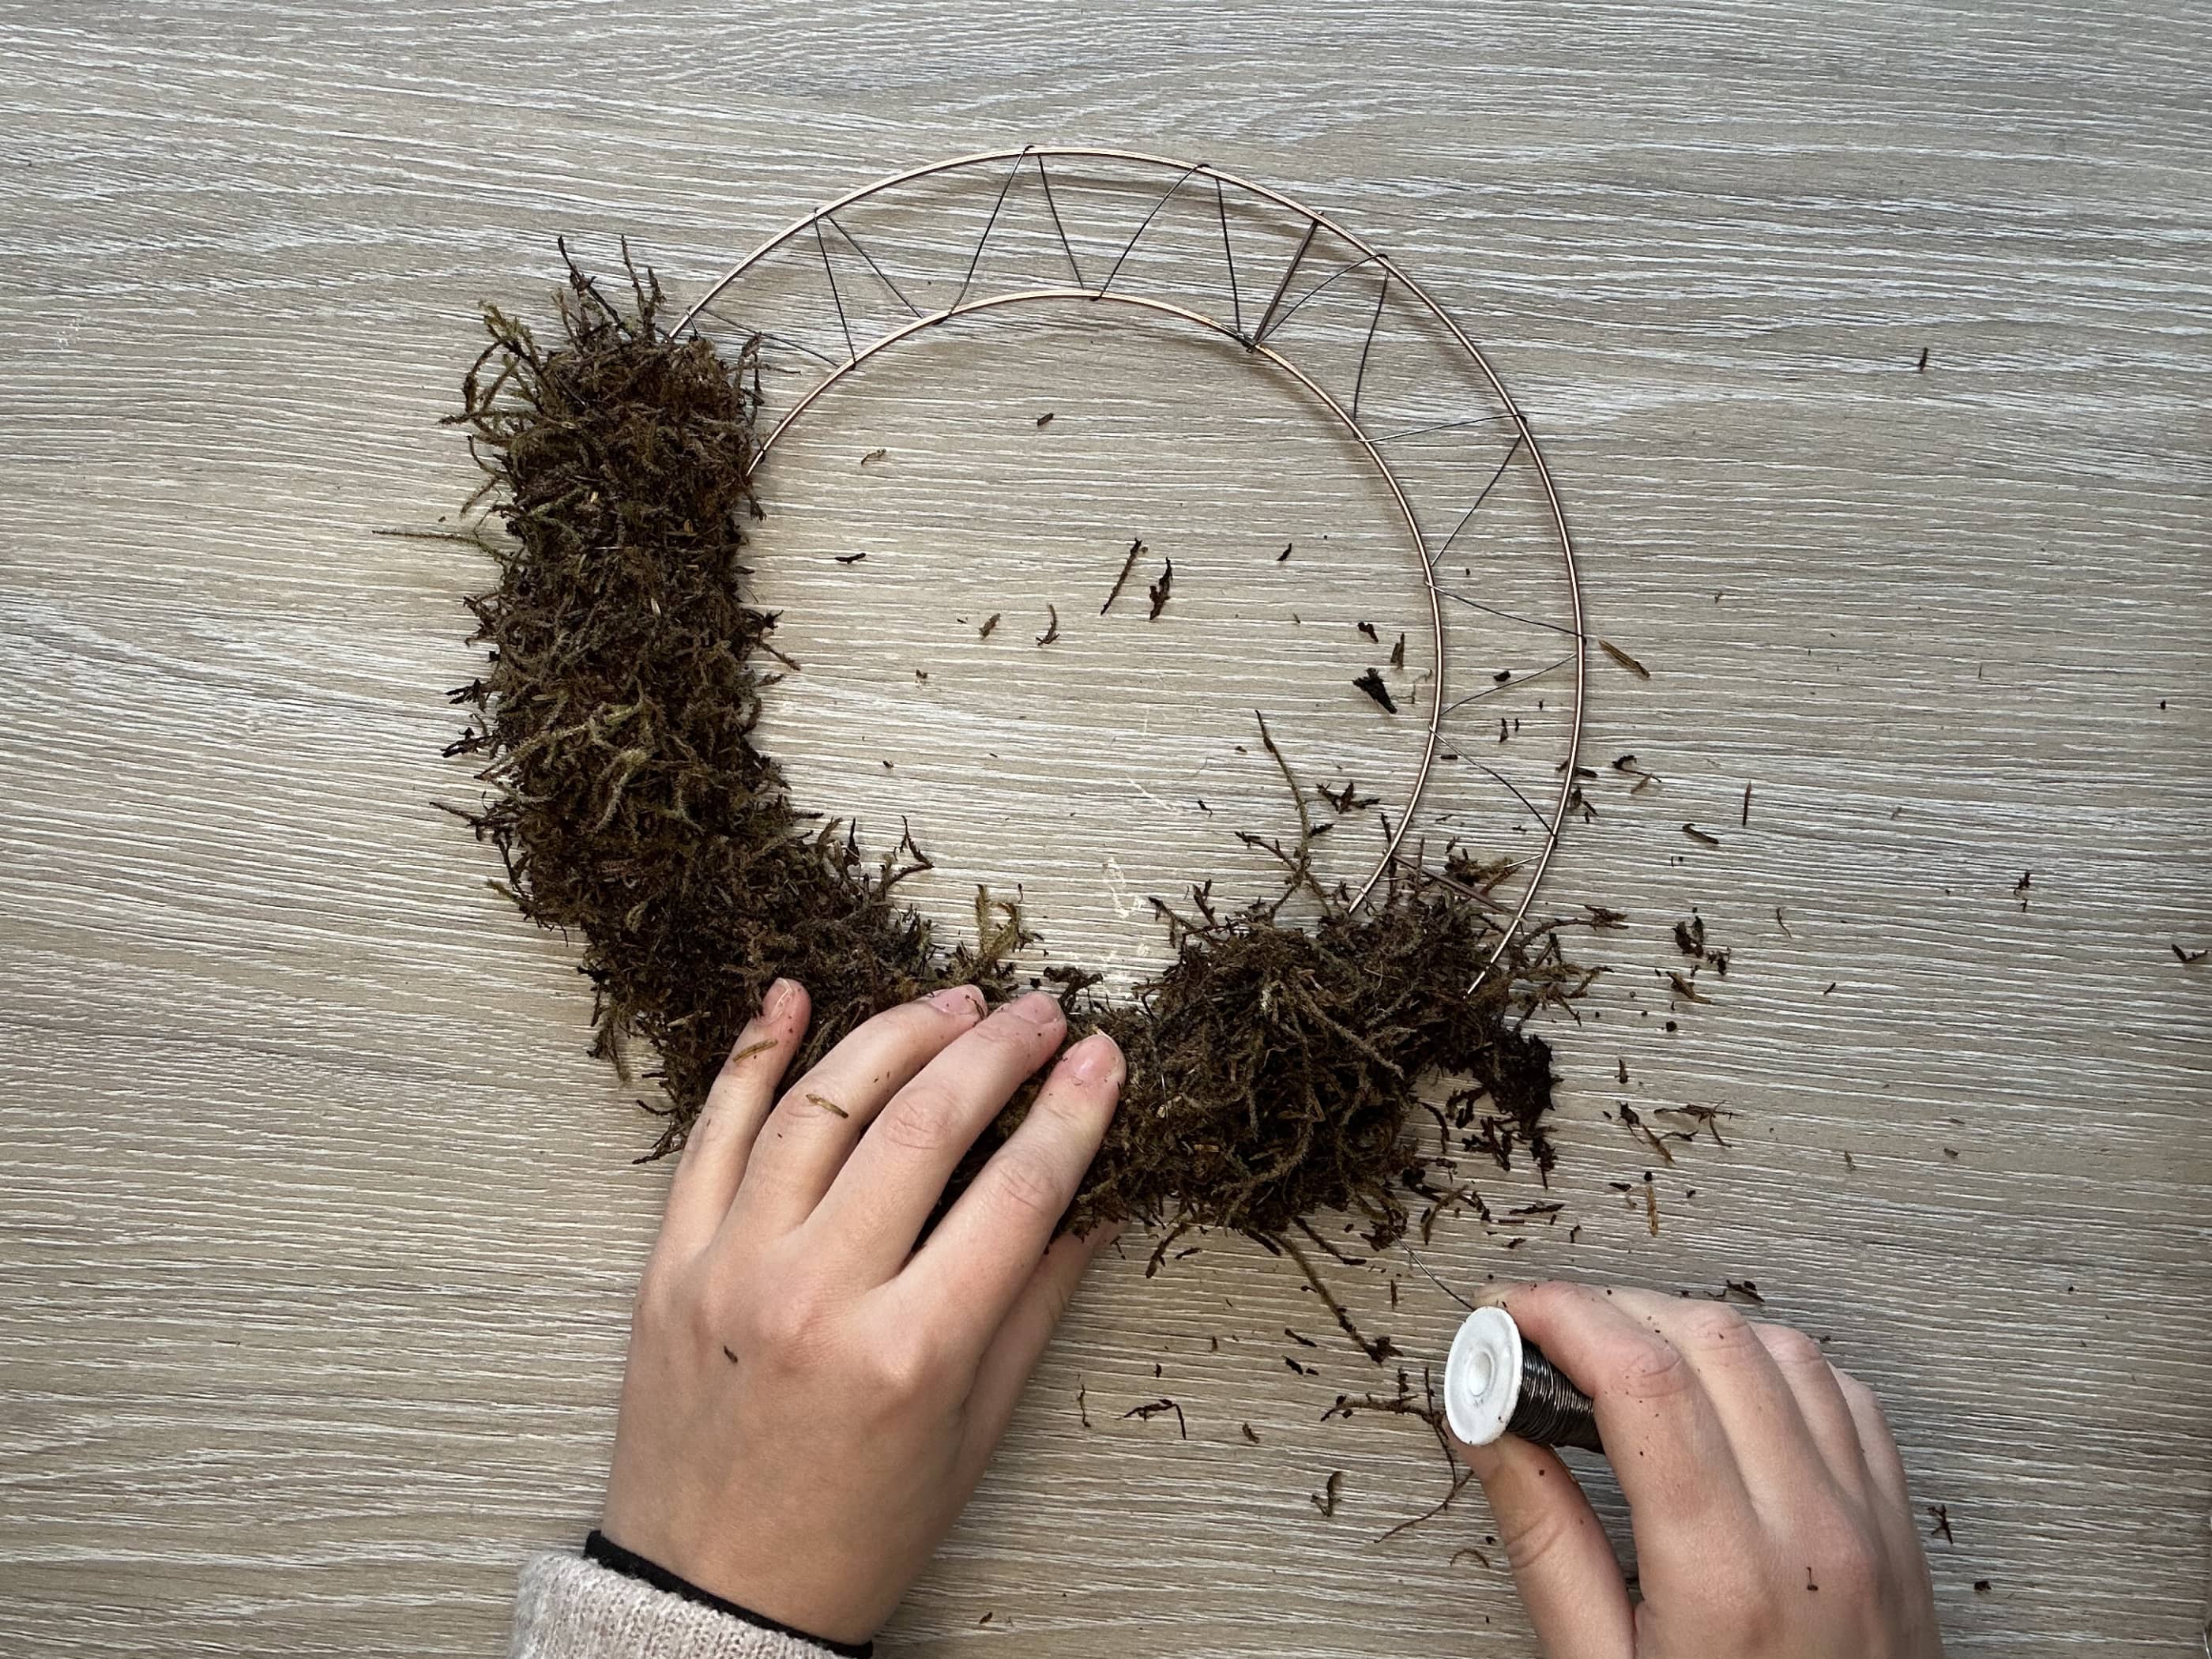
2. Take the reel wire and begin to wrap it around the wreath ring in a zig zag shape, keeping it pulled tight as you work all the way around until you meet the start point. You don’t need to cut the reel wire at this point, leave the reel attached to the wreath for the next step. You are now ready to start adding the moss.
3. Take a handful of moss and mould it into a loose ‘sausage shape’. From there, place the shaped moss bundle on the wreath ring, directly where your reel wire spool is. Wrap the reel wire tightly around the moss and ring, securing it to the wire ring. You may want to go around with the wire twice on each handful of moss.
4. Continue adding handfuls of moss all the way around your wreath ring, until the whole ring is covered. You can tuck each subsequent handful of moss under the edge of the last handful to minimise gaps. Once you’ve covered the whole ring, leave the wire reel attached to the ring and put your wreath to one side.
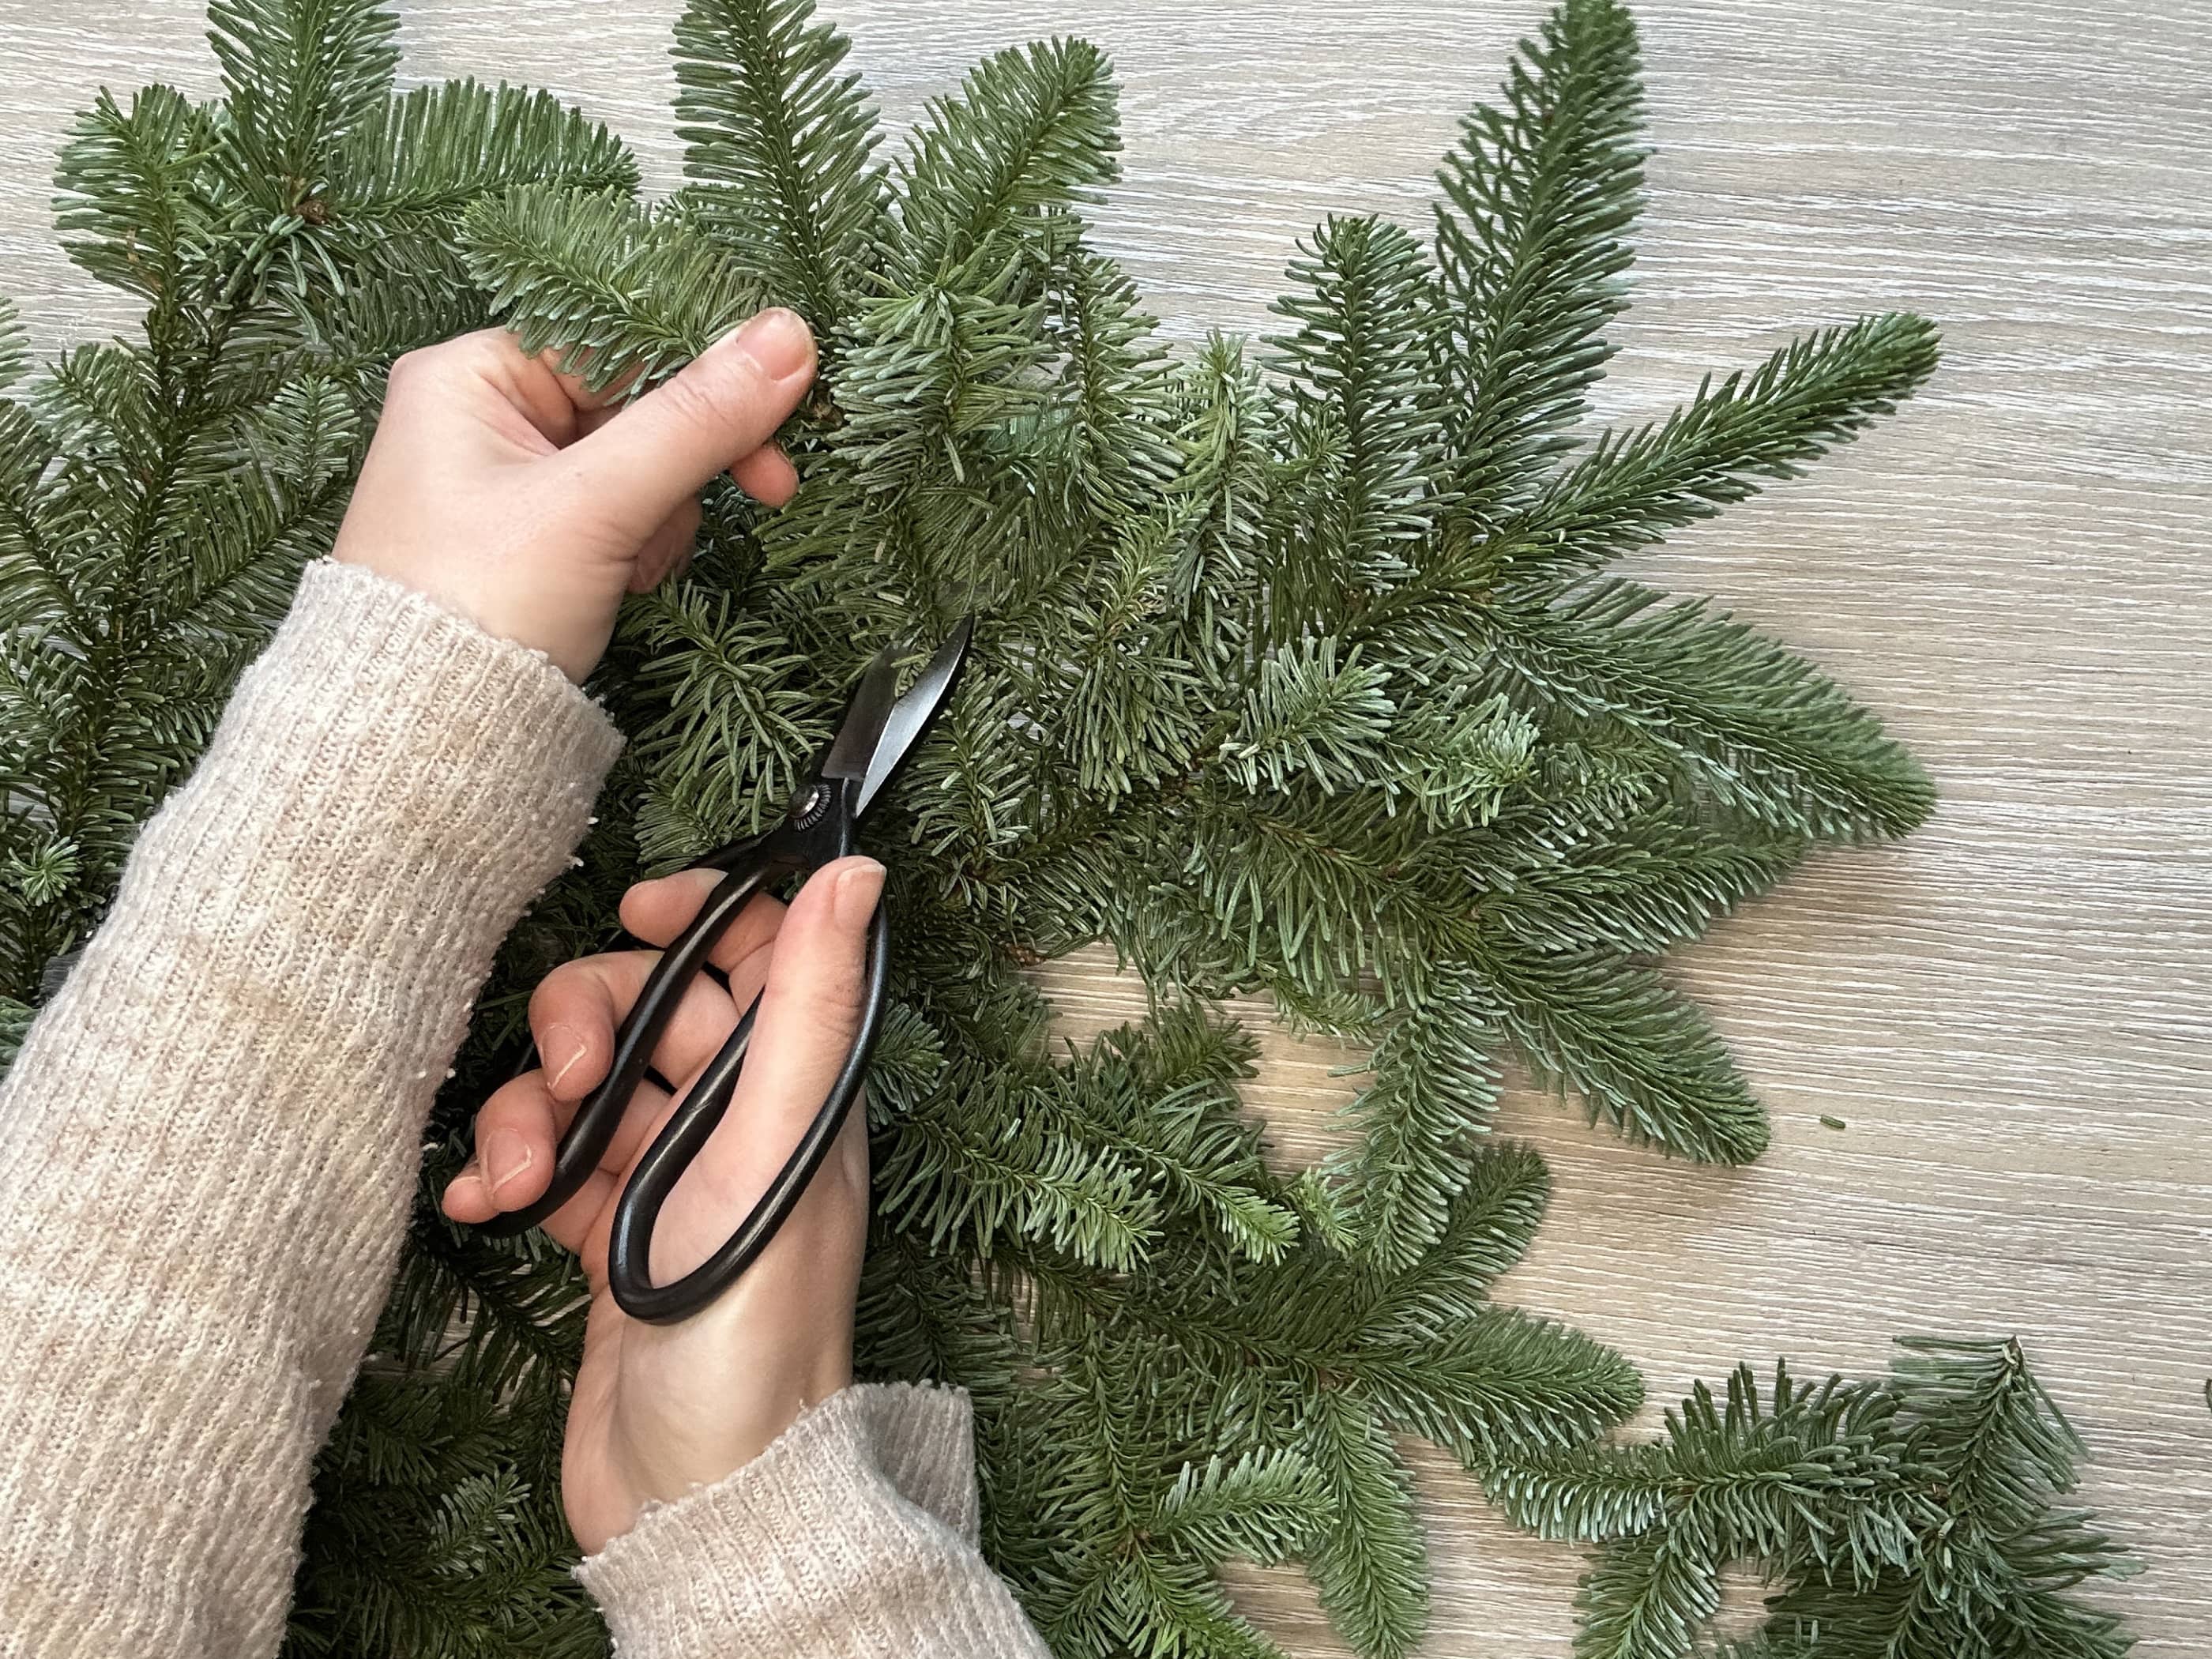
Stage 2: Prepare Your Foliage & Add To Your Wreath
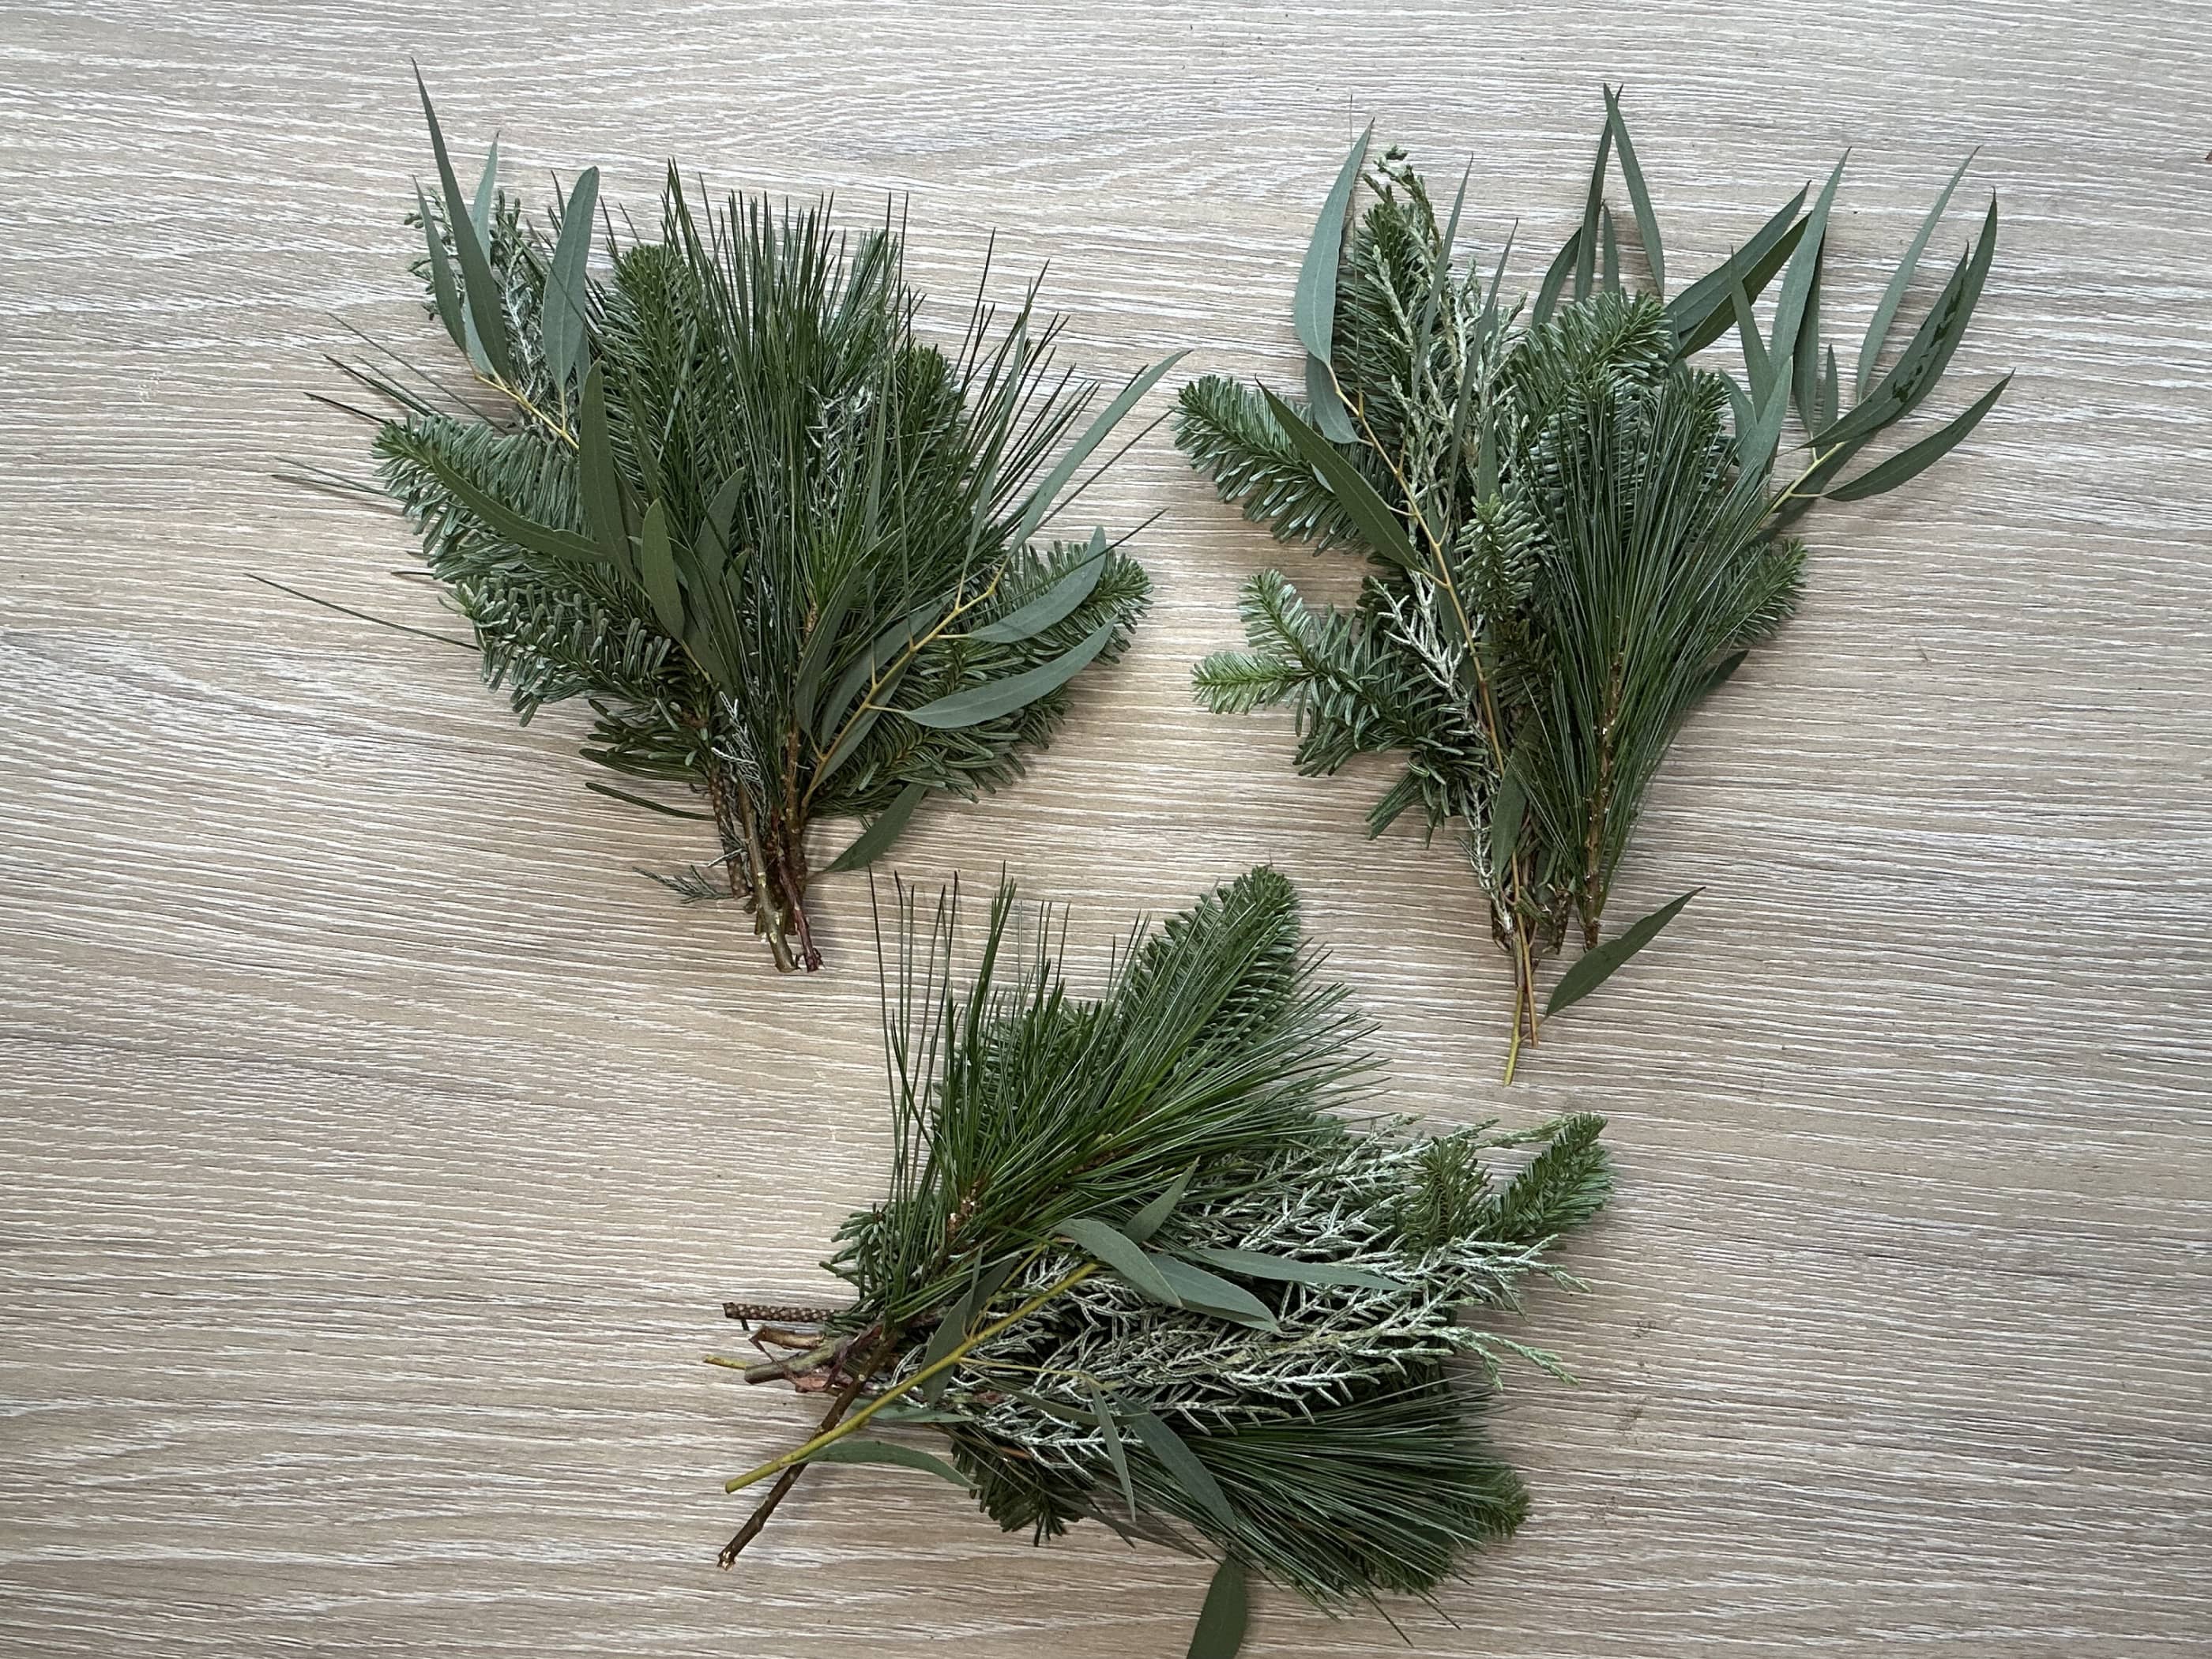
5. Take your selection of fresh foliage and start to trim each stem down into smaller pieces. You’re aiming for pieces of foliage that are roughly 10-15cm in length. Organise each type of foliage into small groups.
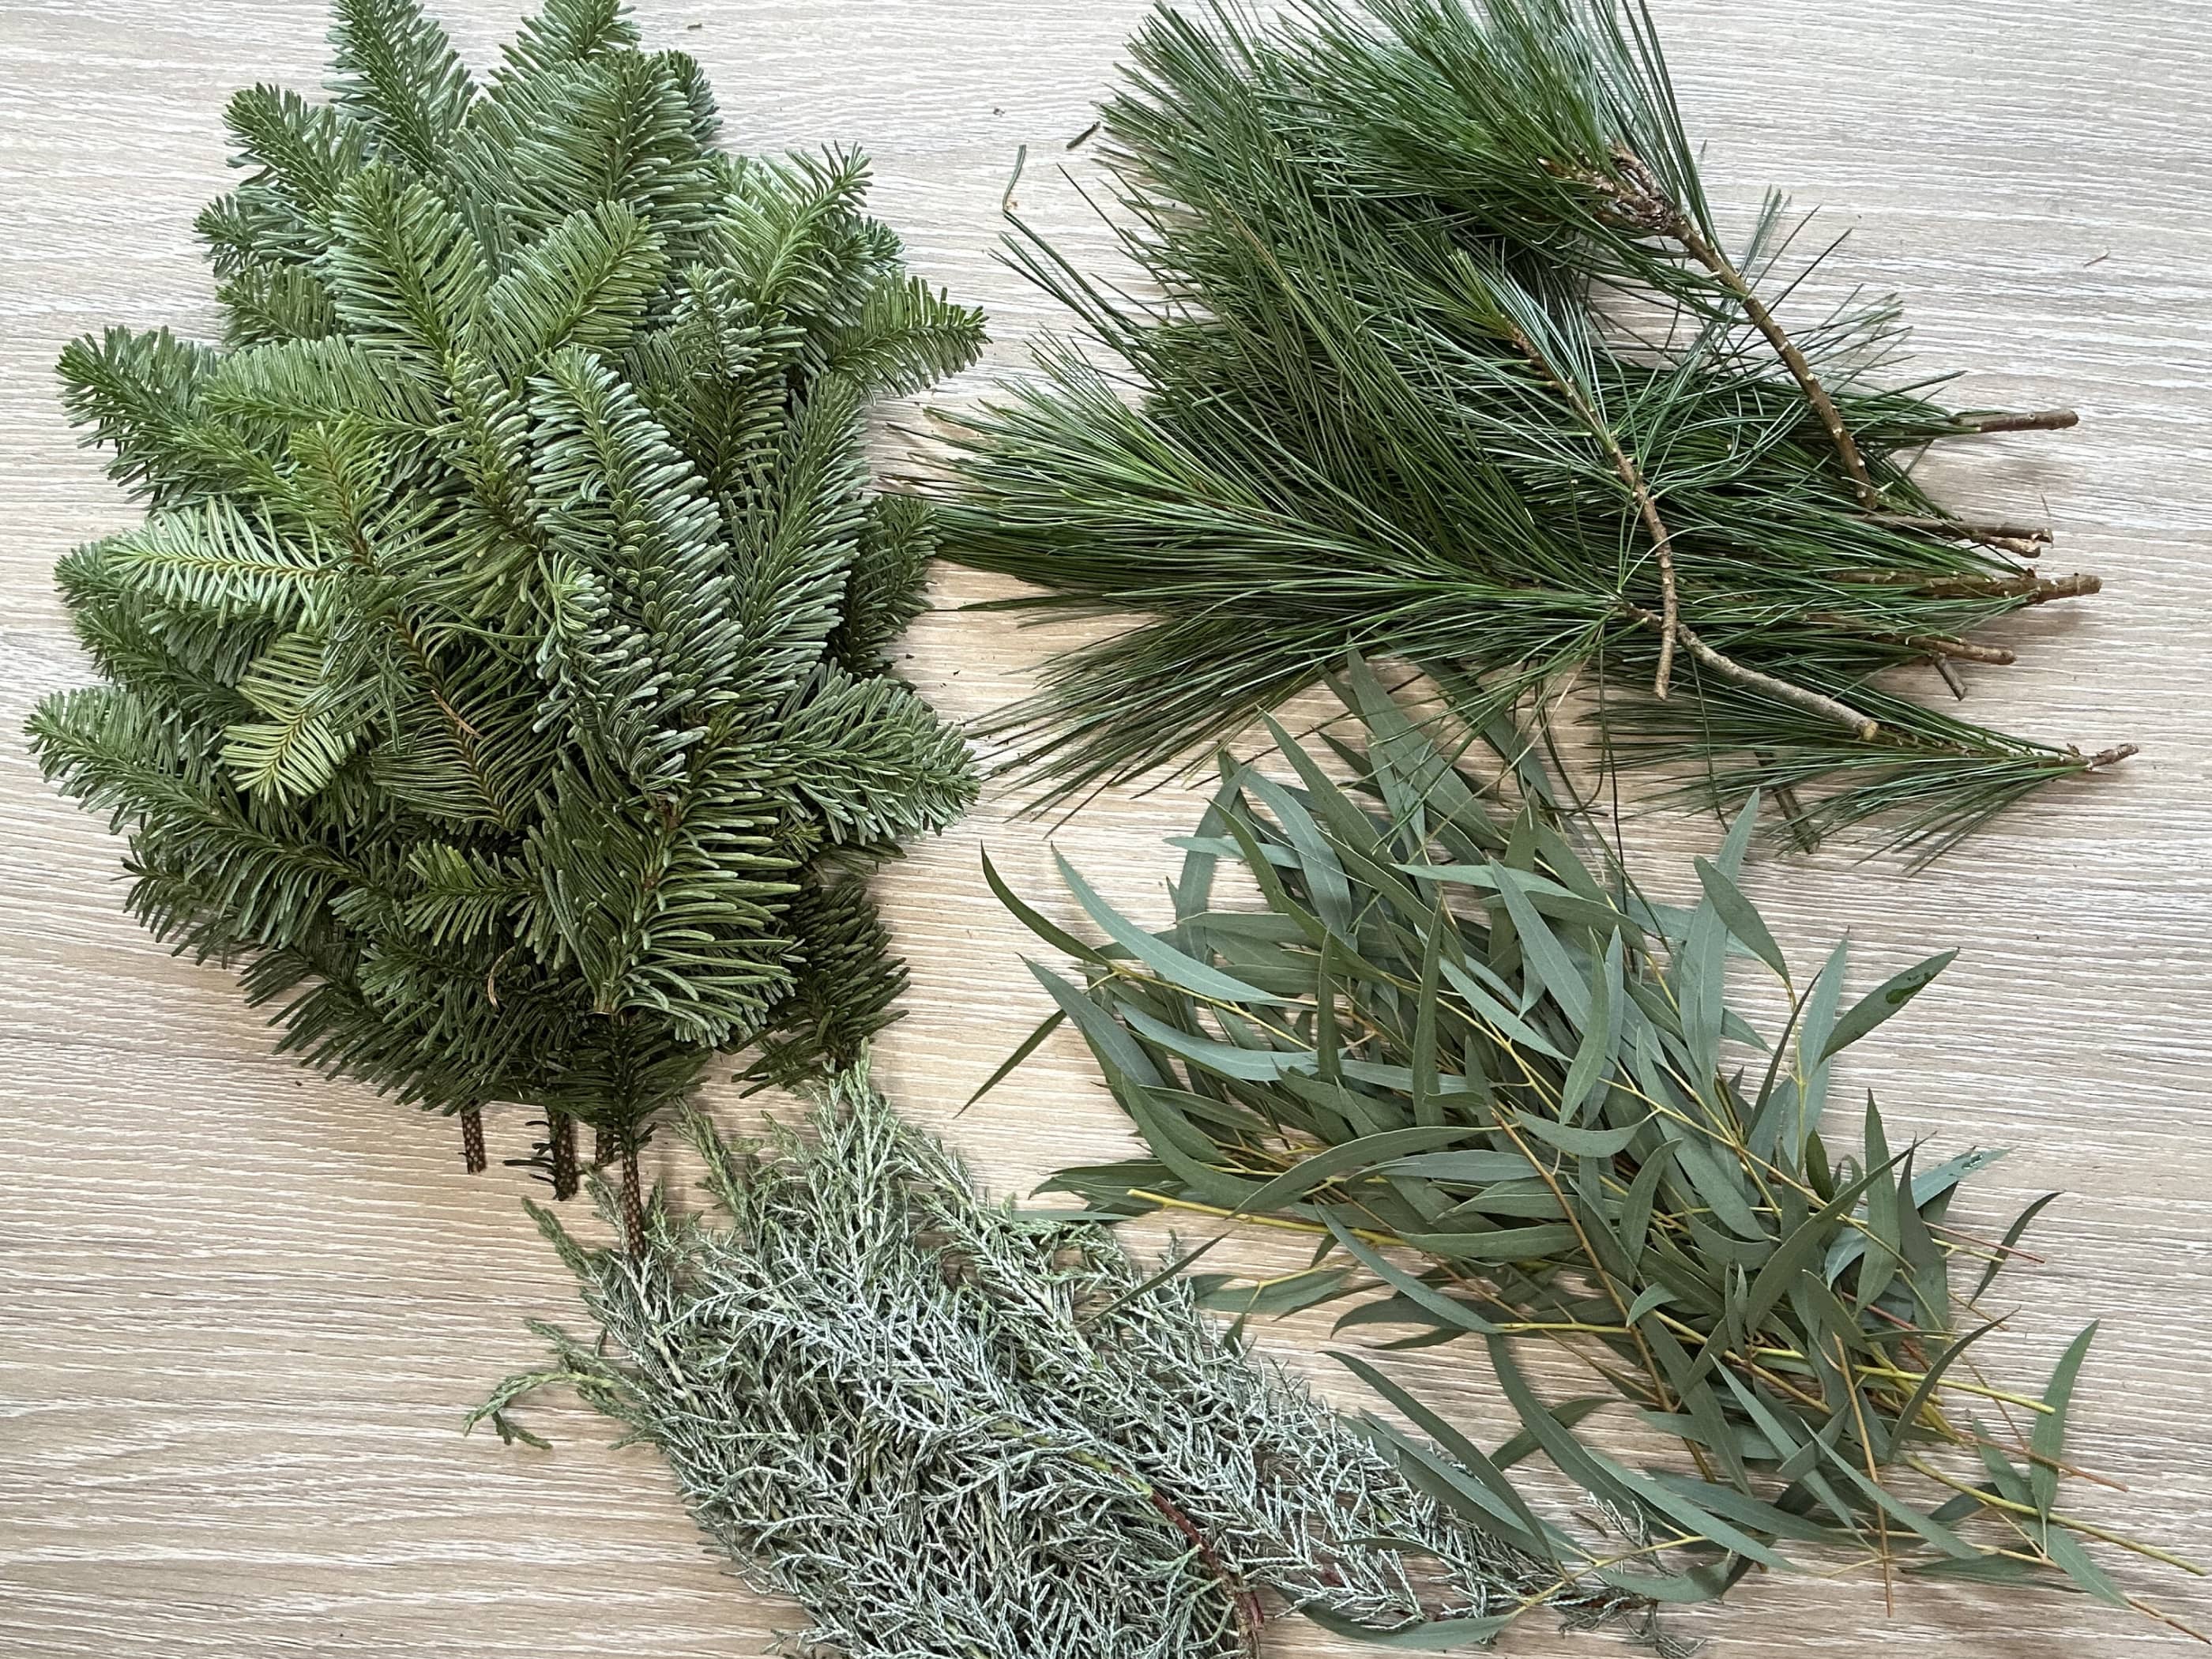
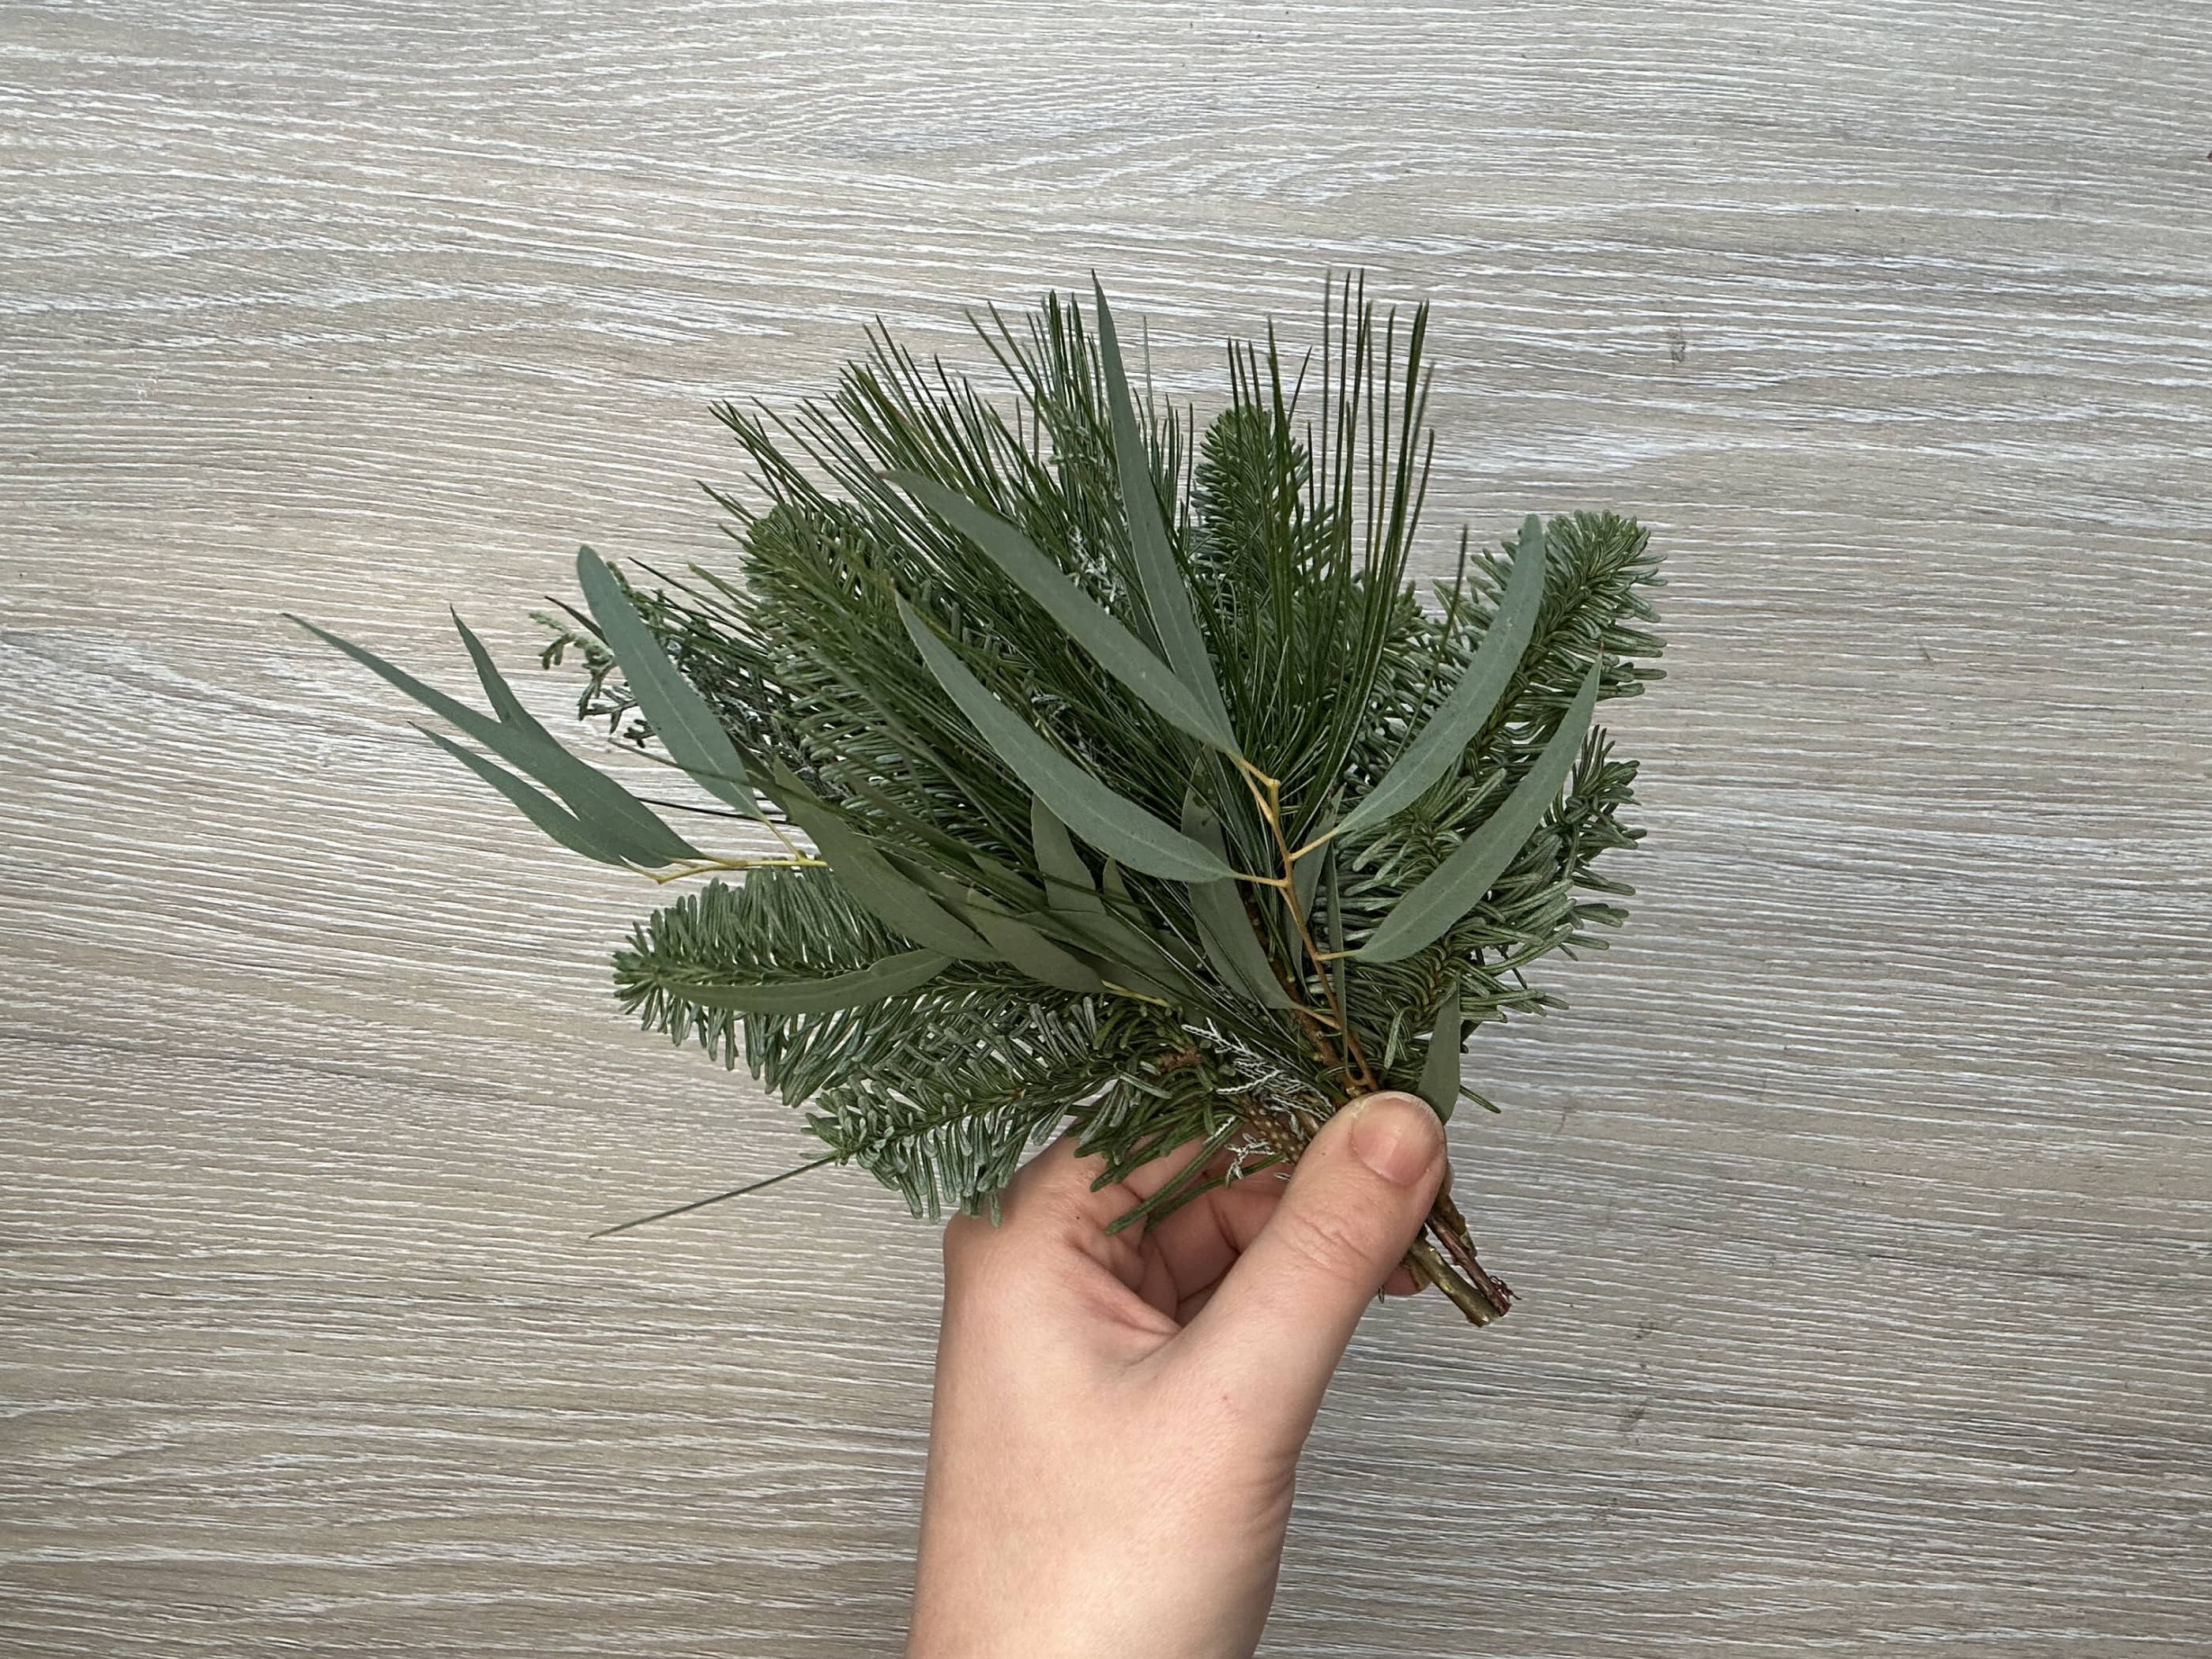
6. Once you have trimmed down all of your foliage and berries, start to make a small mixed bundle of different foliages. This will be the first bundle that we add to the wreath base. You will likely need about 5-6 pieces of foliage per bundle, but this depends on the type and size of each piece.
7. Next you will be adding your first foliage bundle to your wreath ring. Your bundle of foliage should have a gentle ‘fan’ shape whereby the outer edge (the edge that will sit on the outside of the wreath ring) includes longer pieces of foliage and the inner edge (the edge that will sit within the centre hole of the wreath) includes shorter pieces. The inner stems are kept short so the inner wreath ‘hole’ shape isn’t lost.
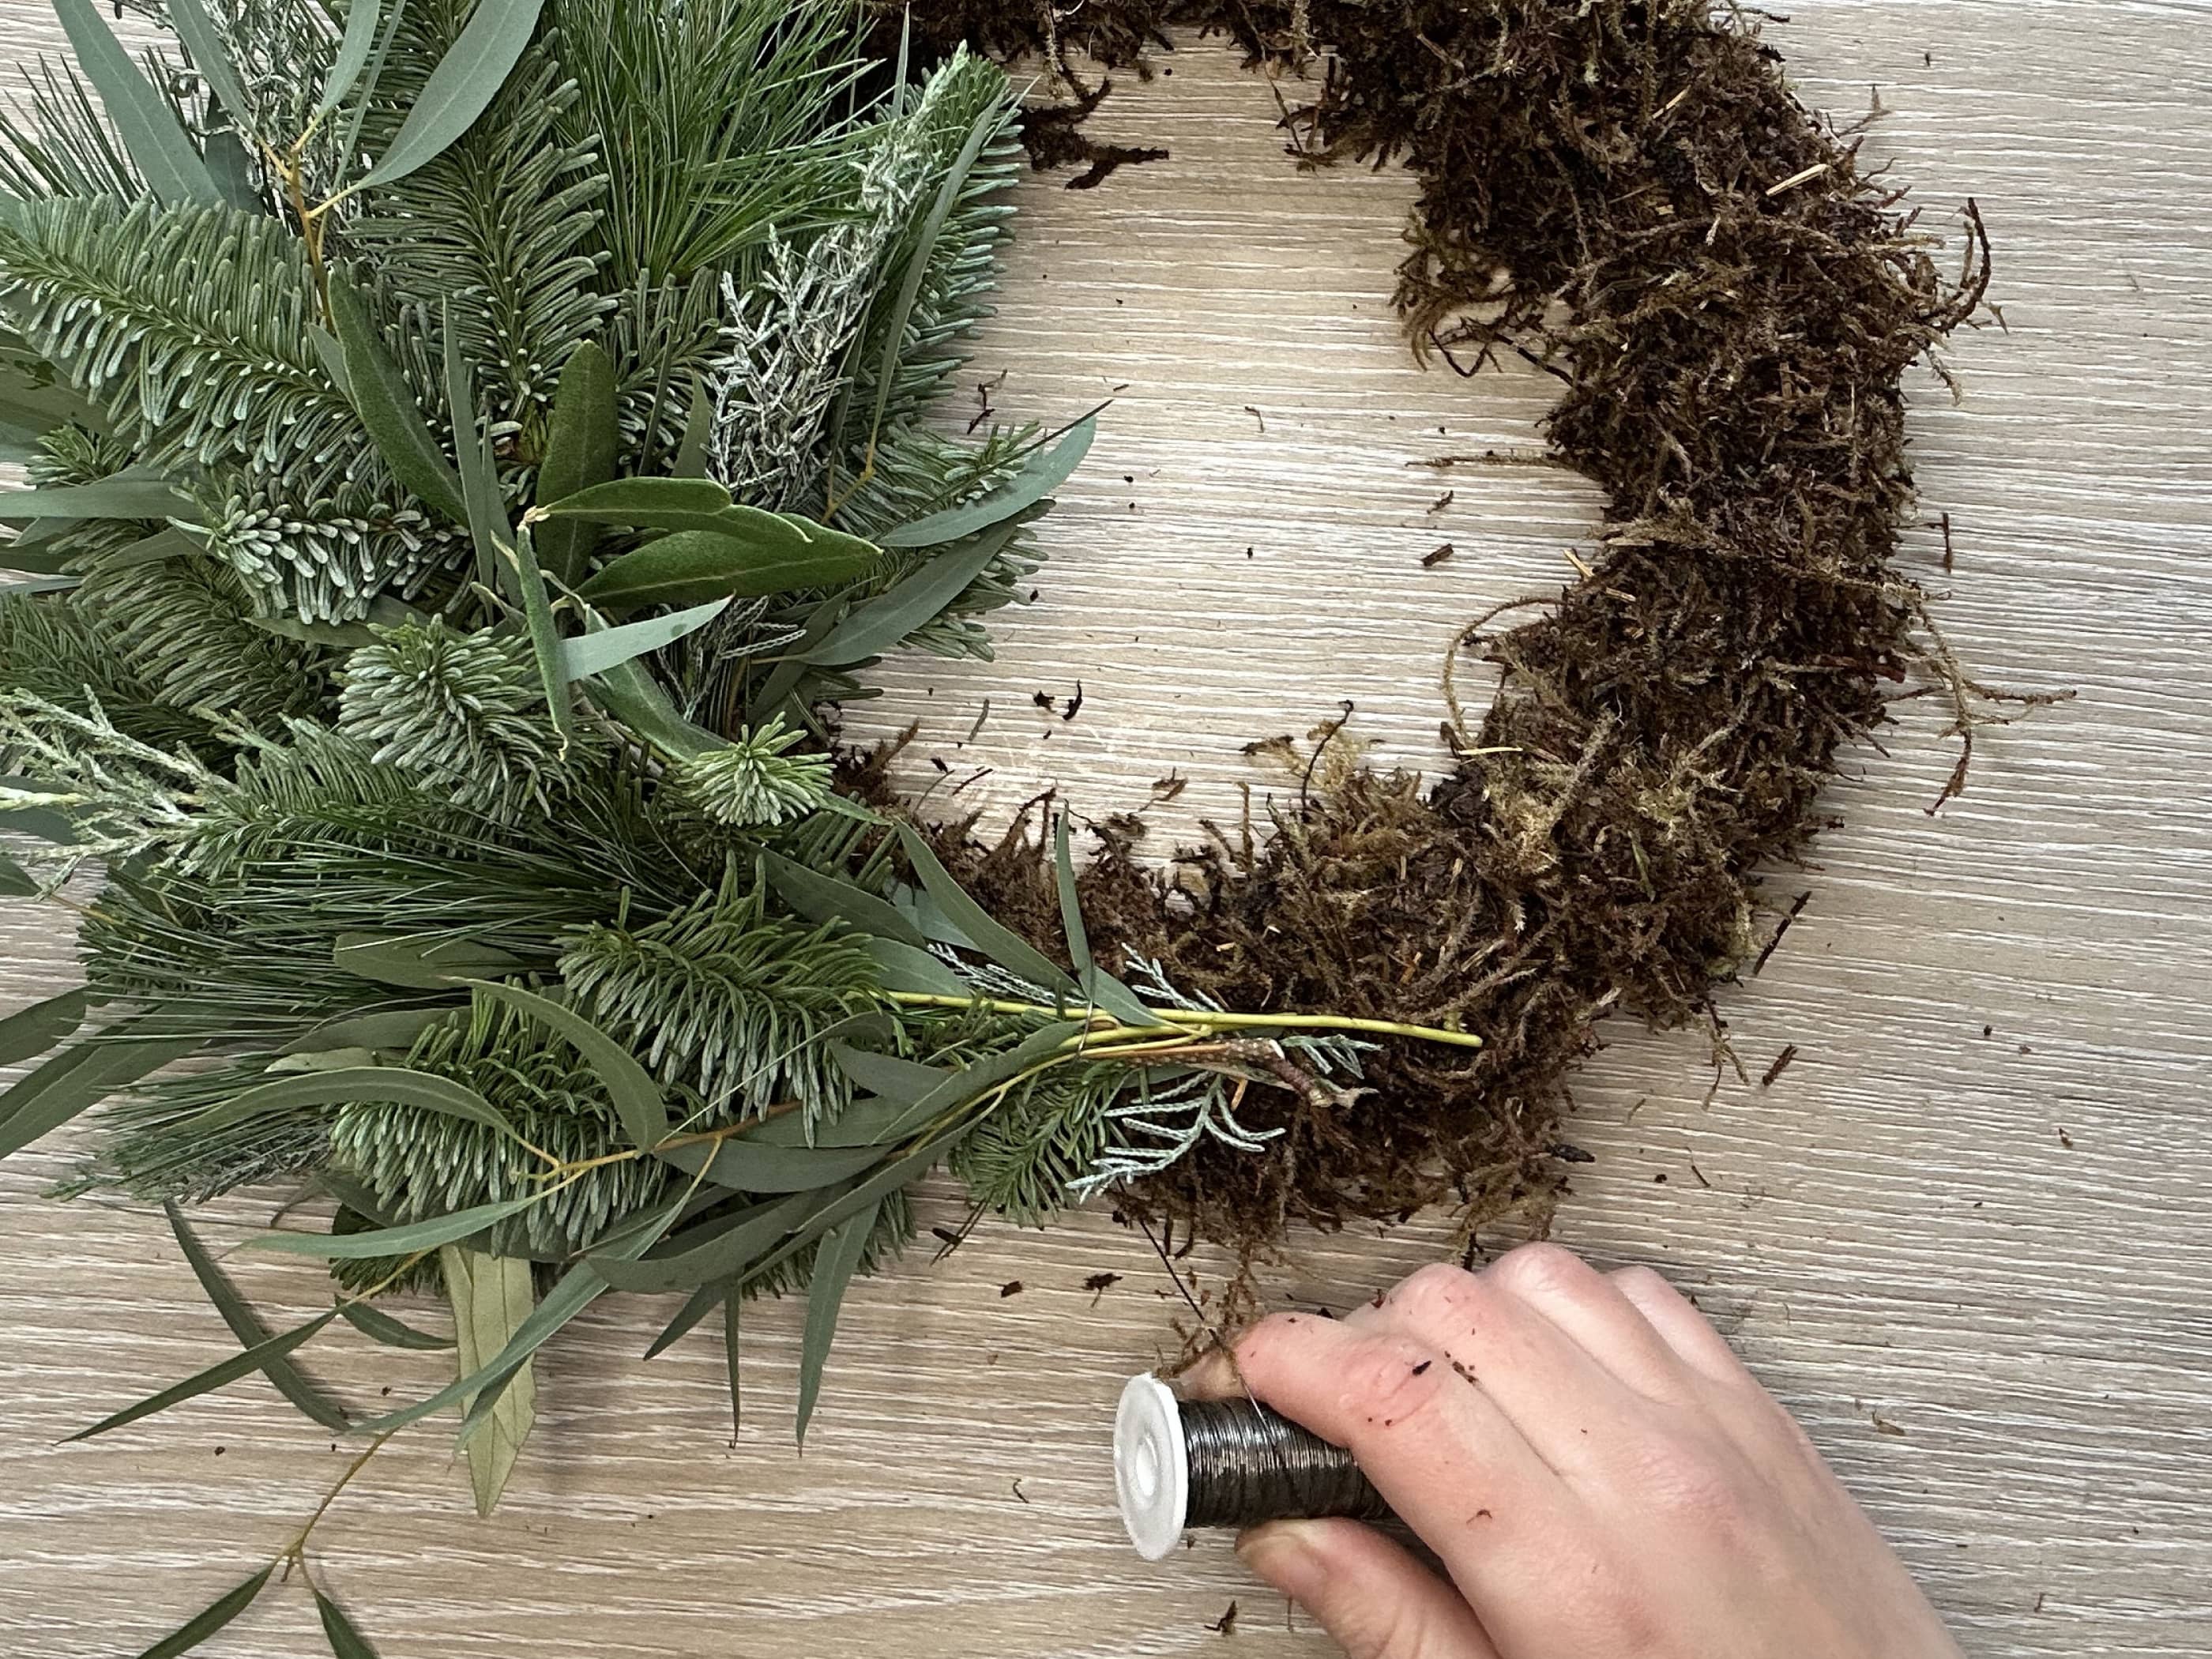
8. Once you’re happy with the shape of your foliage bundle, place it on the top of your wreath base, so that the bottom of the stems sit at the point where your reel wire is secured to the frame. From there, wrap the reel wire around the foliage stems and the wreath base a couple of times, pulling on the wire tightly to make sure the stems are secured to the base.

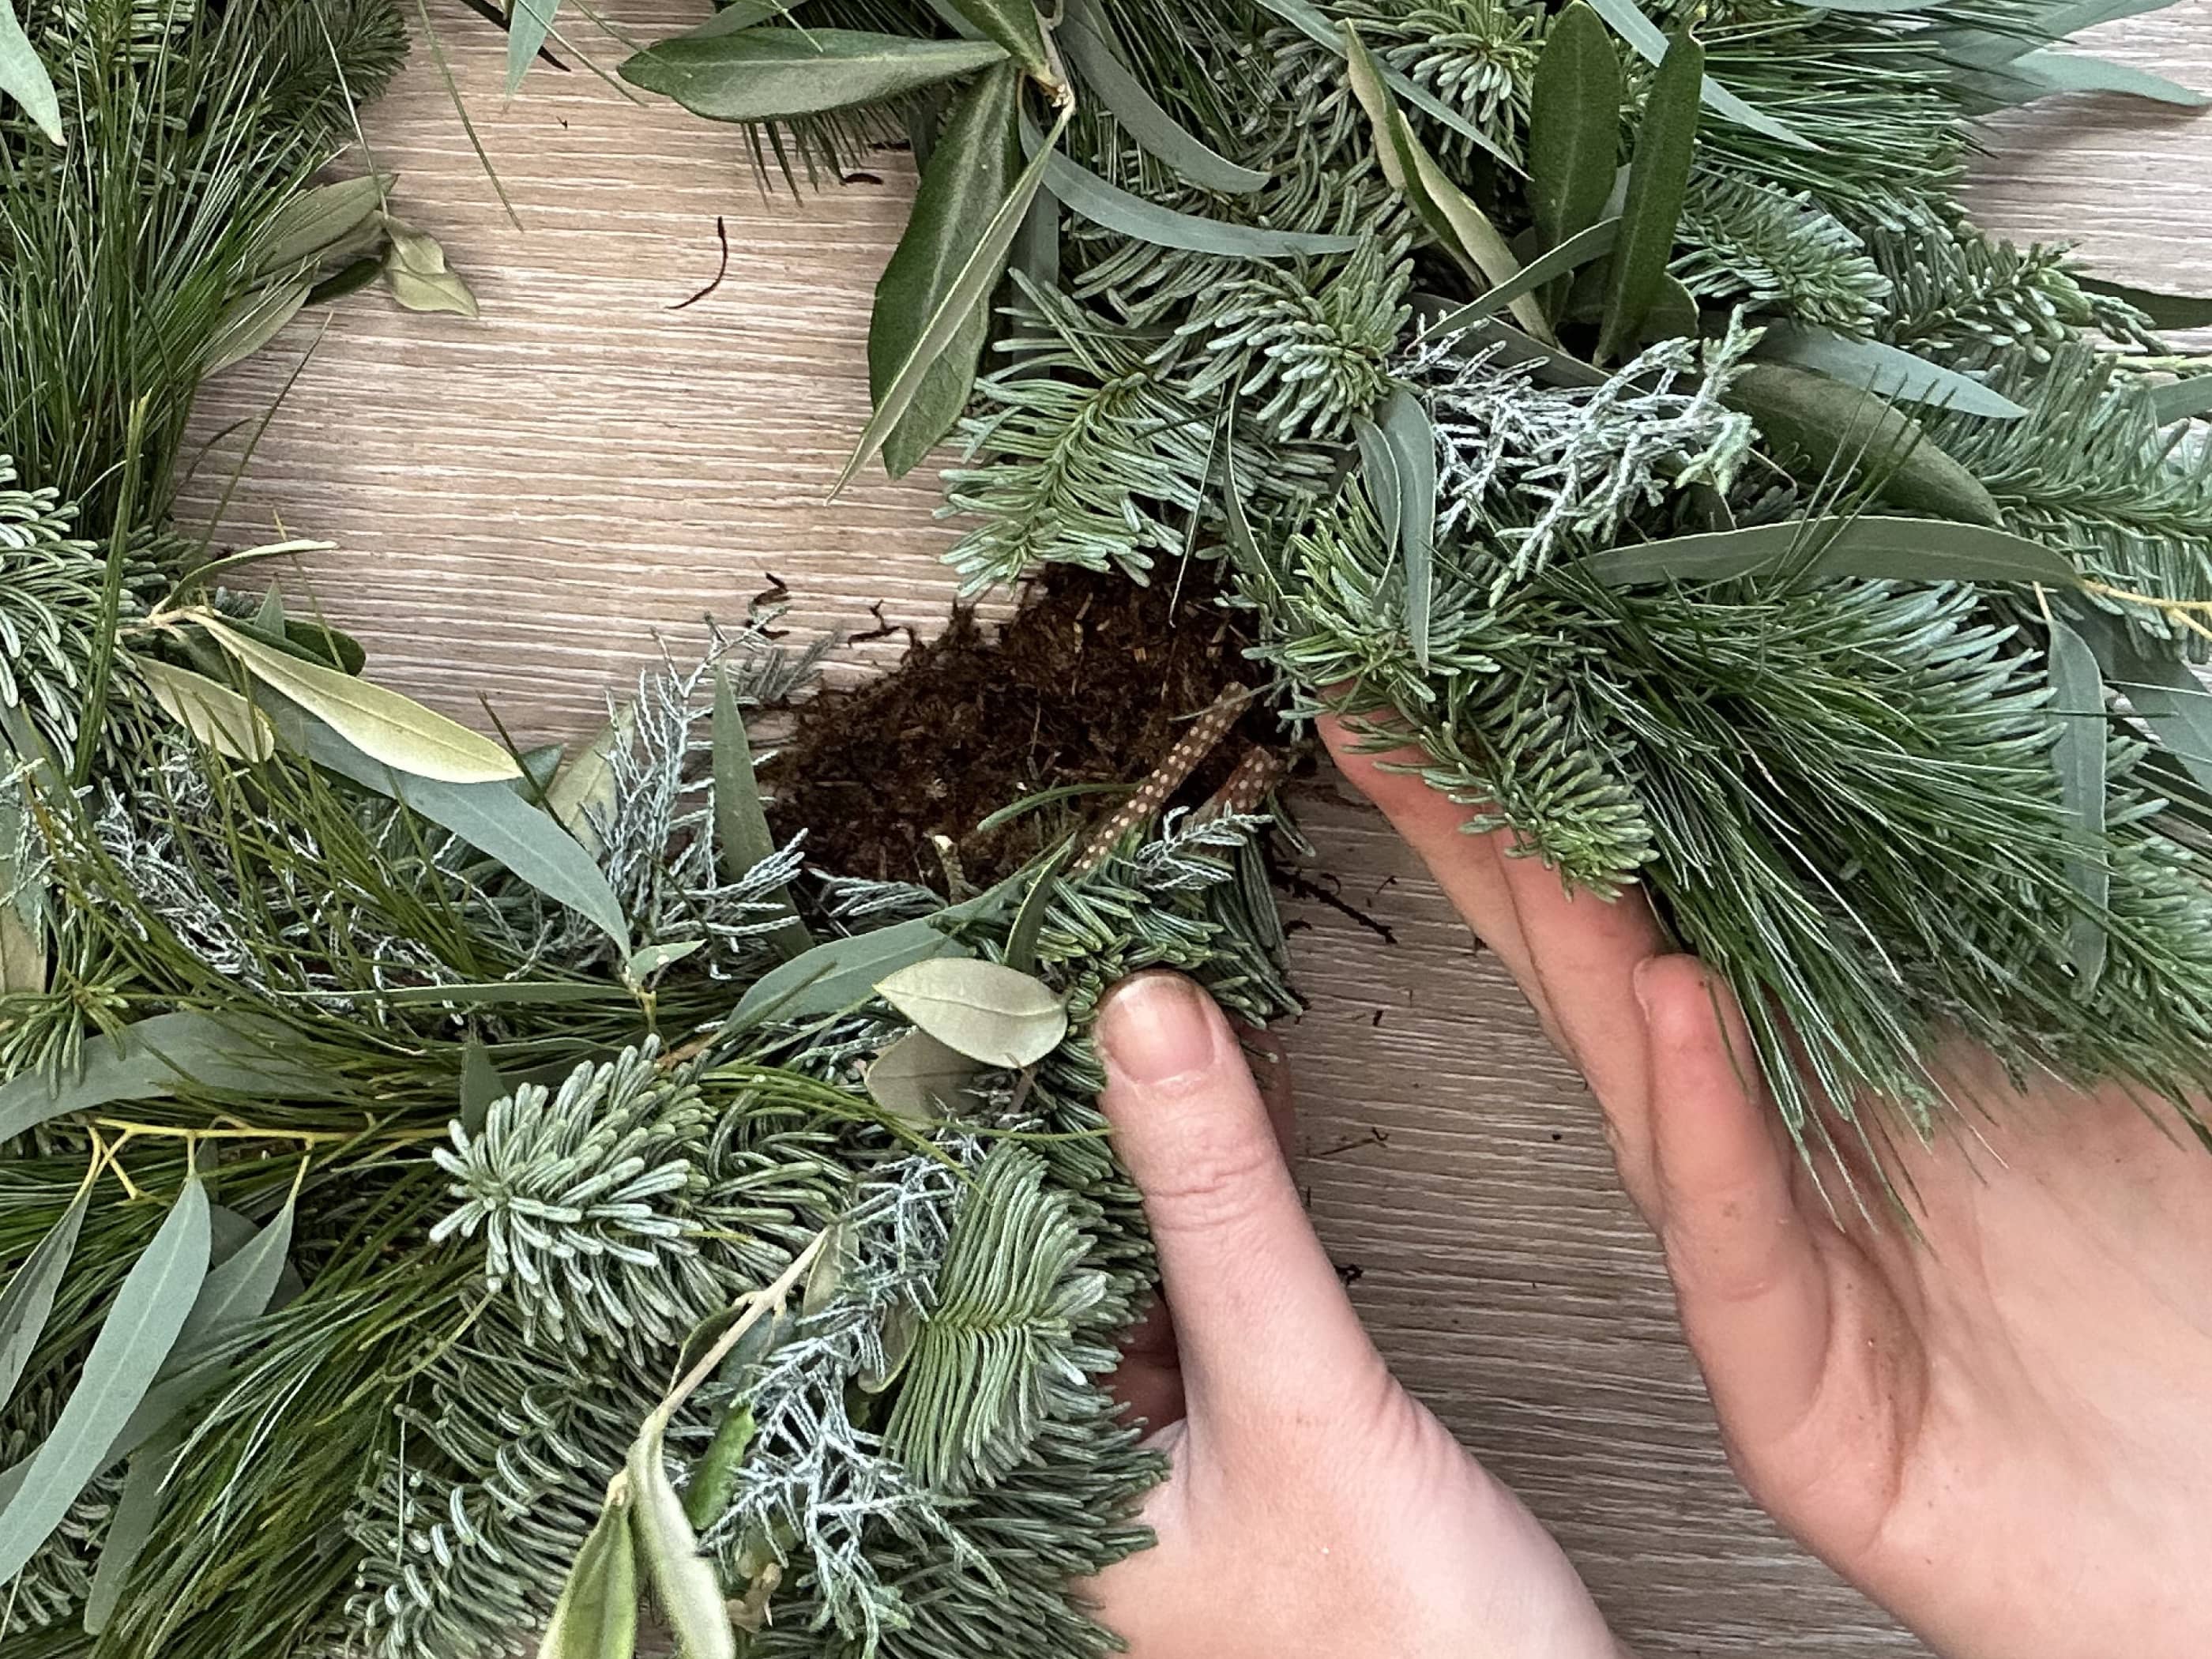
9. Now it’s time to add the next bundle of foliage. Again, arrange your bundle until you’re happy with the shape. Add the bundle to your wreath base, overlapping it over the stems of the first bundle, so that the foliage hides the stems of the first bundle.
10. Work your way around the wreath, adding your small bundles of foliage in the same way. You may want to alternate the placement of the bundles. If you add one directly on top of the wreath ring, you could add the next pointing slightly towards the outside or inside of the wreath ring. This ensures an even coverage all the way around the base.
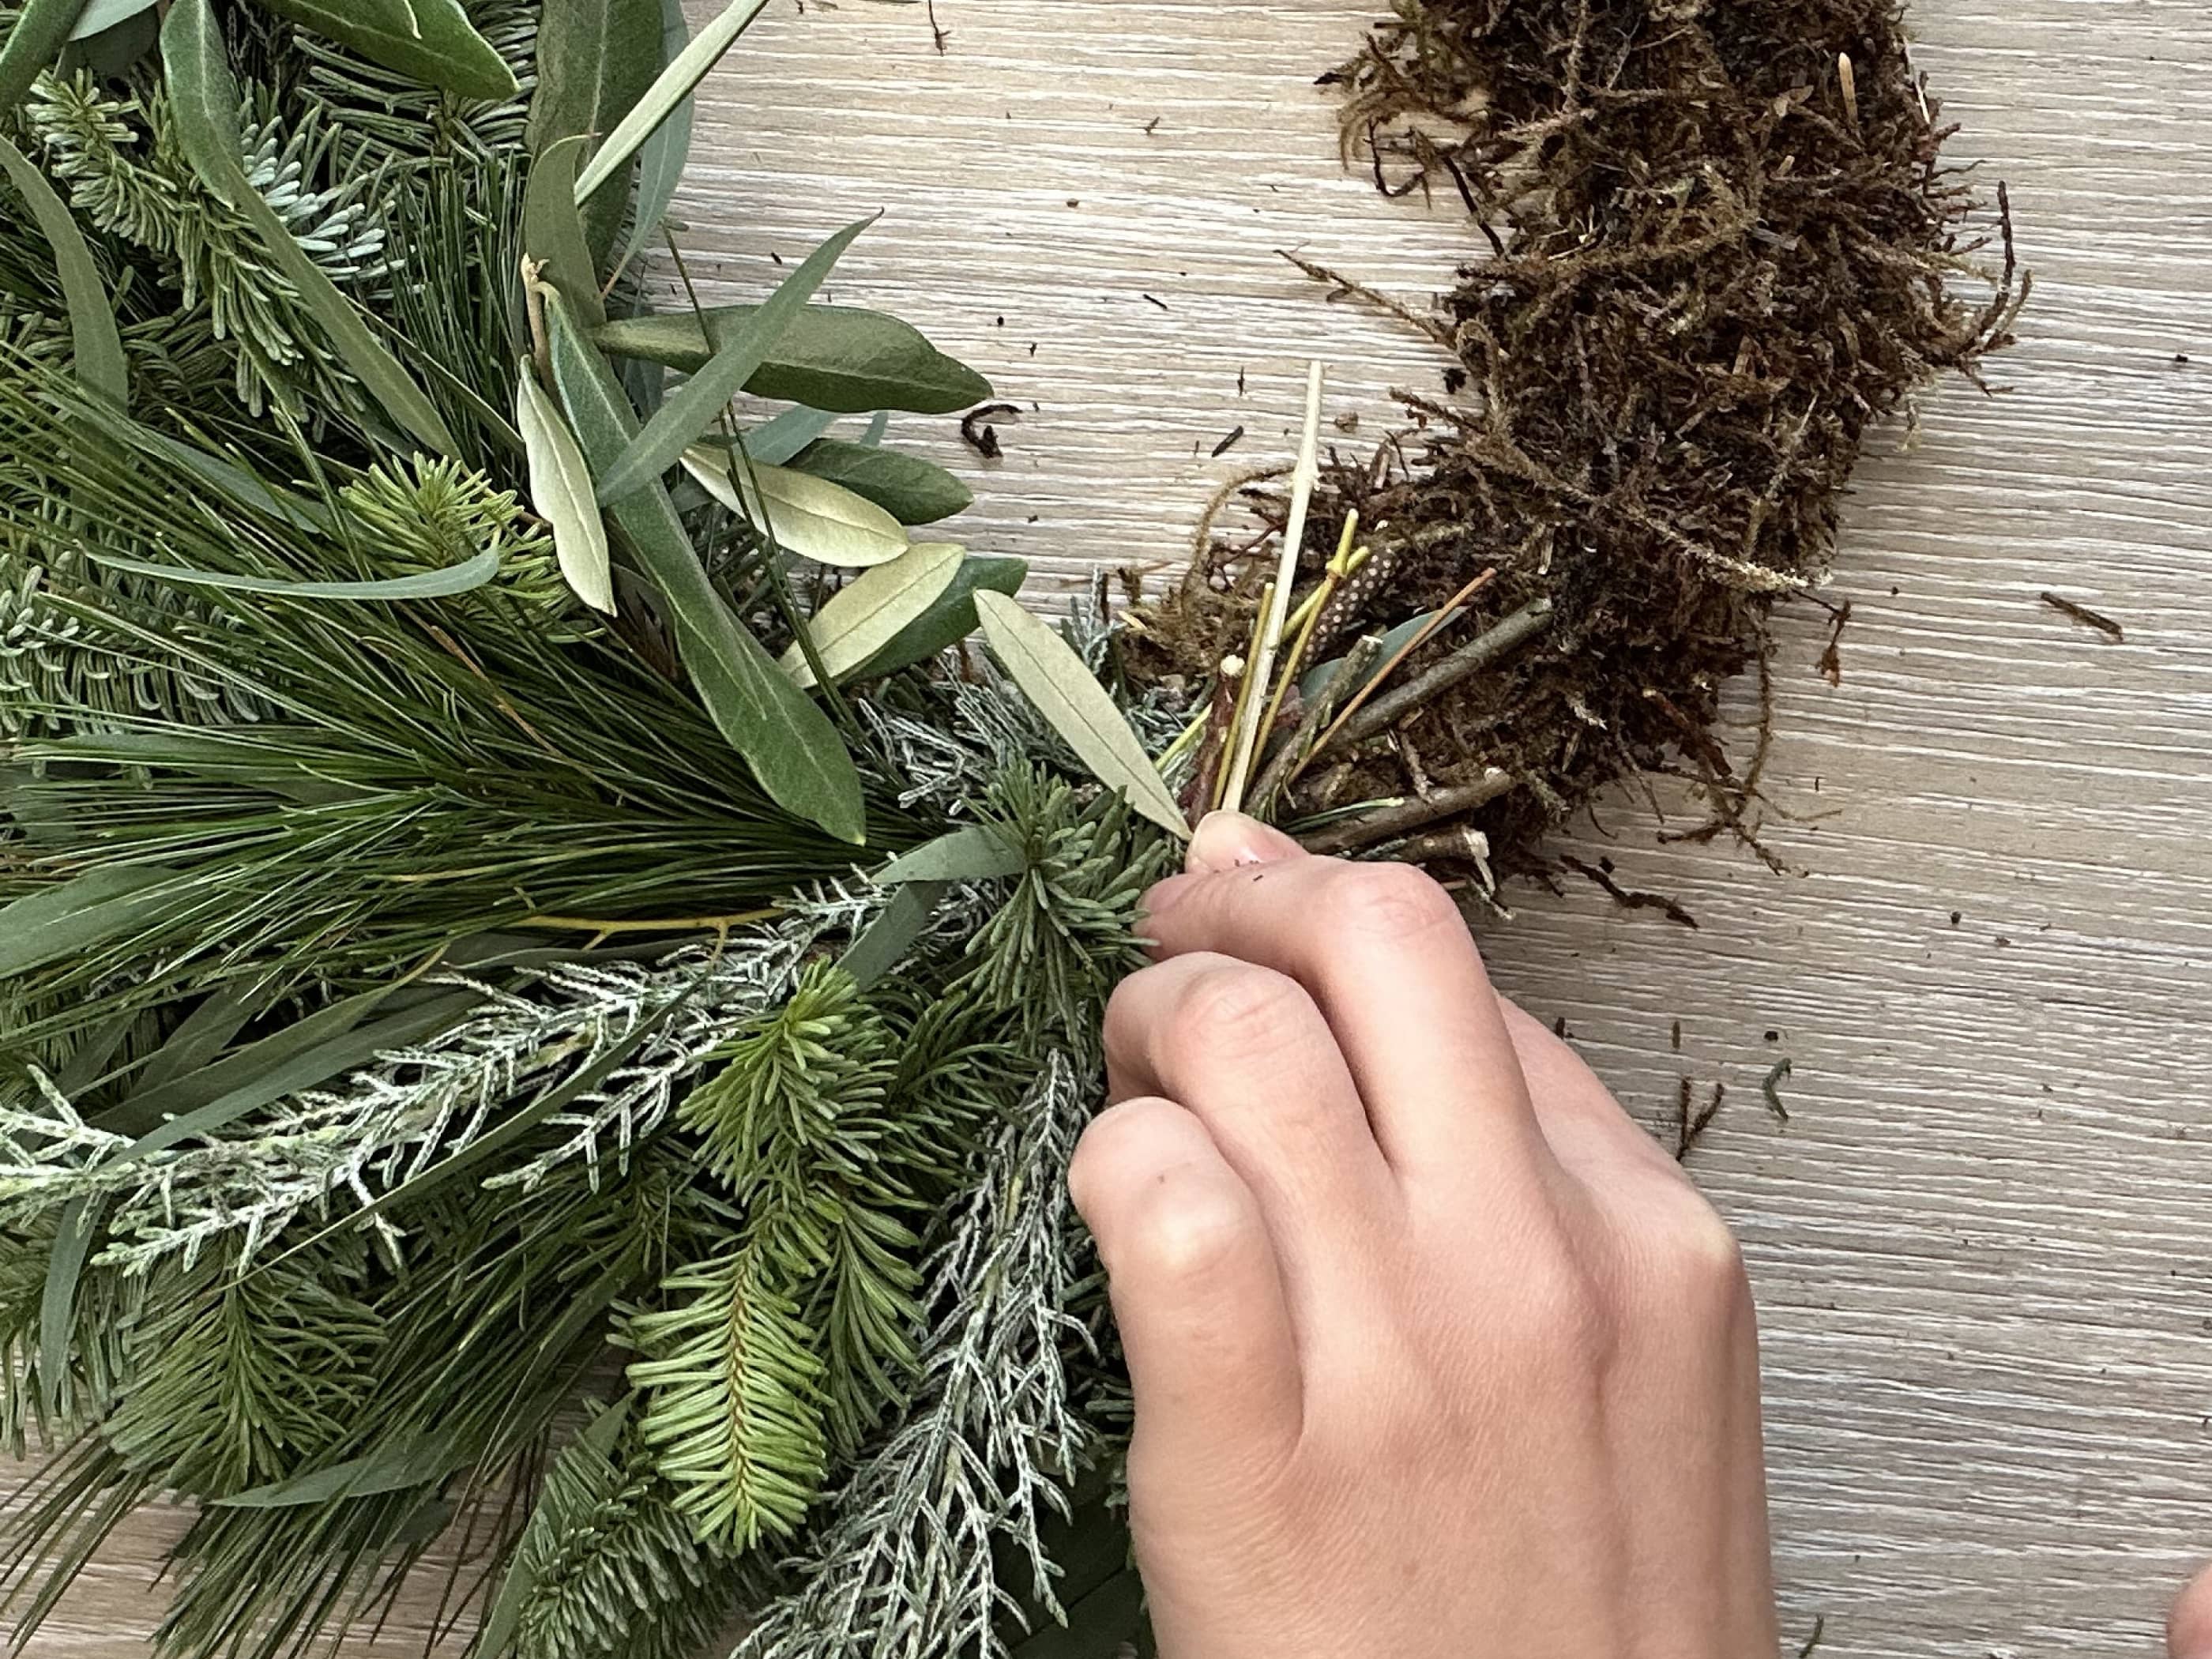
11. When it comes to adding the last bunch of foliage, it will be slightly tricky. You’ll want to lift up the very first bundle that you added at the start, and slide the final bundle underneath it so that you have no gaps in the wreath. Once the final bundle is secured tightly, you can cut the wire off of the reel and poke the excess reel wire back into the moss.
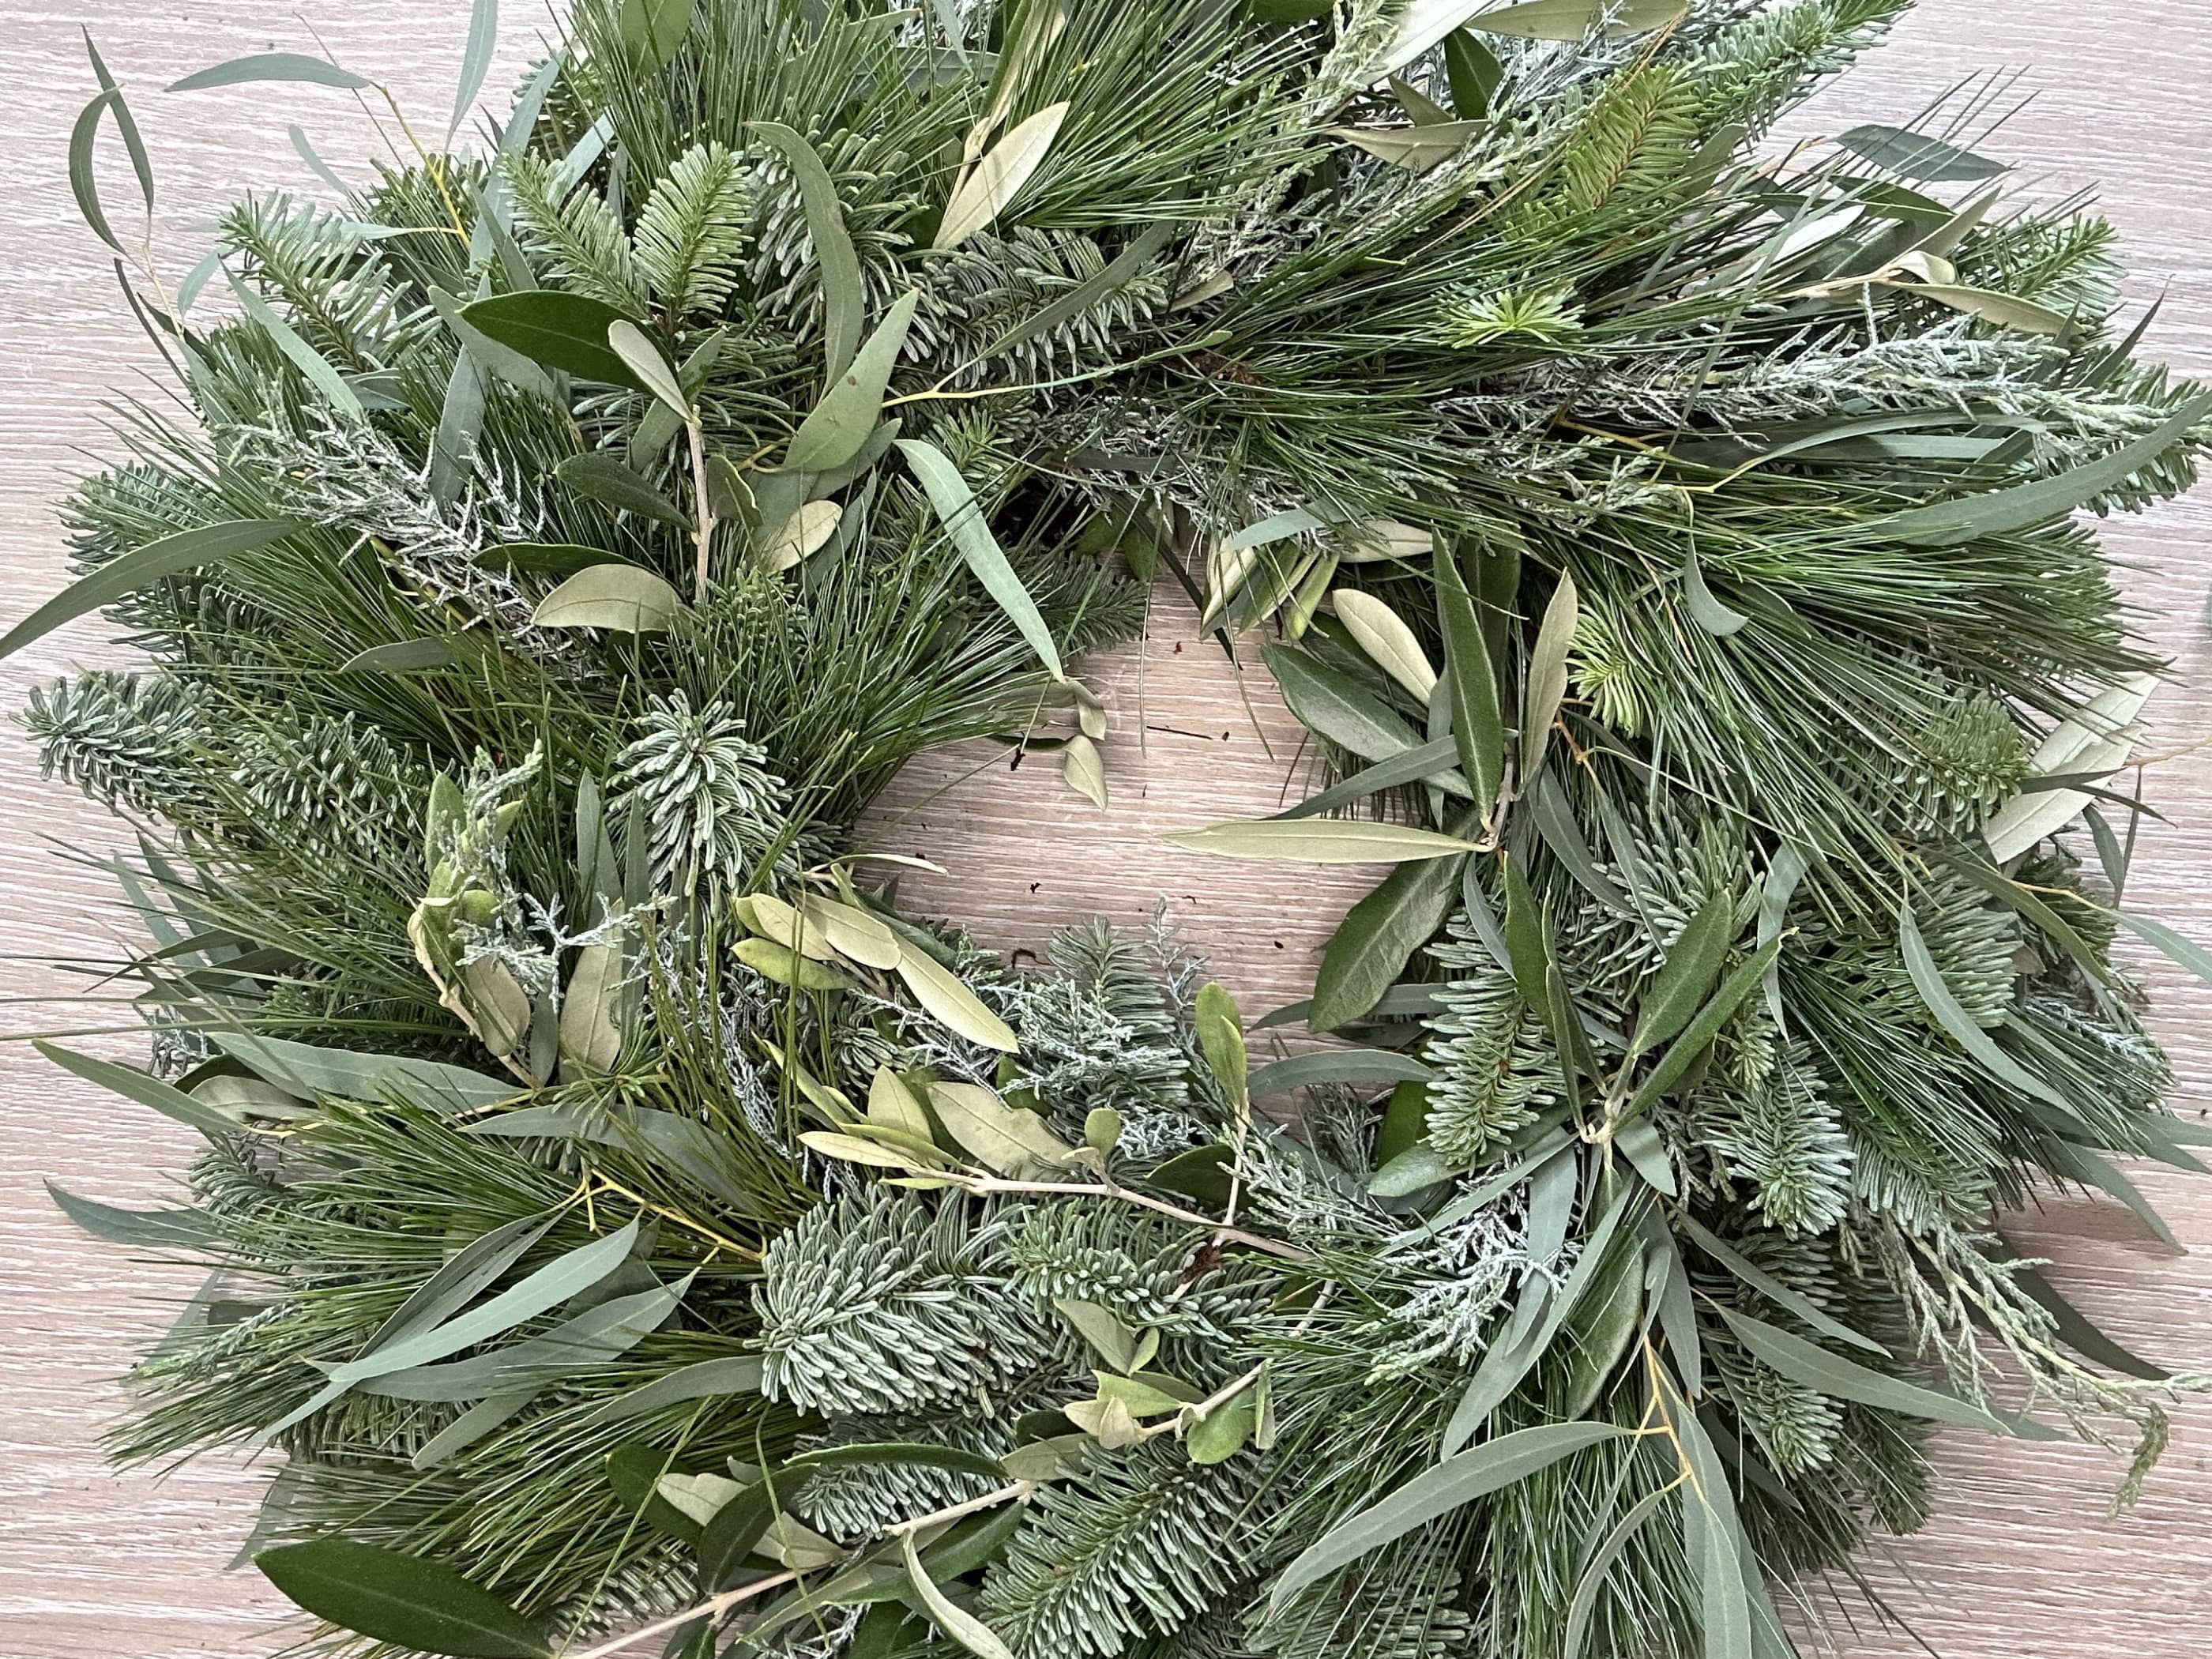
Stage 3: Wiring & Attaching Your Decoration
Now your wreath base has been ‘greened up’, it’s time to prepare the finishing touches! Take your decorations (whether it’s pine cones, oranges, limes etc) out of the packaging, along with the stub wires provided.

Wiring an apple, lemon or orange slice
For apple, lime, lemon and orange slices, the method to attach them is the same. Push the stub wire through your fruit slice, (close to the rind of the orange/skin of the apple) until you have one short end and one long end of wire either side of the fruit. Then, bring the two pieces of the wires together and twist them together at the base near the fruit.
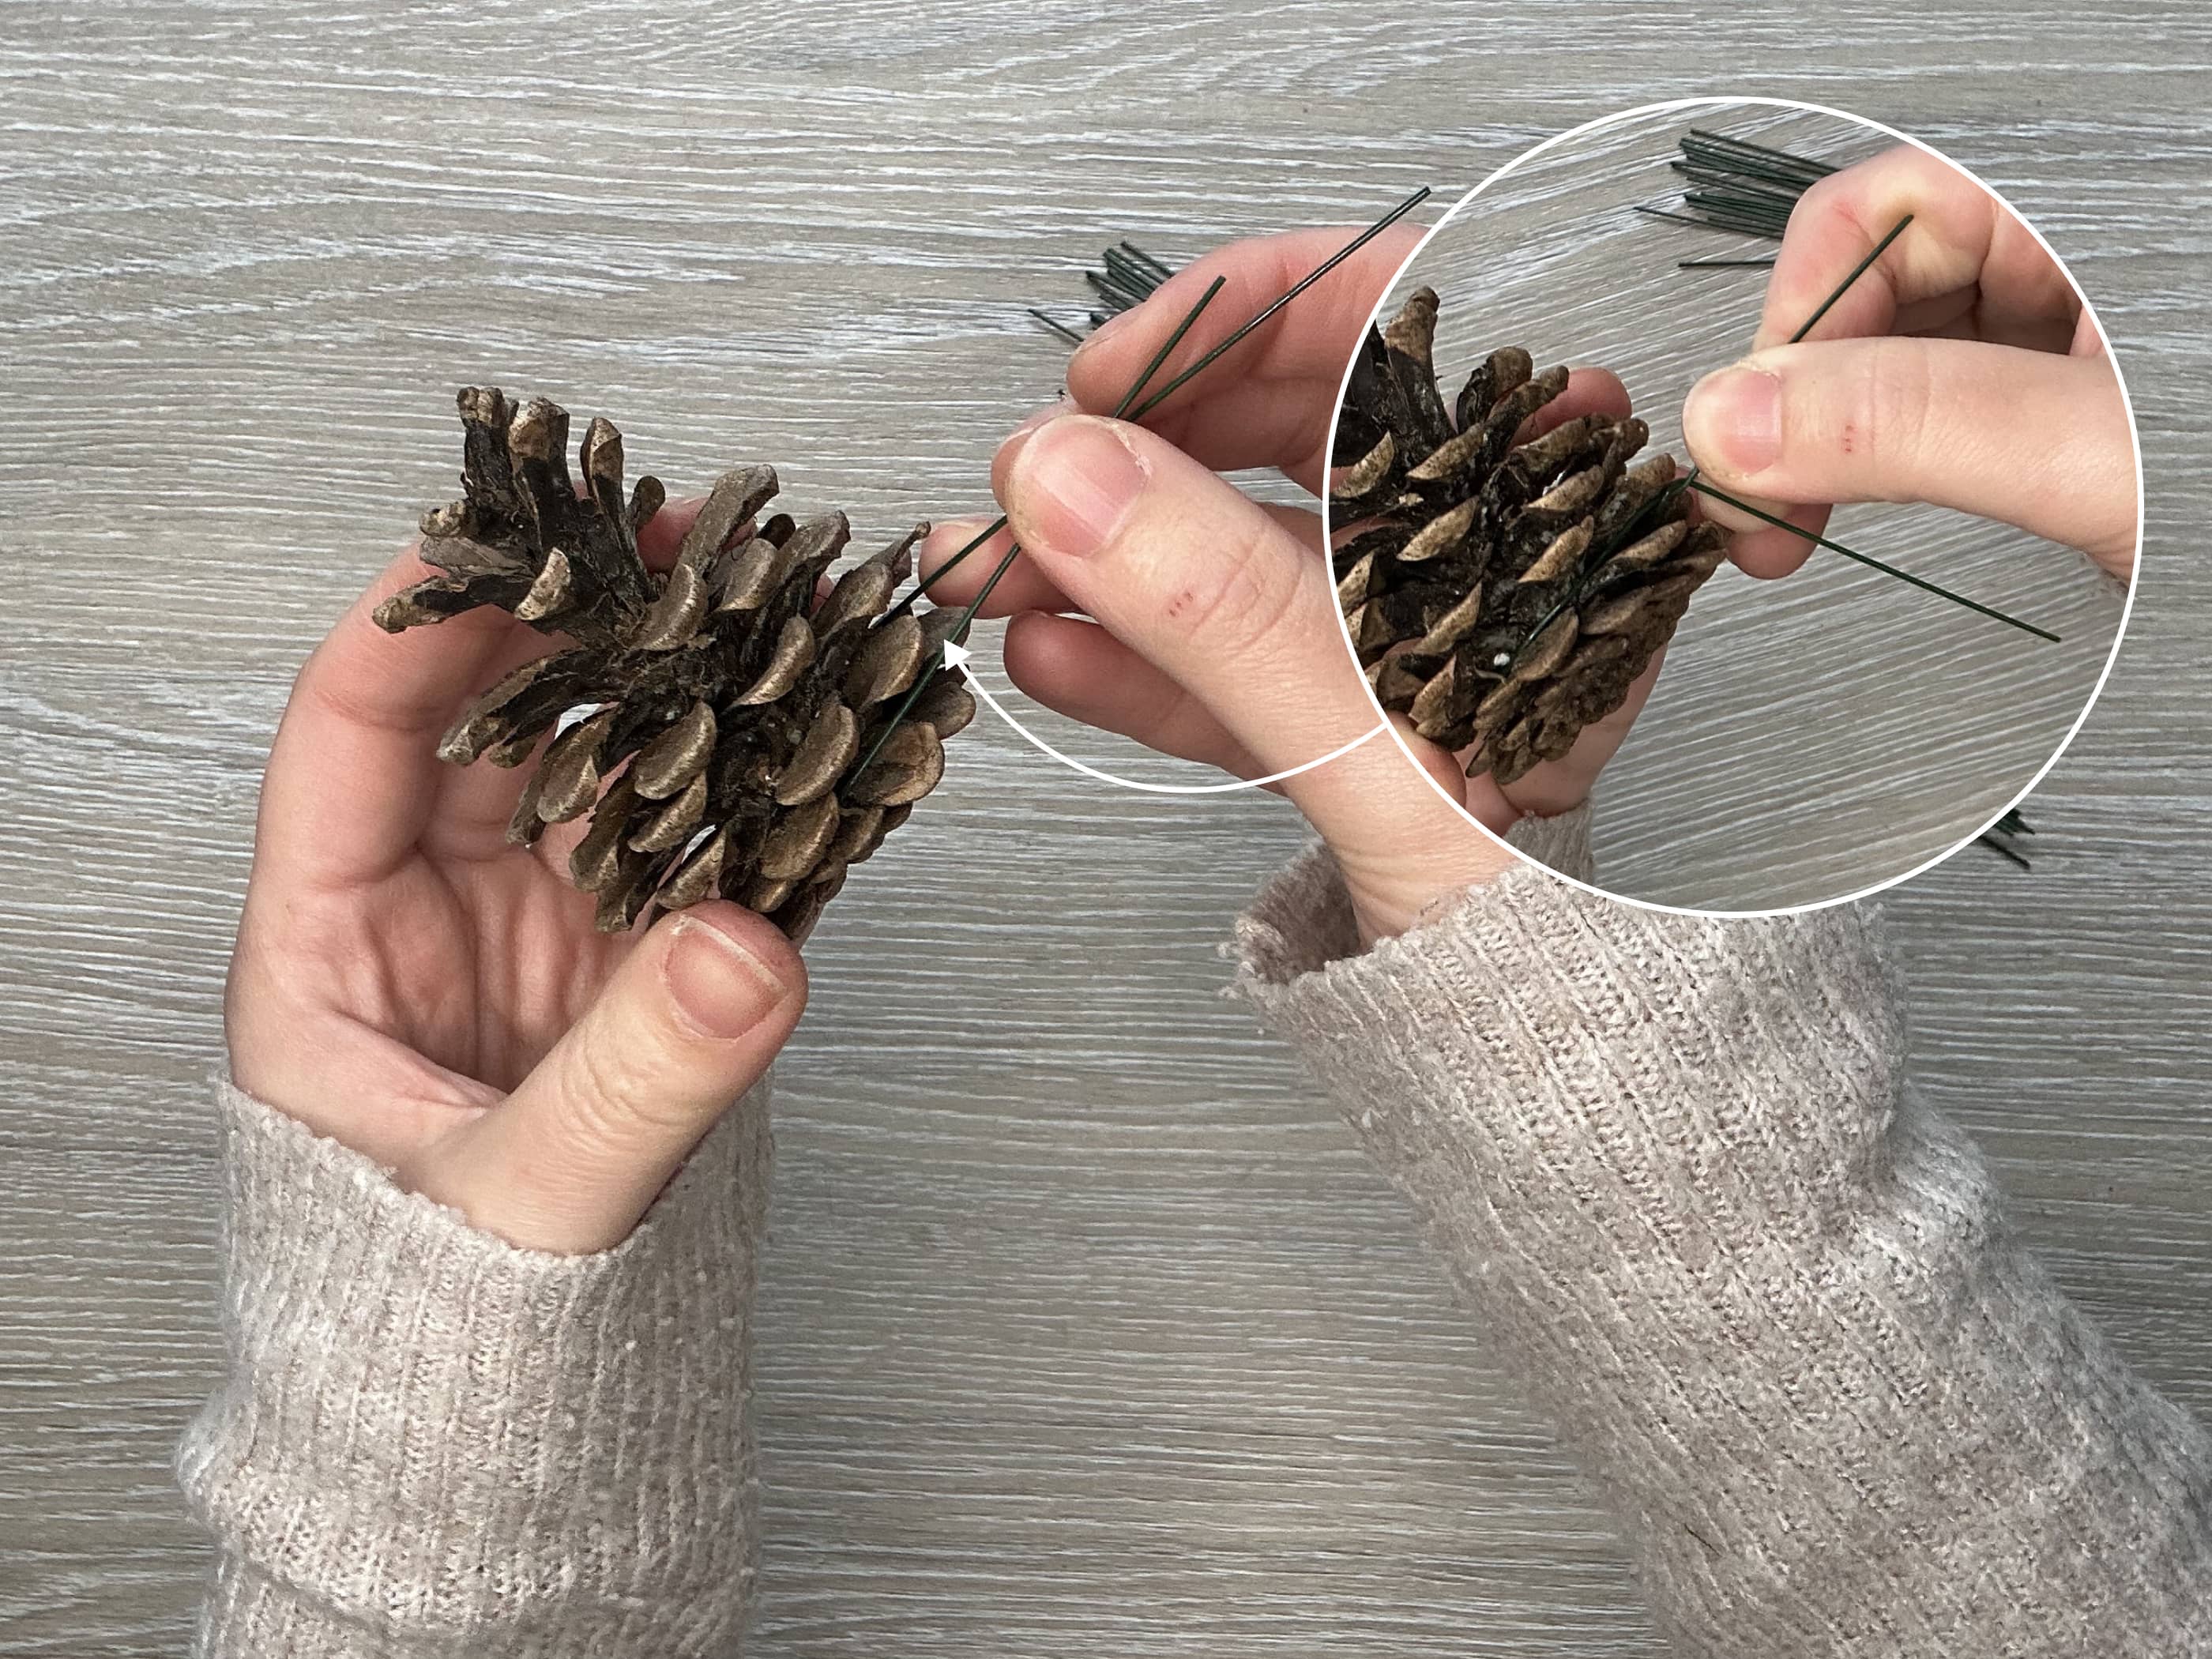
Wiring a Pinecone
Taking a stub wire, wrap it once around the pinecone, threading it through the gap between the first two layers of the pinecone’s scales, near the base of the pinecone. Once you have wrapped the wire around the pinecone and the two ends of the wire meet, twist one wire around the other a couple of times at the base of the pinecone. This secures the wire to the pinecone.
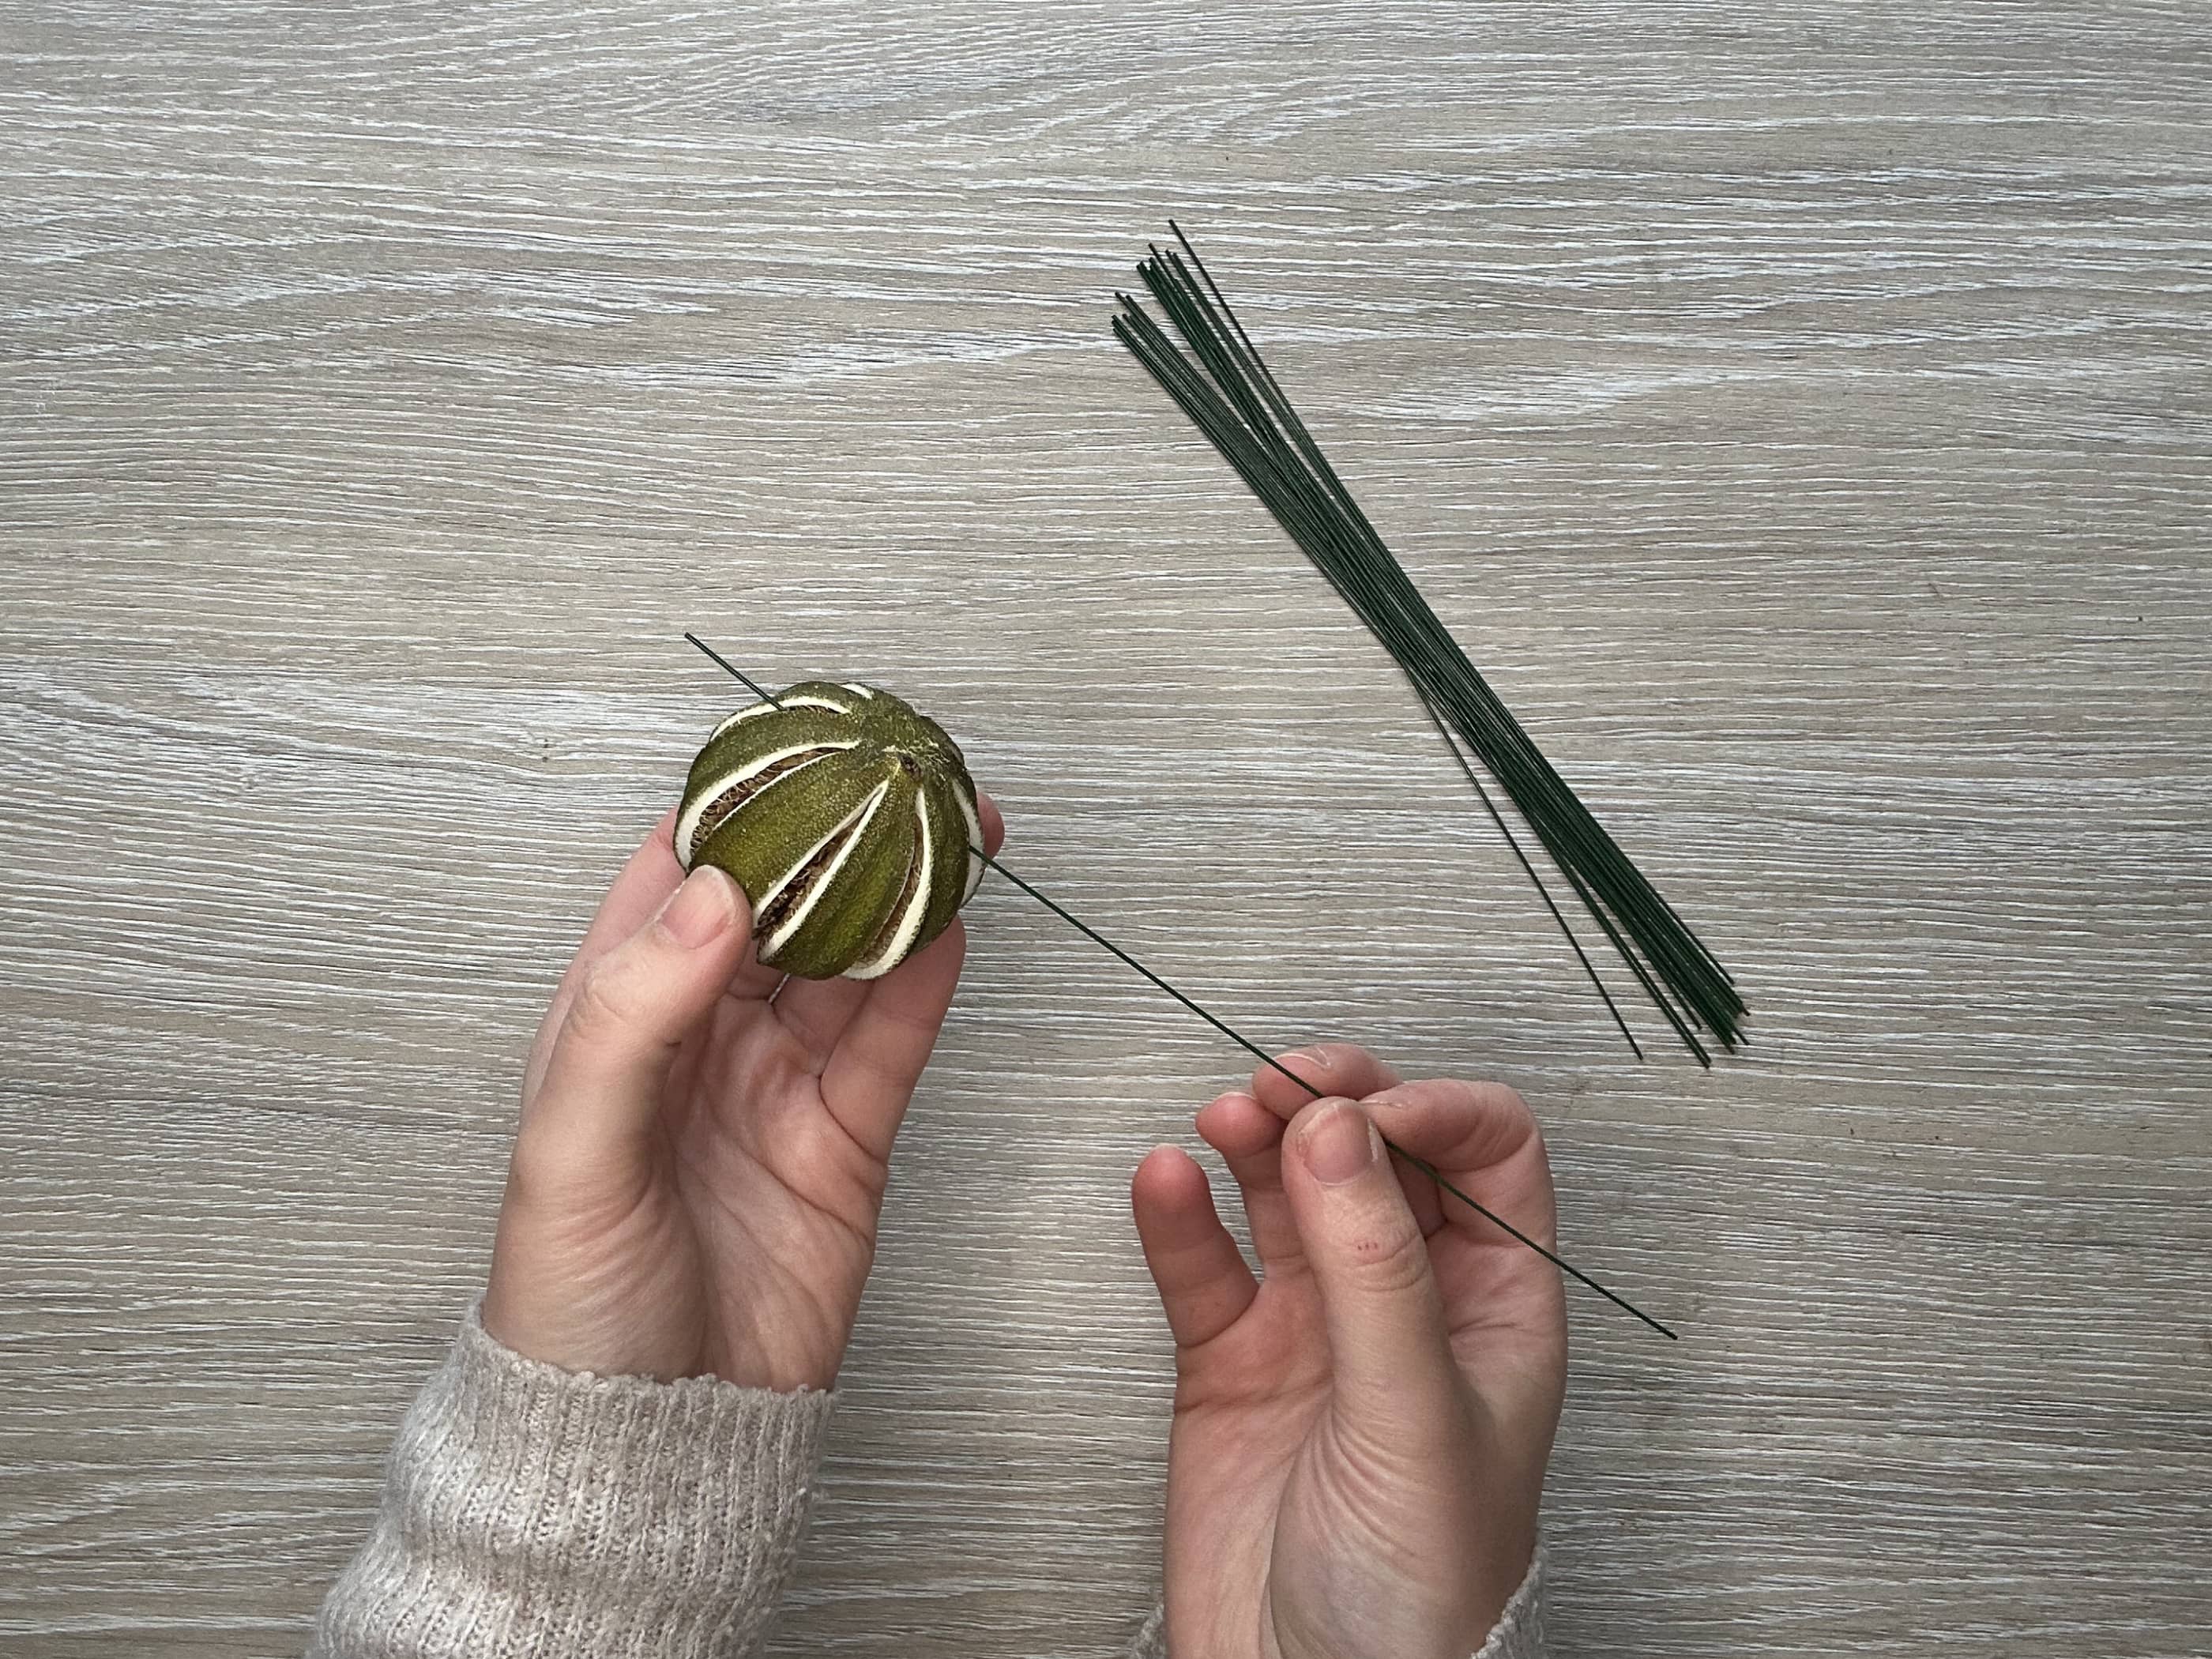
Wiring a whole orange or lime
Insert one of the stub wires provided into one of the splits in the fruit and patiently guide it through the fruit until it pokes out of a split on the other side (you may have to try a few times!). Once your wire has been pushed through, bring the two ends of the wire together and twist the two wire legs together a couple of times to secure the wire to the fruit.
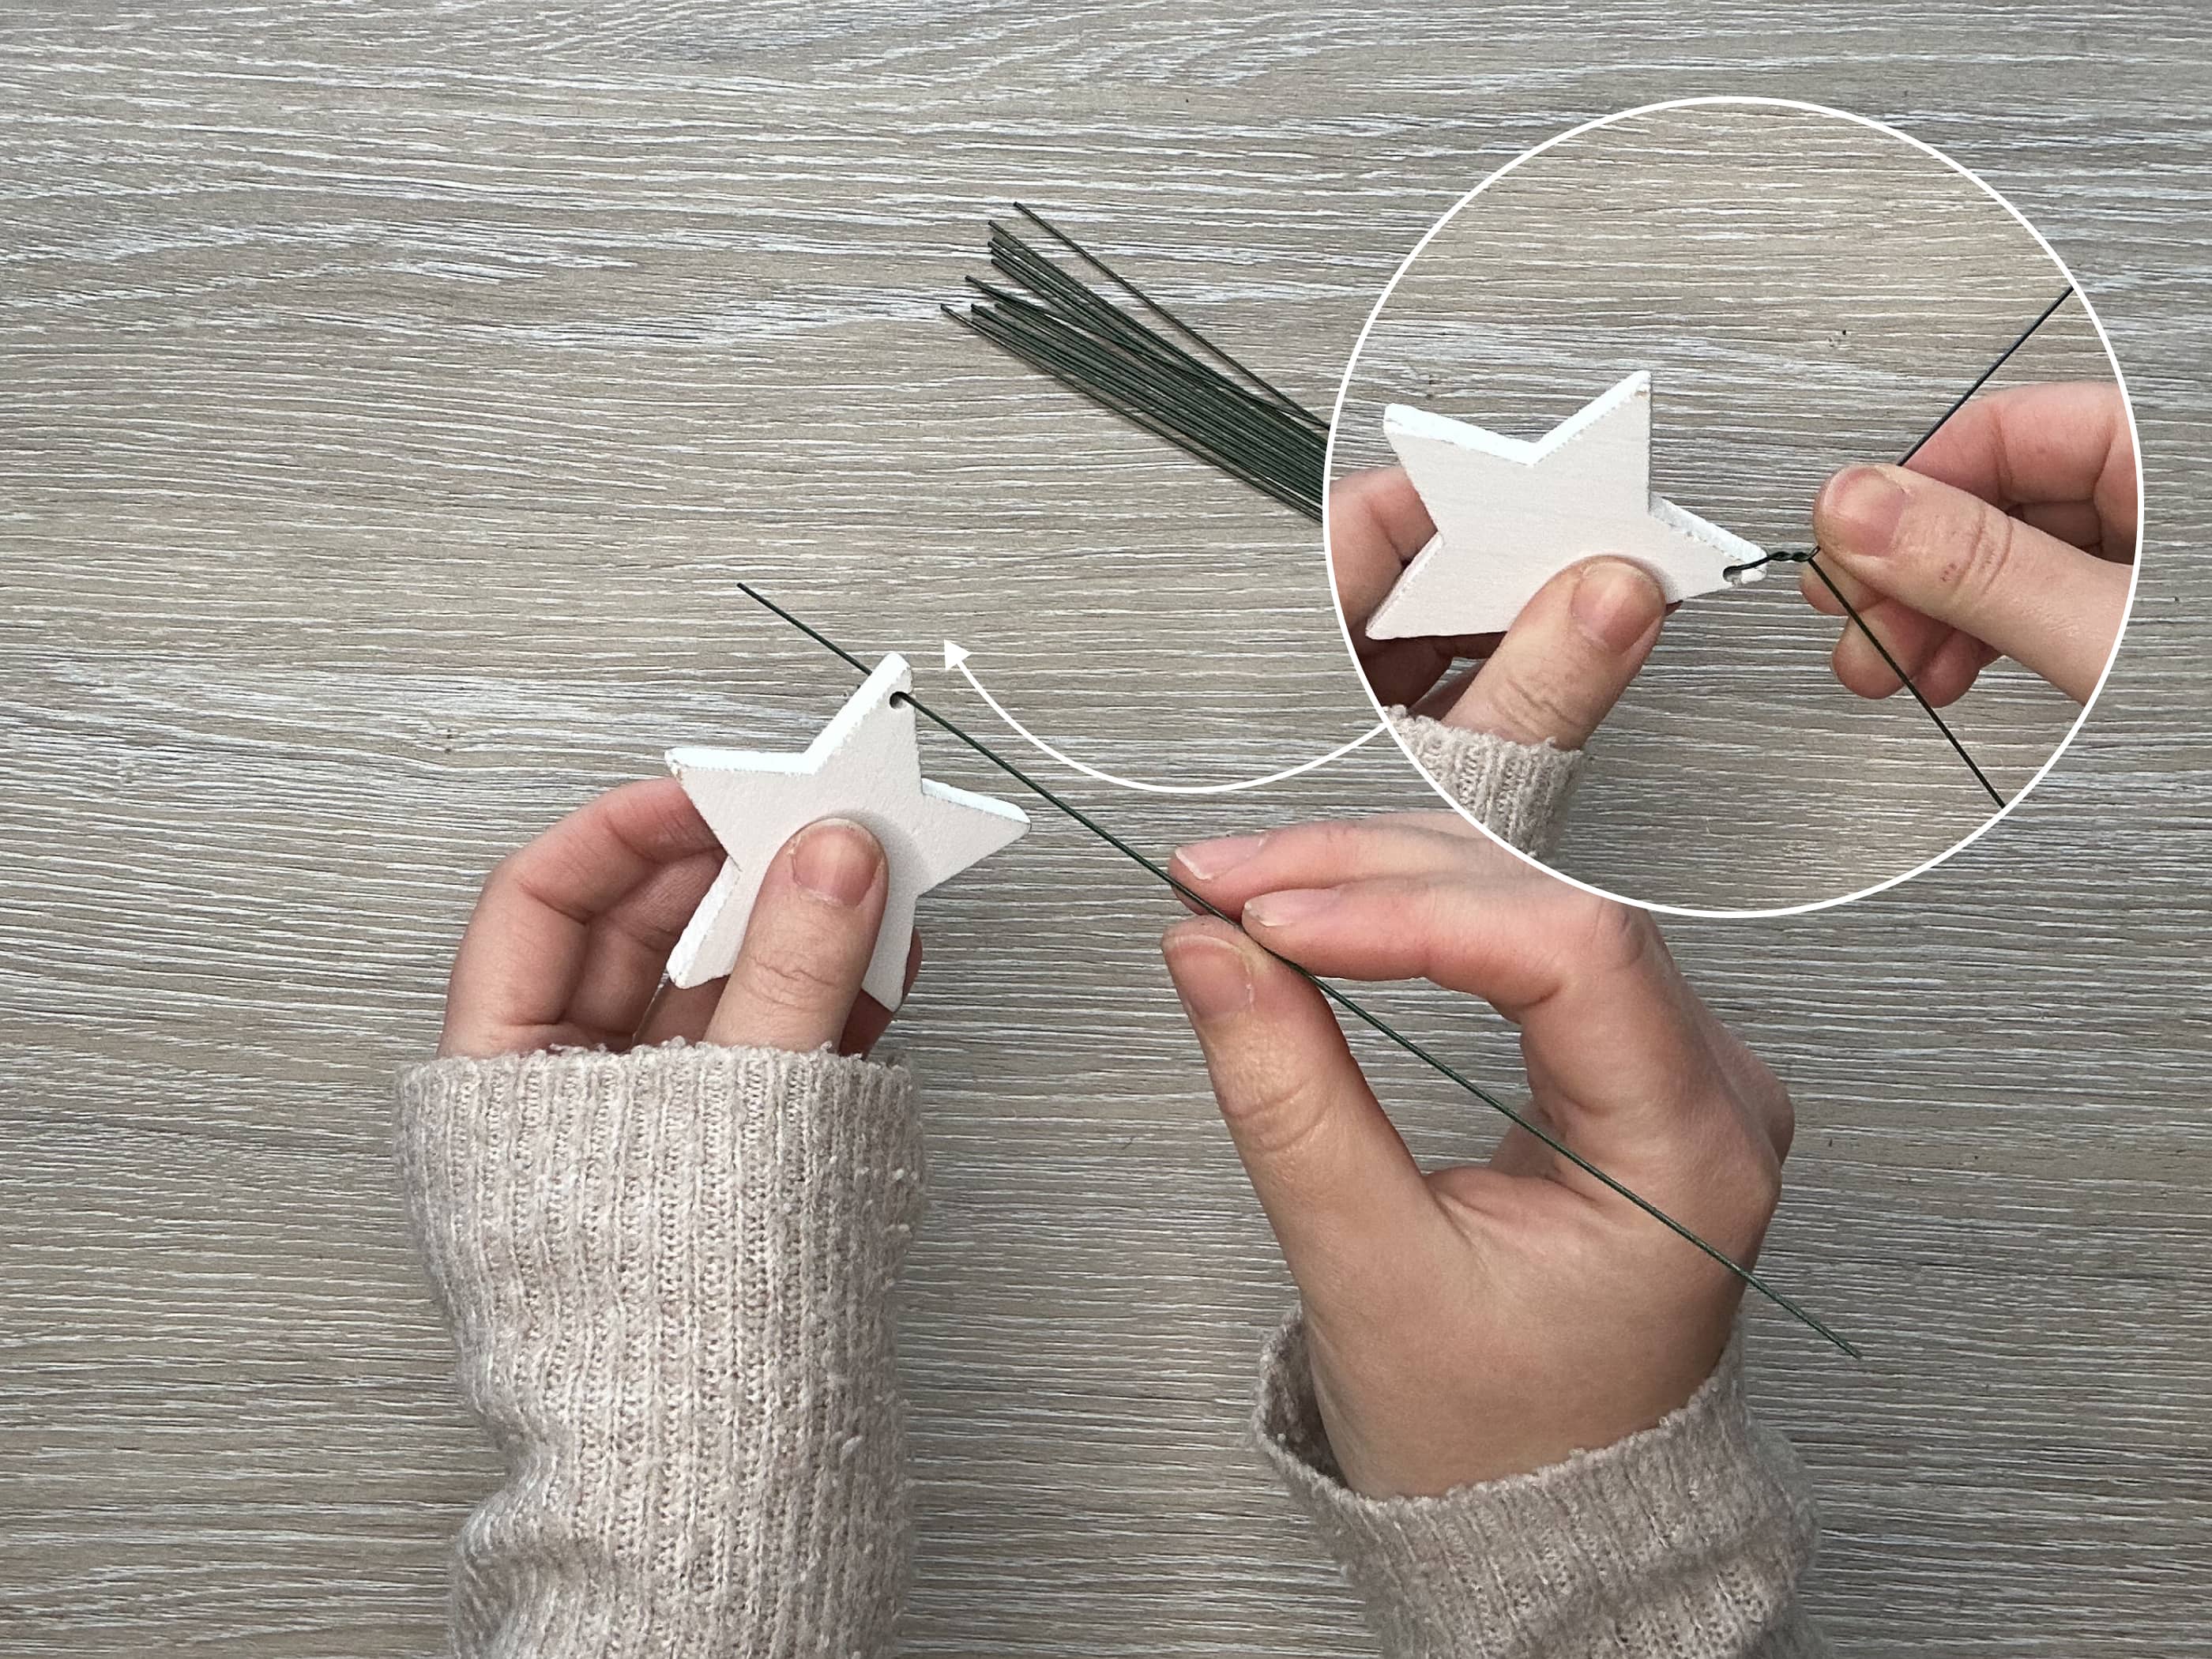
Wiring a mini bauble, bell or shape
Most mini baubles, Christmas bells and embellishments will come with either a wire already attached or a hole to thread a stub wire through. There is no right or wrong way to attach these items, just do what feels practical to you. When using a stub wire, follow the same principles as you have done for wiring a fruit slice.
12. Now it’s time to add your wired decorations to the wreath. Take each decoration, work out where you want to put it on the wreath. Push the wires through the moss base until it comes out of the back of your wreath. Then simply fold the wire ends back on themselves into the moss so that the wires are not sticking out. Keep adding your decorations, spacing them evenly throughout the wreath - make sure to add some on the outer and inside edge too for an even look!

13. Next, add your velvet ribbon. You can either choose to tie this into a bow, or have the ribbon ends trailing down with no bow. Whichever you choose, loop a stub wire either through the back of the bow or around the ribbon, twist the two wires together at the base of the ribbon/bow and then push the wires through the wreath in the same way you did the decorations.
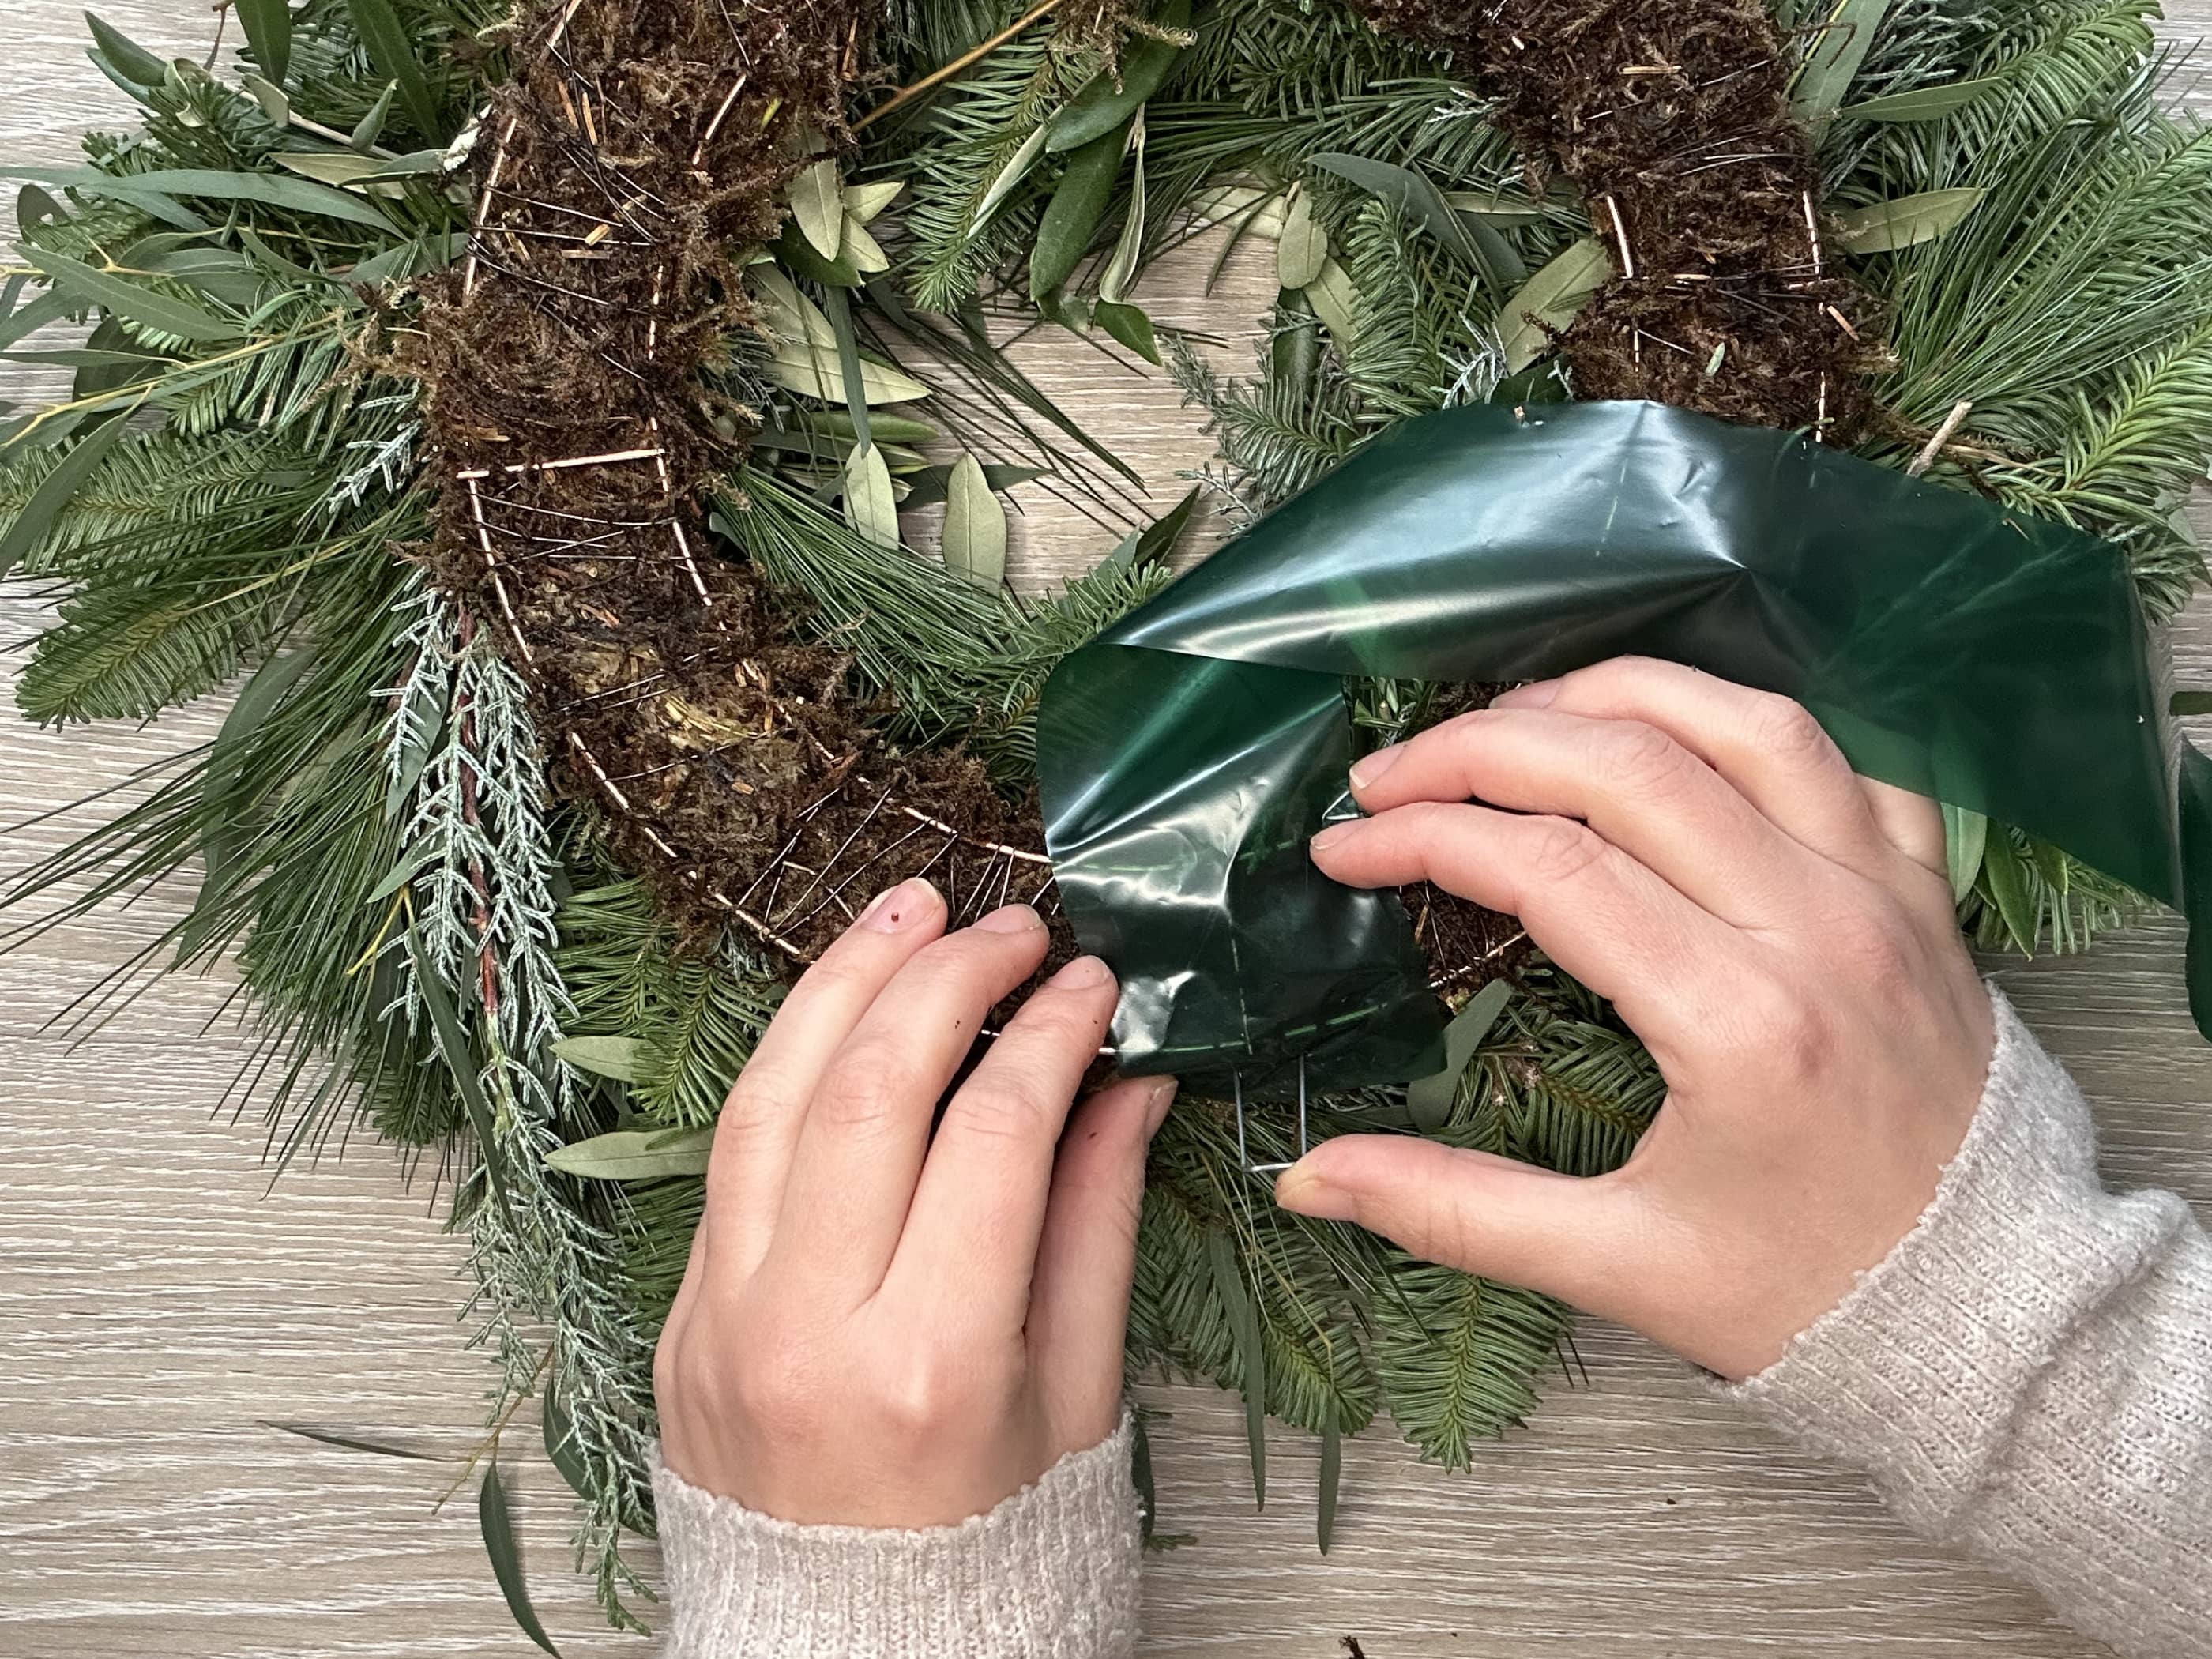
Stage 4: Adding Your Wreath Backing Wrap
14. Although not compulsory, we would recommend that you add a protective wreath backing to your wreath. This is to protect the paintwork on your door from any sharp wires or stems in windy conditions. It also protects a porous paint finish from the moisture in the moss.
15. Take your wreath and gently flip it over so that it’s laying on its front side. Take your roll of wreath wrap and attach the end of the roll to the back of the wreath (towards the outer edge of the ring) using two of the mossing pins provided.
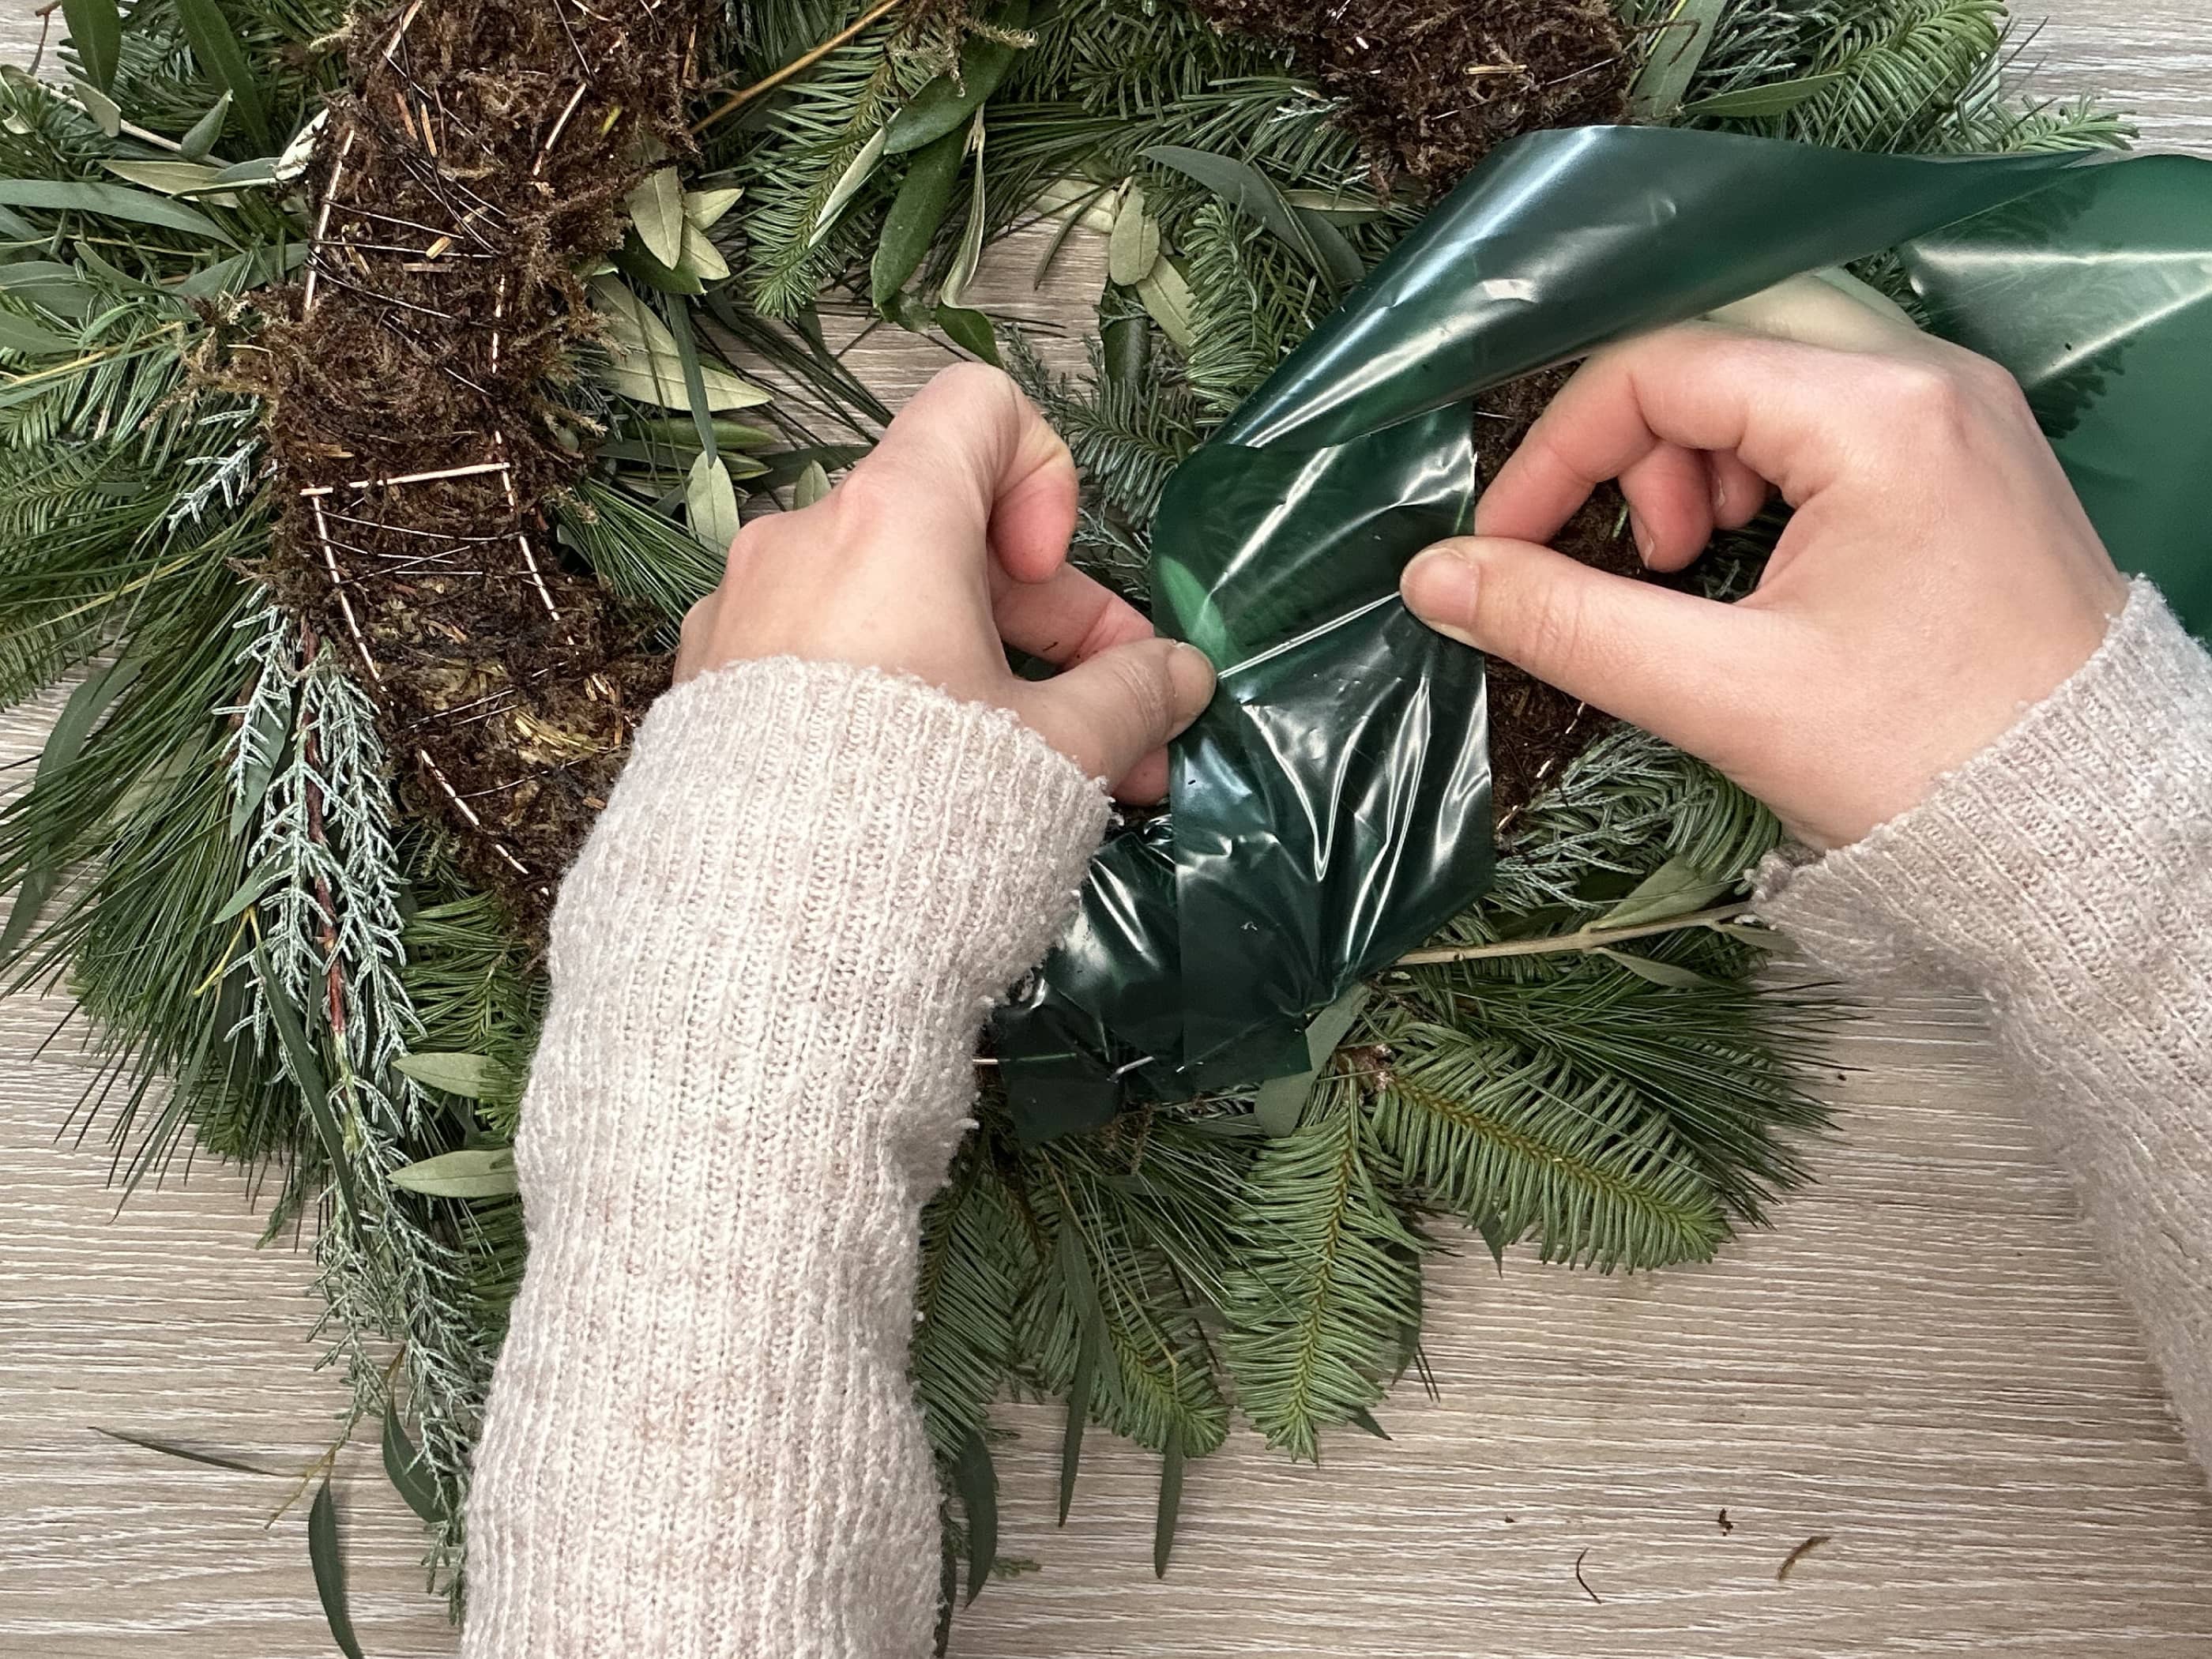
16. Fold the wreath wrap over itself towards the inside of the wreath ring and secure (at the inner edge of the ring) with a mossing pin.

17. Work in a zig-zag motion across the wreath base, pinning the wreath wrap down at each point with a mossing pin. Continue until the whole ring is covered.
Latest Posts

How to Make a Living Spring Easter Wreath | A Step-by-Step Guide
Join me for a detailed, real-time video tutorial on how to create a beautiful fresh spring living wreath using one of my DIY Spring Wreath Kits. In the video, I will guide you through step-by-step as you create a luxury spring wreath for your home using a mix of seasonal plants, bulbs and cut flowers.
Making Your Own DIY Fresh Christmas Wreath | A Step-by-Step Guide
An in-depth article with an accompanying real-time video that guides you through a step-by-step wreath-making tutorial on how to create a luxury Christmas wreath in the comfort of your own home. You can purchase one of my DIY Christmas Wreath Kits which includes all the materials you will need to follow the tutorial.

Understanding Funeral Flowers: A Guide to Funeral Tributes
For most of us, this may be our first time ordering funeral flowers, and knowing what to order or send in a time of mourning can be confusing in an already difficult time. So I’ve put together a quick guide to understanding funeral flowers.